If you’re looking to take your paper creations to the next level, look no further than the honeycomb embossing folder. This versatile tool allows you to create stunning textured designs that add dimension and depth to your DIY crafts. Whether you’re a seasoned crafter or just starting, the honeycomb embossing folder is a must-have in any paper crafting arsenal.
With its unique design and features, the honeycomb embossing folder allows you to create intricate honeycomb patterns that are sure to impress. From cards to scrapbooking to home decor, the possibilities are endless with this specialized embossing tool.
Key Takeaways:
- The honeycomb embossing folder is a versatile tool that can elevate your paper creations to new heights.
- It allows you to create stunning textured designs with intricate honeycomb patterns.
- The possibilities are endless, from cardmaking to scrapbooking to home decor.
- Whether you’re a seasoned crafter or just starting, the honeycomb embossing folder is a must-have tool.
- Stay tuned for more information on how to make the most of this versatile embossing tool.
What is an Embossing Folder?
Embossing is a technique that involves creating raised or sunken designs on a surface, such as paper, to add texture and dimension to your DIY crafts. An embossing folder is a specialized tool that makes it easy to achieve consistent and precise embossed patterns.
Understanding Embossing Techniques
Before we explore embossing folders in detail, let’s first understand the various techniques involved in embossing:
- Dry Embossing: This method involves using a stylus or other tool to manually trace a design onto paper, creating a raised image.
- Heat Embossing: With this technique, you use special ink and embossing powder to create a raised, glossy design on paper using heat to melt the powder.
- Wet Embossing: Also known as relief embossing, this method involves creating a raised design using a mold and a dampened pulp mixture, often used in the creation of handmade paper.
While each technique has its own unique benefits and applications, embossing folders are primarily used for dry embossing, making it the focus of this article.
Introducing the Honeycomb Embossing Folder
The honeycomb embossing folder is a specialized tool that creates intricate honeycomb patterns on paper crafts. This unique design allows you to add texture and visual interest to your projects, elevating them to new heights. If you’re looking to experiment with embossing tools, the honeycomb embossing folder is a perfect place to start.
Unlike other embossing folders, the honeycomb design creates a 3D effect, adding depth and dimension to your paper creations. Whether you’re making greeting cards, scrapbook pages, or other DIY crafts, this versatile folder can enhance any project with its unique and eye-catching pattern.
The honeycomb embossing folder is available in different sizes, allowing you to choose the right one for your project. It’s made of high-quality materials that ensure you get the best results every time you use it. Plus, it’s easy to use and requires only a few steps to create stunning textured designs.
If you’re looking for embossing ideas, the honeycomb embossing folder is a great place to start. You can use it to create various patterns, including honeycomb backgrounds, borders, and accents. You can also experiment with different materials, such as vellum and metallic paper, to achieve different effects.
How to Use the Honeycomb Embossing Folder
If you’re new to embossing, using the honeycomb embossing folder may seem a bit daunting at first. However, with a little practice, it’s a technique that can easily be mastered. Here are the steps to follow:
- Start by selecting the cardstock or paper you want to emboss. The paper’s weight and texture play a significant role in the finished result, so choose wisely. Try experimenting with different types of paper to see which works best for your project.
- Next, prepare your embossing machine according to the instructions provided. Ensure the proper plates are in place to create the necessary pressure for embossing.
- Place your paper or cardstock into the honeycomb embossing folder, ensuring it’s centered and straight.
- Pass the folder through your embossing machine. As it runs through the rollers, you should feel resistance and hear a satisfying crunching sound as the honeycomb pattern is embossed onto the paper.
- Remove your paper or cardstock from the embossing folder, and voila! You now have a beautifully textured piece that’s ready to use in your DIY crafts.
Remember to use the appropriate embossing techniques to achieve the desired effect. Try sanding the edges of your embossed piece to reveal the paper’s core color and create a distinctive look. Alternatively, use ink or markers to add color to the raised areas, creating a unique two-tone effect.
The honeycomb embossing folder is a versatile tool that can be used in various DIY crafts. Let your imagination run wild and experiment with different materials and techniques to create distinctive and stunning textured designs.
Materials Needed for Honeycomb Embossing
To get started with honeycomb embossing, you’ll need a few essential materials. Here’s a list of cardmaking supplies and paper crafting tools you’ll need for the best results:
| Material | Description |
|---|---|
| Honeycomb embossing folder | A specialized embossing folder with a unique honeycomb design. Available in various sizes and styles. |
| Cardstock | A sturdy paper that provides a smooth surface for embossing. Available in various colors and textures. |
| Embossing machine | A tool used to apply pressure to the embossing folder and cardstock for an even impression. Various types available depending on budget and preference. |
| Embossing ink pad | A specialized ink pad used to accentuate the embossed design. Available in various colors and finishes. |
| Embossing powders | A powder used to create a raised effect on the embossed design. Available in various colors and finishes. |
It’s essential to choose the right materials to create perfect honeycomb embossing designs. Remember that the quality of your materials can significantly impact the outcome of your embossing project. Therefore, investing in high-quality products can make all the difference.
Now that you have your materials let’s move on to exploring various techniques to create unique honeycomb designs.
Techniques for Creating Unique Honeycomb Designs
Embossing with a honeycomb embossing folder can add an intricate and unique touch to your DIY crafts. There are several techniques you can experiment with to create different honeycomb designs. Here are some ideas to get you started:
Layered Honeycomb
Create a layered honeycomb pattern by embossing two pieces of paper with the honeycomb folder, cutting one in half, and layering the two pieces on top of each other.
Honeycomb Ombre
Create an ombre effect by using different shades of the same color when embossing with the honeycomb folder. Start with the lightest shade at the top and gradually transition to the darkest shade at the bottom for a stunning honeycomb gradient.
Embossed Border
Emboss just the edge of your paper to create a decorative border. Use a straight-edge embossing tool or masking tape to create a straight line, then run it through your embossing machine.
Mixed Media Honeycomb
Combine embossing with other mixed media techniques such as stamping, stenciling, or painting to create a unique honeycomb design with added texture and dimension.
Embossed Honeycomb Die-Cut
| Materials Needed: | Steps: |
|---|---|
| Cardstock | 1. Die-cut a honeycomb shape from cardstock. 2. Run the die-cut piece through the honeycomb embossing folder. 3. Use ink or a blending tool to emphasize the texture of the honeycomb design. |
These techniques are just a starting point for your honeycomb embossing journey. Mix and match these ideas or come up with your own unique techniques to create textured designs that stand out.
Honeycomb Embossing Folder for Cardmaking
Cardmaking enthusiasts, the honeycomb embossing folder is the perfect addition to your cardmaking supplies. This specialized embossing tool adds a unique texture and dimension to your handmade cards, making them stand out from the rest.
The honeycomb pattern is a popular choice for embossed designs, as it creates a beautiful, intricate pattern that catches the eye. Whether you’re creating birthday cards, thank you notes, or invitations, the honeycomb embossing folder can elevate your card designs to new heights.
To use the honeycomb embossing folder for cardmaking, you will need:
- Cardstock or paper
- Honeycomb embossing folder
- Embossing tools, such as a die-cutting machine or embossing stylus
To create embossed honeycomb patterns on your cards:
- Trim your cardstock or paper to the desired size
- Insert the cardstock into the honeycomb embossing folder
- Run the folder through a die-cutting machine or use an embossing stylus to create the embossed pattern
- Remove the cardstock from the folder and admire your beautiful embossed honeycomb design
Experiment with different color combinations and cardstock textures to create unique designs. You can also combine the honeycomb pattern with other embossing techniques for even more variety.
Tip: If you’re new to embossing, try practicing on scrap paper first before creating your final design.
With the honeycomb embossing folder, the possibilities for cardmaking are endless. Explore different ways to incorporate embossed honeycomb patterns into your cards and let your creativity soar.
Honeycomb Embossing in Paper Crafting
Paper crafting is a versatile art form that allows you to create unique pieces with endless possibilities. By incorporating honeycomb embossing into your paper crafts, you can add a beautiful textured effect that elevates your projects to a whole new level.
One of the most popular paper crafting techniques is scrapbooking. Scrapbooking is a fun and creative way to preserve and highlight your memories. By using a honeycomb embossing folder, you can create intricate patterns and designs that add depth and dimension to your scrapbook pages.
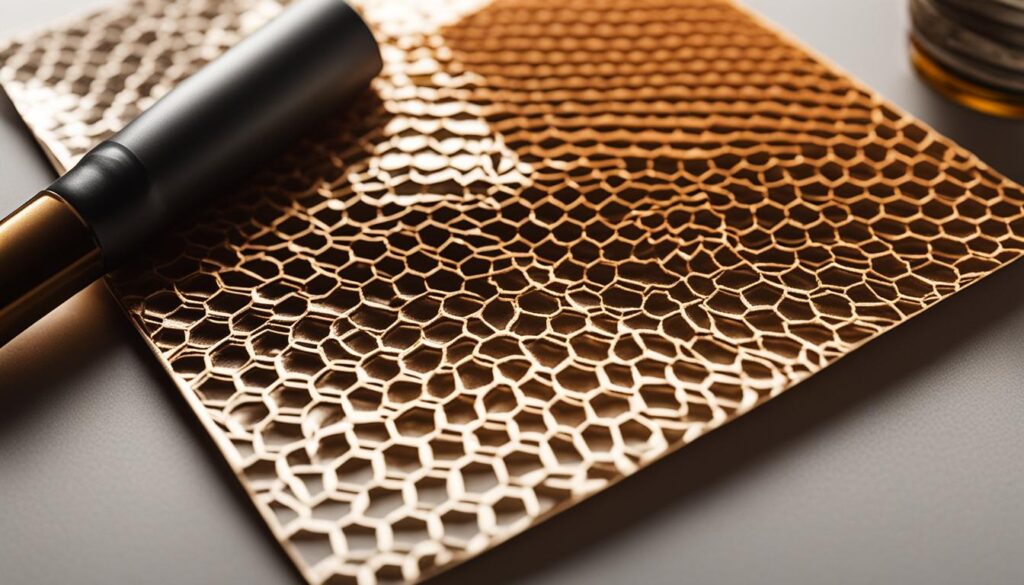
Another way to incorporate honeycomb embossing in paper crafting is by creating handmade cards. Whether it’s a birthday card, a thank-you note, or a holiday greeting, the honeycomb design adds a unique touch to your handmade cards. You can experiment with different colors, patterns, and materials to create personalized and one-of-a-kind cards.
Aside from scrapbooking and card making, you can also use honeycomb embossing in other paper-based crafts. For instance, you can use honeycomb embossing to enhance your journaling, create paper flowers, or design wall art. The possibilities are endless, and you’re only limited by your creativity and imagination.
Embossing Ideas for Paper Crafting
If you’re looking for inspiration, here are some ideas on how to use honeycomb embossing in your paper crafting projects:
- Create a honeycomb background for your scrapbook pages
- Add a honeycomb pattern to your handmade cards
- Emboss honeycomb patterns on paper flowers for an added dimension
- Create a honeycomb border on your journal pages
- Emboss honeycomb pattern on vellum paper for a delicate and elegant effect
With honeycomb embossing, you can take your paper crafting to a whole new level. So why not give it a try and see where your creativity takes you?
Tips and Tricks for Perfect Honeycomb Embossing
Embossing with the honeycomb embossing folder is an exciting way to enhance your crafting projects with unique and intricate designs. However, achieving perfect embossing results can be challenging, especially for beginners. Here are some tips and tricks to help you get the most out of your honeycomb embossing folder.
Select the Right Materials
Choosing the right materials is crucial to achieving perfect honeycomb embossing results. Make sure you use high-quality cardstock that is sturdy enough to withstand the pressure exerted by the embossing folder. Additionally, ensure that the embossing folder and plates are well-maintained and free of any debris or damage.
Master Embossing Techniques
Mastering embossing techniques is essential to achieving flawless honeycomb designs. Some techniques you can use include dry embossing, wet embossing, and heat embossing. Experiment with different techniques and tools, such as a bone folder or stylus, to create unique effects.
Experiment with Pressure and Layers
When embossing with the honeycomb folder, experiment with different levels of pressure and layers to achieve varying degrees of texture and dimension. Start with light pressure and gradually increase it until you achieve your desired results. Additionally, try layering different colors and textures to create a striking contrast.
Trim Embossed Pieces Carefully
Trimming embossed pieces can be tricky, but it’s essential to ensure that your finished project looks neat and professional. Use a sharp craft knife or scissors to trim away the excess cardstock, being careful not to damage the embossed design.
By following these tips and tricks, you’ll be well on your way to achieving perfect honeycomb embossing results every time.
Honeycomb Embossing Folder: Beyond Paper Crafts
The honeycomb embossing folder is a versatile tool that can be used in a variety of DIY crafts beyond paper projects. With its unique honeycomb design, this embossing folder can add texture and dimension to anything from home decor to fashion accessories. Let’s explore some embossing ideas to take your textured craft journey to the next level.
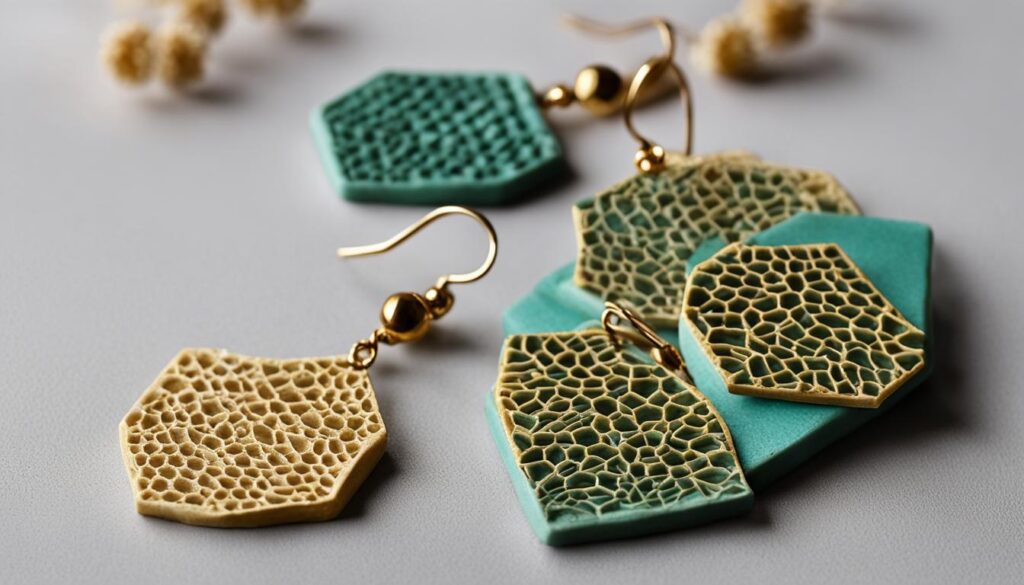
Honeycomb Embossed Clay Jewelry
Embossing can be used to create unique textures and patterns on clay, making it perfect for creating jewelry pieces. Use the honeycomb embossing folder to create intricate designs on your clay and then shape it into earrings or pendants. This adds a unique touch to your accessories and can be customized to fit your personal style.
Honeycomb Textured Wall Art
Adding texture to wall art can make it more visually appealing. Use the honeycomb embossing folder to create a textured design on paper and then frame it for a unique piece of wall decor. This is an easy and inexpensive way to add a touch of elegance to any room.
Honeycomb Embossed Leather Notebook Cover
Leather notebooks are a popular accessory, but they can be quite expensive. Create your own unique leather notebook cover using the honeycomb embossing folder. Emboss your design onto the leather and then cut it to size. This is a great way to personalize a notebook or planner.
Honeycomb Embossed Glass Candle Holder
Embossing can also be used on glass to create a stunning effect. Use the honeycomb embossing folder to emboss a design onto a glass candle holder. When you light the candle, the pattern will be illuminated, creating a beautiful ambiance.
These are just a few ideas for incorporating the honeycomb embossing folder into your DIY crafts beyond paper projects. With a little creativity and experimentation, the possibilities are endless. Let your imagination run wild and see what unique textured designs you can create.
Exploring Honeycomb Embossing Techniques
Now that we’ve covered the basics of the honeycomb embossing folder, let’s dive deeper into specific embossing techniques that can be used to enhance the honeycomb design.
1. Ink Emboss Resist Technique
This technique involves stamping an image onto paper, applying ink over the stamp, and then adding embossing powder before heat embossing the design. The result is a resist effect, where inked areas remain visible while embossed areas create a textured pattern. Try this technique with honeycomb stamp designs to add an extra layer of texture to your cards or paper crafts.
2. Layered Embossing Technique
The layered embossing technique involves using multiple embossing folders to create a dimensional, layered effect. Start with a base layer embossed with the honeycomb folder, then use a smaller embossing folder to create a contrasting design on top. Play around with different textures and patterns to create a unique layered effect on your DIY projects.
3. Die Cut Embossing Technique
The die cut embossing technique involves cutting a shape or design from embossed paper, creating a unique textured element for your DIY crafts. Use your honeycomb embossed paper to die-cut shapes like flowers, butterflies, or geometric shapes for added texture and dimension.
4. Watercolor Embossing Technique
This technique involves watercoloring over an embossed design to create a soft, blended effect. Stamp your design onto watercolor paper, emboss with the honeycomb folder, and then add watercolor paint over the design for a beautiful, textured effect. Use this technique to create unique backgrounds for cards or scrapbook pages.
5. Foil Embossing Technique
The foil embossing technique adds a touch of glamour to your DIY crafts. Start by embossing your design with the honeycomb folder, then use a foil transfer sheet and a laminator to add foil to the embossed areas. The result is a luxurious, metallic finish that adds a touch of elegance to your creations.
Try out these honeycomb embossing techniques to take your DIY projects to the next level. With the unique texture and dimension created by the honeycomb embossing folder, the possibilities are endless.
Conclusion
In conclusion, the honeycomb embossing folder is a versatile tool that offers endless possibilities for creating stunning textured designs in your DIY crafts. With the ability to add dimension and depth to your paper creations and beyond, this embossing technique is sure to impress. By exploring different embossing techniques and incorporating unique honeycomb designs, you can unleash your creativity and take your projects to new heights.
Tips for Success
When embossing with the honeycomb embossing folder, keep in mind some essential tips for success. Always choose high-quality cardstock and paper that complements your textured designs. Experiment with different colors and textures to create contrast and depth. Use a die-cutting machine that can accommodate the size of the embossing folder and ensure the proper pressure setting for the best results.
Embrace Your Creativity
Ultimately, the honeycomb embossing folder is a tool that allows you to embrace your creativity fully. Don’t be afraid to try new techniques or incorporate different materials into your projects. Whether you’re making handmade cards, scrapbooking, or creating home decor, the honeycomb design is a unique touch that will elevate your crafts. So gather your materials, follow our tips, and let your imagination run wild with textured designs!
Thank you for joining us on this textured craft journey.
FAQ
What is an Embossing Folder?
An embossing folder is a tool used in the craft industry to create dimensional and textured designs on paper. It typically consists of two plastic plates with a raised pattern or design on one plate and a recessed area on the other plate. By sandwiching paper between the plates and running them through a die-cutting and embossing machine, the raised pattern is pressed into the paper, resulting in an embossed design.
What is the Honeycomb Embossing Folder?
The Honeycomb Embossing Folder is a specific type of embossing folder that features a honeycomb pattern. It is designed to create intricate honeycomb designs on paper crafts, adding texture and dimension to your projects.
How do I use the Honeycomb Embossing Folder?
To use the Honeycomb Embossing Folder, start by selecting the paper or cardstock you want to emboss. Insert the paper into the embossing folder, aligning it with the honeycomb pattern. Place the folder between the plates of a die-cutting and embossing machine, following the manufacturer’s instructions. Run the sandwich through the machine to apply pressure and create the embossed honeycomb design on your paper.
What materials do I need for Honeycomb Embossing?
To embark on your honeycomb embossing journey, you will need the following materials: a Honeycomb Embossing Folder, paper or cardstock, a die-cutting and embossing machine, and any additional embellishments or tools you wish to incorporate into your projects.
Can I use the Honeycomb Embossing Folder for cardmaking?
Absolutely! The Honeycomb Embossing Folder is perfect for cardmaking. It adds a beautiful texture and design element to handmade cards, making them stand out and impress recipients. Experiment with different color combinations and cardstock textures to create unique honeycomb-inspired cards.
Are there any tips and tricks for perfect Honeycomb Embossing?
Certainly! Here are a few tips and tricks to ensure flawless honeycomb embossing results:
1. Use a smooth, high-quality paper or cardstock for best embossing effects.
2. Avoid overloading the embossing folder with too many layers of paper, as it may result in less defined embossed designs.
3. Experiment with different pressure settings on your die-cutting and embossing machine to achieve the desired embossing depth.
4. Consider combining the embossed honeycomb design with other techniques, such as inking or heat embossing, to add further dimension and interest to your projects.
5. Practice on scrap paper or cardstock before embossing your final project to familiarize yourself with the process and optimize your results.
Can I use the Honeycomb Embossing Folder for crafts other than paper projects?
Yes! While the Honeycomb Embossing Folder is primarily designed for paper crafts, you can certainly explore its use in other DIY projects. Consider using it on lightweight materials like thin plastic, fabric, or even clay to create unique textured designs for home decor, accessories, or mixed media crafts.
What are some creative techniques for creating unique honeycomb designs?
There are several techniques you can explore to create unique honeycomb designs using the embossing folder. Some ideas include:
1. Layering different colors of cardstock or patterned paper before embossing to create a multi-colored honeycomb effect.
2. Applying ink or paint to the embossing folder before inserting the paper to add color to the raised honeycomb pattern.
3. Heat embossing the embossed honeycomb design using embossing powders and a heat gun for a glossy or metallic finish.
4. Experimenting with different orientations of the embossing folder to create diagonal or angular honeycomb patterns.
Where can I find inspiration for using the Honeycomb Embossing Folder?
Look for inspiration in various sources, including craft magazines, social media platforms, and online crafting communities. You can also explore tutorials and project ideas provided by the manufacturer of the Honeycomb Embossing Folder. Don’t forget to let your own creativity shine and experiment with different ideas to make your honeycomb embossed projects unique.

