Melting beeswax at home is a simple and rewarding process that opens up a world of possibilities for DIY projects and crafts. Whether you’re a seasoned candle maker or a beginner looking to explore the wonders of beeswax, knowing the best ways to melt it is essential. In this comprehensive guide, we will walk you through various methods and provide step-by-step instructions on how to melt beeswax safely and efficiently.
Key Takeaways:
- The best way to melt beeswax at home is by using a double boiler, a crockpot, or a solar oven.
- Using a double boiler ensures even melting and prevents the wax from overheating.
- A crockpot is convenient for melting smaller quantities of beeswax, perfect for candle making.
- A solar oven offers an eco-friendly and energy-efficient method for melting beeswax.
- When melting beeswax, it is crucial to follow safety precautions to avoid accidents and burns.
Using a Double Boiler
One of the most common and effective methods for melting beeswax is using a double boiler setup. This technique is particularly popular among crafters who use beeswax for various projects. The double boiler method provides a gentle and controlled heat source, ensuring that the wax melts evenly without the risk of scorching or overheating.
To use a double boiler, start by filling a larger pot with water and placing it on the stove. Then, place a smaller metal bowl or saucepan inside the pot, making sure it sits securely. Measure the desired amount of beeswax and place it in the smaller bowl. Turn on the heat and let the water come to a simmer. As the water heats up, the beeswax in the smaller bowl will gradually melt due to the indirect heat.
Table 1:
| Pros of Using a Double Boiler | Cons of Using a Double Boiler |
|---|---|
| Ensures even and gentle melting of beeswax | Requires additional equipment (double boiler setup) |
| Reduces the risk of overheating or scorching the wax | Takes longer to melt compared to other methods |
| Allows for precise control of the melting process | May not be suitable for large quantities of beeswax |
Using a double boiler is a reliable and safe method for melting beeswax, especially when working on crafts that require a smooth and consistent texture. It is important to keep an eye on the wax as it melts and stir occasionally to ensure even melting. Once the beeswax has completely melted, it is ready to be used in your chosen projects.
Using a Crockpot
Another convenient method for melting beeswax is using a crockpot or slow cooker. This method is ideal for melting smaller quantities of beeswax and is especially popular among candle makers. The beeswax is placed in the crockpot along with a small amount of water and heated on a low or medium setting. It is important to monitor the wax as it melts and periodically stir it to ensure even melting. Once the wax is completely melted, it can be poured into molds or used for other crafts.
| Advantages of Using a Crockpot | Disadvantages of Using a Crockpot |
|---|---|
|
|
Using a crockpot can be a convenient and efficient method for melting beeswax. It provides a hands-off approach and reduces the risk of scorching or overheating the wax. However, it may take longer compared to other methods, and monitoring and stirring are necessary to ensure even melting. Additionally, the capacity of a crockpot may be limited for melting larger quantities of beeswax.
To use a crockpot for melting beeswax, follow these simple steps:
- Place the desired amount of beeswax and a small amount of water in a crockpot.
- Set the crockpot to a low or medium heat setting.
- Allow the wax to melt slowly, periodically stirring it to ensure even melting.
- Once the beeswax is completely melted, it can be poured into molds or used for other crafts.
Using a crockpot is a popular method among DIY enthusiasts and candle makers due to its convenience and ease of use. It is a great option for melting smaller quantities of beeswax and provides a safe and controlled melting process. By following these step-by-step instructions, you can effectively melt beeswax using a crockpot and unleash your creativity in various craft projects.
Using a Solar Oven
For those interested in a more eco-friendly method, using a solar oven to melt beeswax is a great option. This method involves lining a styrofoam cooler with aluminum foil, placing the beeswax in a metal or glass bowl, and covering the cooler with a sheet of glass. The solar oven is then placed in direct sunlight, allowing the wax to slowly melt over time. This method requires a warm and sunny day, but it is a natural and energy-efficient way to melt beeswax.
To create a solar oven for melting beeswax, follow these steps:
- Line a styrofoam cooler with aluminum foil to maximize heat absorption.
- Place a metal or glass bowl filled with beeswax inside the cooler.
- Cover the cooler with a sheet of glass or plexiglass.
- Position the solar oven in direct sunlight, ensuring it receives maximum exposure throughout the day.
It is important to note that melting beeswax using a solar oven will take longer compared to other methods, as it relies on the sun’s heat. However, this method is a sustainable and natural way to melt beeswax, making it a popular choice for those looking to minimize their environmental impact.

Comparing Methods: Pros and Cons
| Method | Pros | Cons |
|---|---|---|
| Double Boiler | – Even heat distribution – Prevents overheating – Suitable for larger quantities |
– Requires stovetop heating – May be slower compared to other methods |
| Crockpot | – Convenient and easy to use – Suitable for smaller quantities – Ideal for candle making |
– Requires periodic stirring – May take longer to melt wax |
| Solar Oven | – Eco-friendly and energy-efficient – Natural method – Requires minimal equipment |
– Dependent on weather conditions – Longer melting time |
Each method has its own advantages and considerations. Choosing the right method depends on your specific needs, available equipment, and personal preferences. Consider factors such as convenience, speed, environmental impact, and the quantity of beeswax you need to melt when deciding which method to use.
Safety Precautions
When it comes to melting beeswax, it’s important to prioritize safety. By following some key precautions, you can ensure a safe and successful melting process. Here are some essential safety tips to keep in mind:
- Never melt beeswax over an open flame. Beeswax is highly flammable and can pose a serious fire hazard. Always use indirect heat sources, such as a double boiler or a crockpot, to melt beeswax.
- Avoid overheating the beeswax. Exposing beeswax to high temperatures for extended periods of time can cause it to lose its beneficial properties and may even lead to splattering. It’s recommended to melt beeswax at a temperature not exceeding 185 degrees Fahrenheit.
- Use dedicated equipment for melting beeswax. To prevent contamination, it’s best to reserve specific tools and utensils solely for melting beeswax. Using equipment that comes into contact with food or other substances may affect the quality of the beeswax.
- Wear protective gloves and handle hot wax with caution. Beeswax can reach high temperatures when melted, and it can cause burns or injuries if not handled carefully. Wearing heat-resistant gloves and using appropriate tools when working with hot wax is essential for personal safety.
By adhering to these safety precautions, you can ensure a safe and enjoyable beeswax melting experience. Remember, safety should always be a top priority when working with any kind of heat source and hot materials.
Quote of the Section:
“Safety first is safety always.” – Charles M. Hayes
Now that you are equipped with the necessary safety knowledge, let’s move on to the next section where we will explore the process of filtering and pouring the melted beeswax to ensure a smooth and pure end product.

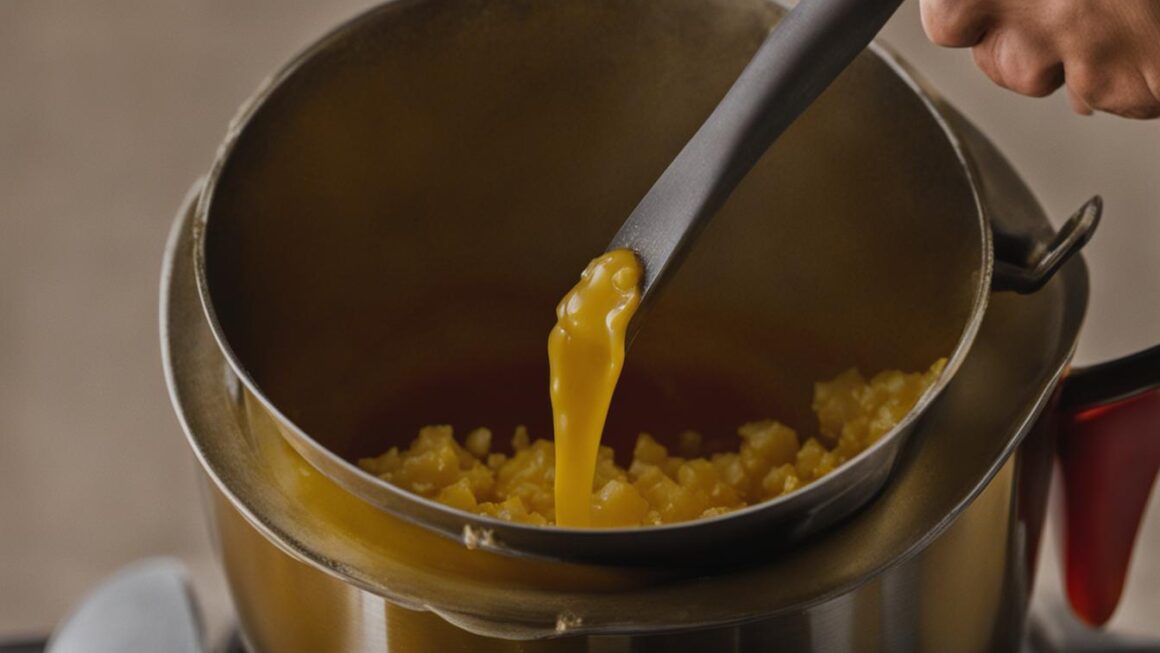
Filtering and Pouring the Melted Wax
Once the beeswax is melted, it is important to filter out any impurities or debris before using it for your desired crafts. This will ensure a smooth and clean final product. To filter the melted wax, you will need a fine-mesh strainer or filtering material that can effectively remove any particles.
Place the strainer or filtering material over a container or a clean bowl. Slowly pour the melted wax through the strainer, allowing it to pass through while capturing any unwanted residue. This step is crucial in achieving a high-quality beeswax that is free from any impurities.
If you notice that the wax starts to solidify while filtering, you can gently reheat it over a low heat source until it becomes liquid again. This will make the filtering process easier and ensure that no debris is left behind.
Once the wax has been filtered, it is ready to be poured into molds or used for your desired crafts. The filtered wax will have a smooth texture and will be free from any impurities, allowing you to create beautiful and flawless beeswax creations.
Tips for Pouring Melted Beeswax
- Make sure the molds or containers you are using are clean and dry before pouring the melted wax.
- For best results, use silicone molds or molds specifically designed for pouring wax to ensure easy removal once the wax has solidified.
- Consider using a pouring pitcher or a small ladle to pour the melted wax into the molds. This will help control the flow and prevent any spills or accidents.
- Allow the wax to cool and solidify completely before removing it from the molds. This will ensure that the finished product retains its shape and doesn’t break or deform.
- Experiment with different pouring techniques and molds to create unique designs and patterns with your beeswax creations.
By following these steps and tips, you can effectively filter and pour the melted beeswax, resulting in high-quality and visually appealing beeswax products for your crafts and DIY projects.
Melting Time and Temperature
Melting beeswax can be a time-consuming process, but the exact time it takes will vary depending on the method used and the quantity of wax being melted. Generally, beeswax will start to melt within about 2-3 minutes of heating and will be fully melted within approximately half an hour. However, larger quantities of beeswax may take up to an hour to completely melt.
To ensure the wax melts evenly and maintains its properties, it’s important to monitor the temperature throughout the melting process. Beeswax should not be heated above 185 degrees Fahrenheit, as overheating can cause the wax to lose its natural properties and even splatter. Keeping the temperature within this range will help preserve the quality of the wax.
It’s worth noting that different methods of melting beeswax may have varying heat requirements. For example, using a double boiler on the stove may require more precise temperature control compared to using a crockpot. It’s important to follow the specific instructions for the method you choose to ensure the best results.
Table: Melting Time and Temperature Guidelines
| Method | Melting Time | Temperature |
|---|---|---|
| Double Boiler | Approximately 2-3 minutes to start melting, up to 30 minutes for complete melting | Do not exceed 185 degrees Fahrenheit |
| Crockpot | Approximately 2-3 minutes to start melting, up to 30 minutes for complete melting | Do not exceed 185 degrees Fahrenheit |
| Solar Oven | Approximately 30 minutes to 1 hour, depending on sunlight intensity | Do not exceed 185 degrees Fahrenheit |
Remember to always exercise caution when handling melted wax, as it can cause burns. Use appropriate protective gear such as gloves and handle the hot wax with care. By monitoring the melting time and keeping the temperature within the recommended range, you can successfully melt beeswax for your crafting or DIY projects.
Creative Uses for Beeswax
Once you have mastered the art of melting beeswax, you open up a world of possibilities for its creative use. Beeswax is a versatile natural material that can be transformed into various crafts and products. Here are some creative uses for beeswax that you can explore:
Table: Examples of Beeswax Crafts and Uses
| Beeswax Craft/Use | Description |
|---|---|
| Candle Making | Beeswax candles have a beautiful, natural scent and a warm glow. They are a popular choice among crafters and can be customized with different colors, shapes, and scents. |
| Lip Balm | Beeswax is a key ingredient in homemade lip balms. It moisturizes the lips and provides a protective barrier against dryness and harsh weather conditions. |
| Soap Making | Adding beeswax to soap recipes can improve the texture, hardness, and longevity of the soap. It also enhances its moisturizing properties. |
| Furniture Polish | A mixture of beeswax and natural oils can be used to create a homemade furniture polish that nourishes and protects wooden surfaces. |
| Sealant for Stone Countertops | Applying a beeswax sealant to stone countertops can help protect them from stains and enhance their natural beauty. |
| Woodworking | Beeswax can be used as a natural finish for woodworking projects. It brings out the depth and richness of the wood grain while providing a protective layer. |
In addition to these popular uses, beeswax can also be incorporated into leatherworking, as a natural rust prevention method, and in various other DIY projects. The possibilities are endless when it comes to unleashing your creativity with beeswax.
“Beeswax is like a blank canvas waiting to be transformed into something beautiful and functional.”
Whether you are an experienced crafter or a beginner looking for a new hobby, working with beeswax can be a rewarding and enjoyable experience. So, grab your beeswax and let your imagination soar as you explore the world of beeswax crafts and creations.
Remember to always follow safety precautions when working with melted beeswax and enjoy the process of bringing your creative ideas to life!
Conclusion
Melting beeswax is a simple and enjoyable process that allows you to unlock the full potential of this versatile natural material. Whether you are a seasoned candle maker, a DIY enthusiast, or a beekeeper looking for ways to utilize excess beeswax, knowing the best methods to melt beeswax will help you create beautiful and functional products.
With the information provided in this comprehensive guide, you can confidently embark on your beeswax melting journey and enjoy the wonderful world of beeswax crafts and creations. From using a double boiler or a crockpot to the eco-friendly option of a solar oven, each method has its advantages and can be adapted to suit your needs.
Remember to prioritize safety when working with melted beeswax and follow the recommended precautions. Filtering the melted wax and monitoring the temperature are crucial steps to ensure the quality of your final products. Beeswax offers endless possibilities for creative uses, from making candles and lip balms to polishing furniture and preserving countertops.
So, gather your supplies, choose your preferred method, and dive into the fascinating world of beeswax. Explore your creativity, experiment with different recipes and crafts, and enjoy the satisfaction of crafting with this remarkable natural material. The possibilities are truly limitless, and your beeswax melting journey awaits!
FAQ
What is the best way to melt beeswax?
There are multiple methods to choose from, including using a double boiler setup, a crockpot, or even a solar oven. Each method has its advantages and can be used depending on your needs and preferences.
How do I use a double boiler to melt beeswax?
Place a smaller metal bowl or saucepan inside a larger stock pot filled with water. Heat the water on the stove until it boils, and then place the beeswax in the smaller bowl to melt slowly over the simmering water.
Can I use a crockpot to melt beeswax?
Yes, a crockpot or slow cooker is a convenient method for melting smaller quantities of beeswax. Simply place the beeswax in the crockpot along with a small amount of water and heat on a low or medium setting. Monitor and stir the wax periodically to ensure even melting.
Is it possible to use a solar oven to melt beeswax?
Yes, using a solar oven is an eco-friendly method to melt beeswax. Line a styrofoam cooler with aluminum foil, place the beeswax in a metal or glass bowl, and cover the cooler with a sheet of glass. Put the solar oven in direct sunlight and allow the wax to slowly melt over time.
What safety precautions should I take when melting beeswax?
Beeswax should never be melted over an open flame and should not be overheated or exposed to high temperatures for extended periods of time. Use dedicated equipment, like a double boiler or a crockpot, and wear protective gloves to handle the hot wax safely.
How do I filter and pour the melted beeswax?
Pour the melted wax through a fine-mesh strainer or filtering material while it is still liquid to remove impurities. Once filtered, the wax can be poured into molds or used for various crafts.
How long does beeswax take to melt?
The melting time depends on the method used and the quantity of wax. Generally, beeswax will start to melt after about 2-3 minutes of heating and will be fully melted within half an hour. Larger quantities may take up to an hour to completely melt.
What can I use melted beeswax for?
Melted beeswax has numerous uses, including making candles, lip balms, soaps, furniture polish, and natural sealants for stone countertops. It can also be used in woodworking, leatherworking, and as a natural rust prevention method.