Making your own natural homemade products using beeswax is a great way to embrace a healthier and eco-friendly lifestyle. In this step-by-step guide, we will explore various DIY beeswax projects such as candles, wraps, skincare, and more.
Key Takeaways:
- Diving into the world of DIY beeswax allows you to create natural and eco-friendly products at home.
- Beeswax can be used in a variety of homemade creations, including candles, wraps, skincare products, and crafts.
- DIY beeswax projects offer a rewarding and satisfying experience, allowing you to customize your products to your liking.
- By following our step-by-step guide and safety precautions, you can embark on your beeswax journey with confidence.
- Reduce your carbon footprint and discover the numerous benefits of beeswax in your everyday life.
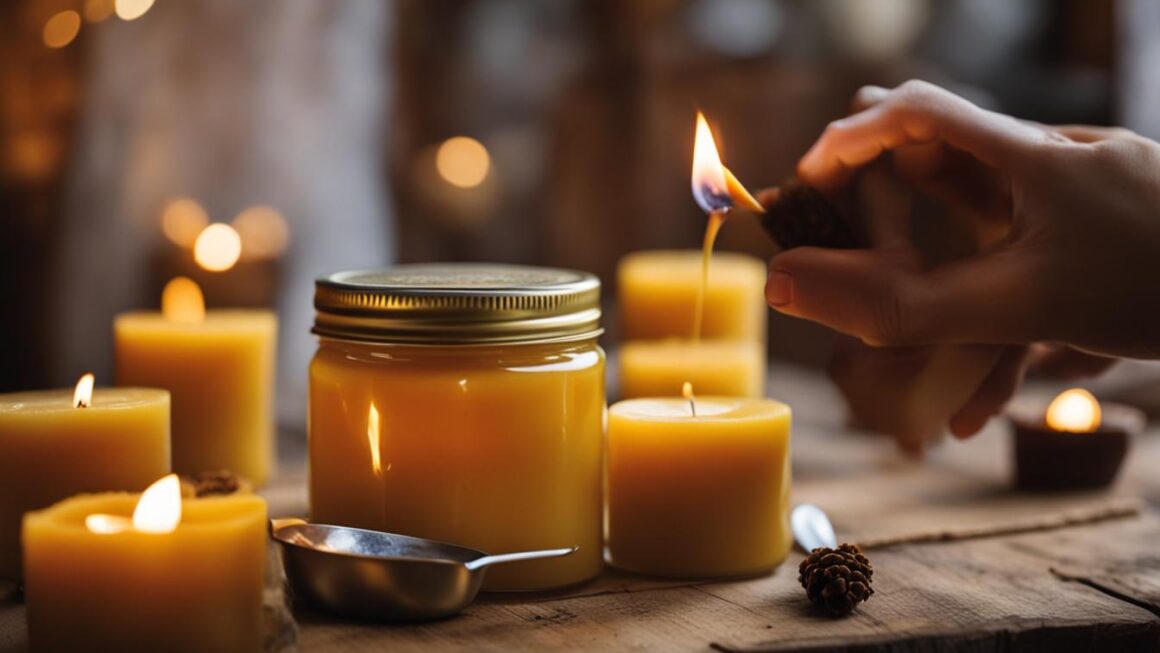
The Art of Beeswax Candle Making
Beeswax candles are a natural and environmentally-friendly alternative to conventional candles. They emit a warm and soothing glow, creating a cozy atmosphere in any space. Making your own beeswax candles allows you to customize the scent, color, and design, adding a personal touch to your home decor or gift-giving. Follow our step-by-step instructions to learn the art of beeswax candle making.
Materials Needed for Beeswax Candle Making
- Beeswax beads
- Essential oils (optional)
- Wicks
- Jars or molds
- Double boiler or a heat-safe container
- Thermometer
- Stirring utensil
- Scissors
Step-by-Step Guide to Beeswax Candle Making
- Prepare your work area by covering it with newspaper or a heat-resistant mat.
- Melt the beeswax in a double boiler or a heat-safe container over low heat. Use a thermometer to monitor the temperature, ensuring the wax doesn’t exceed 185°F (85°C).
- Once the beeswax has melted, remove it from the heat and stir in any desired essential oils for fragrance.
- While the wax is still liquid, carefully pour it into the jars or molds. Insert the wicks into the center, ensuring they are straight and secure.
- Allow the candles to cool and solidify completely, which usually takes a few hours.
- Trim the wick to about ¼ inch (0.6 cm) before lighting the candle.
With just a few simple steps, you can create your own all-natural beeswax candles. Experiment with different fragrances and containers to suit your preferences and style. Beeswax candles make beautiful additions to your home or thoughtful handmade gifts for loved ones.
Benefits of Beeswax Candles
“Beeswax candles are not only beautiful but also have several benefits. They burn cleaner than paraffin wax candles, releasing no toxins or pollutants into the air. Beeswax candles also emit a subtle honey scent, creating a pleasant and natural fragrance in the room. Additionally, they have a longer burn time compared to other types of candles, making them more cost-effective in the long run.”
| Benefits of Beeswax Candles | Traditional Candles | Beeswax Candles |
|---|---|---|
| Burn Time | Shorter | Longer |
| Environmental Impact | Pollutants released | Minimal to none |
| Fragrance | Synthetic scents | Natural honey scent |
| Health Benefits | Potential toxins | None |
As you can see, beeswax candles offer a more sustainable and healthier option for candle enthusiasts. Enjoy the soothing glow, pleasant scent, and longevity of beeswax candles while knowing that you’re making a positive impact on your health and the environment.
Beeswax Wraps for Sustainable Food Storage
Beeswax wraps are a fantastic eco-friendly alternative to traditional plastic wrap for food storage. Not only are they reusable, but they also help to reduce plastic waste and promote sustainable living. Made by coating fabric with a mixture of beeswax, jojoba oil, and pine resin, beeswax wraps provide a natural and effective way to keep your food fresh.
These eco-friendly wraps can be used to cover bowls, wrap sandwiches, or store cheese and other perishable items. The natural antibacterial properties of beeswax help to keep your food fresh for longer, while the pine resin provides a sticky texture that allows the wraps to adhere easily to containers and food.
Creating your own beeswax wraps is a simple and rewarding DIY project. You’ll need some cotton fabric, beeswax pellets, jojoba oil, and pine resin. Cut the fabric into the desired sizes, and then melt the beeswax, jojoba oil, and pine resin together. Once melted, dip the fabric into the mixture to evenly coat it, and then hang it up to dry. Voila! You have your very own homemade beeswax wraps for sustainable food storage.
Benefits of Beeswax Wraps:
- Environmentally friendly and reusable
- Natural and chemical-free alternative to plastic wrap
- Helps to reduce plastic waste
- Antibacterial properties keep food fresh
- Provides a secure and adhesive seal
By using beeswax wraps, you can make a positive impact on the environment while keeping your food fresh and reducing waste. These wraps are not only practical but also beautiful, with various designs and colors available. Join the sustainable food storage movement and give beeswax wraps a try!

DIY Beeswax Skincare Products for Nourished Skin
Creating your own homemade skincare products using beeswax is not only a rewarding experience but also a way to nourish your skin with natural and eco-friendly ingredients. Beeswax, derived from the honeycomb of bees, has long been cherished for its emollient and protective properties. By incorporating beeswax into your skincare routine, you can enjoy the many benefits it offers.
Beeswax acts as a natural humectant, helping to retain moisture in the skin and preventing it from drying out. It also forms a protective barrier on the skin’s surface, locking in moisture and shielding it from environmental stressors. This makes beeswax ideal for creating lip balms, lotions, salves, and other skincare products that help keep your skin soft, supple, and hydrated.
One of the advantages of making your own beeswax skincare products is that you have complete control over the ingredients. You can choose organic and natural oils, such as almond oil or coconut oil, to further enhance the nourishing properties of your creations. Additionally, you can add essential oils like lavender or tea tree oil for their aromatic and therapeutic benefits.
Homemade beeswax skincare products are not only good for your skin but also for the environment. By reducing your reliance on commercial skincare products, which often contain synthetic chemicals and come in non-recyclable packaging, you can contribute to a more sustainable lifestyle.
Whether you’re looking to soothe dry lips, moisturize rough patches, or protect your skin from harsh weather conditions, DIY beeswax skincare products can be tailored to meet your specific skincare needs. By following simple recipes and techniques, you can create effective and nourishing products that promote healthy and radiant skin.
Table: Benefits of Beeswax in Skincare
| Benefit | Description |
|---|---|
| Moisturizing | Locks in moisture and prevents dryness |
| Protective | Forms a barrier against environmental stressors |
| Nourishing | Provides essential nutrients for healthy skin |
| Healing | Helps soothe and repair damaged skin |
| Sustainable | Reduces reliance on synthetic chemicals and non-recyclable packaging |
With beeswax skincare products, you can indulge in self-care while knowing that you’re using natural and beneficial ingredients on your skin. So, why not give it a try and start creating your own DIY beeswax skincare products for nourished and happy skin?

Benefits of Beeswax in DIY Crafts
Beeswax is a versatile material that offers numerous benefits when used in DIY crafts. Its natural properties make it an excellent choice for creating beautiful and functional homemade crafts. Whether you’re making ornaments, candles molds, or experimenting with encaustic art, beeswax can enhance your creative projects in various ways.
One of the key benefits of using beeswax in DIY crafts is its malleability. Beeswax has a low melting point, which means it can easily be shaped and molded into different forms. This makes it ideal for creating intricate designs and detailed ornaments. Whether you’re crafting beeswax candles in unique shapes or molding beeswax into decorative figurines, the possibilities are endless.
Another advantage of using beeswax in DIY crafts is its natural beauty. Beeswax has a warm, golden color that adds a touch of elegance to any handmade creation. Its glossy finish and subtle texture give crafts a professional and polished look. Whether you’re making beeswax jewelry or incorporating beeswax into mixed media artwork, it adds a unique and organic element to your creations.
| Benefits of Beeswax in DIY Crafts | Examples |
|---|---|
| Enhanced creativity | Exploring new techniques in encaustic art |
| Natural beauty | Handcrafted beeswax candles with a warm glow |
| Durability | Beeswax-coated fabric for long-lasting reusable wraps |
| Environmental friendliness | Using beeswax instead of plastic in DIY crafts |
In addition to its aesthetic appeal, beeswax also offers durability. When used in DIY crafts such as beeswax-coated fabric for wraps, it creates a protective barrier that helps preserve the integrity of the material. This makes beeswax crafts long-lasting and more sustainable compared to their plastic counterparts.
Lastly, using beeswax in DIY crafts is a more environmentally friendly alternative. By opting for natural materials like beeswax instead of plastics, you can reduce your carbon footprint and contribute to a greener planet. Beeswax is biodegradable and renewable, making it a sustainable choice for eco-conscious crafters.
Where to Source Beeswax and Materials
When embarking on your DIY beeswax projects, it’s essential to source high-quality beeswax and other materials. There are several reputable suppliers where you can purchase everything you need to get started. Here are some recommended options:
Carmel Pure Beeswax
Carmel Pure Beeswax is a trusted supplier known for its high-quality beeswax products. They offer a wide range of beeswax beads, perfect for making candles, skincare products, and crafts. With their commitment to sustainability and eco-friendly practices, you can be confident in the quality of their products.
Dadant
Dadant is another reliable supplier that has been serving beekeepers and DIY enthusiasts for over 150 years. They offer a variety of beeswax products, including beeswax sheets, blocks, and pellets. Whether you need beeswax for candles, wraps, or skincare, Dadant has you covered.
Local Beekeeping Associations
Supporting local beekeeping associations is not only a great way to source beeswax but also to connect with the beekeeping community. Many associations have their own stores or can provide recommendations for local suppliers. By purchasing from these associations, you contribute to the sustainability of beekeeping and the preservation of honeybee populations.
Remember to check online marketplaces, such as Etsy and Amazon, for additional options. Read customer reviews and product descriptions to ensure you’re getting the best quality beeswax for your projects. With the right materials, you’ll be well-equipped to unleash your creativity and explore the endless possibilities of DIY beeswax projects.
| Supplier | Products | Benefits |
|---|---|---|
| Carmel Pure Beeswax | Beeswax beads | High-quality, sustainable |
| Dadant | Beeswax sheets, blocks, pellets | Trusted supplier, wide range of products |
| Local Beekeeping Associations | Varies | Support local beekeepers, connect with the community |
Tips for Successful DIY Beeswax Projects
Embarking on DIY beeswax projects can be a rewarding and creative experience. To ensure success, here are some helpful tips to guide you through your projects:
Choosing the Right Beeswax
When sourcing beeswax, opt for high-quality and pure beeswax. This will ensure that your projects have the best results and the natural benefits of beeswax are fully utilized. Look for reputable suppliers like Carmel Pure Beeswax or Dadant for all your beeswax needs.
Adding Essential Oils to Beeswax Candles
If you’re making beeswax candles, consider enhancing their scent by adding essential oils. Opt for strong scents like peppermint or lavender to create a soothing and aromatic experience. Remember to choose essential oils that are safe for candle use and follow the recommended usage ratios for optimal fragrance.
When adding essential oils to melted beeswax, it’s important to do so at a lower temperature to preserve the scent. Mixing at a high temperature can cause the oils to dissipate, resulting in a weaker fragrance. Allow the mixture to cool slightly before adding the essential oils, and stir gently to combine.
Properly Curing Beeswax Candles
After pouring your beeswax candles, it’s essential to let them cure for at least two days before lighting them. This allows the wax to fully harden and the fragrance to develop. Rushing the curing process may result in uneven burn or a weaker scent. Take your time and be patient to enjoy the best results.
Following these tips will help ensure that your DIY beeswax projects turn out successful and enjoyable. From choosing the right beeswax to adding scents and properly curing your candles, each step plays a crucial role in creating beautiful and functional homemade products.
Safety Precautions When Working with Beeswax
Working with beeswax is a rewarding and enjoyable process, but it’s important to prioritize safety to ensure a smooth and accident-free experience. Here are some essential precautions to keep in mind when embarking on your DIY beeswax projects:
1. Take fire safety precautions
Since beeswax candles involve an open flame, it’s crucial to exercise caution. Keep lit candles away from flammable materials and always supervise them, especially if children or pets are present. Remember to extinguish candles before leaving the room or going to bed to prevent accidents.
2. Handle melted beeswax with care
When melting beeswax, it’s necessary to use caution to avoid burns. Always heat the wax slowly and ensure a safe temperature range. Use appropriate heat-resistant utensils, such as stainless steel or heat-resistant glass, and be mindful when pouring melted wax into molds or containers to prevent spills or splashes.
3. Be aware of allergies and sensitivities
While beeswax is generally safe for most individuals, it’s essential to be aware of any allergies or sensitivities you may have to beeswax or essential oils commonly used in DIY projects. Always test products on a small area of skin to check for any adverse reactions before applying them more extensively.
4. Work in a well-ventilated area
When working with melted beeswax or using heating devices, it’s important to ensure proper ventilation to prevent the build-up of fumes. Open windows or work in a well-ventilated space to maintain air quality and minimize any potential respiratory irritation.
By following these safety precautions, you can enjoy the creative and rewarding process of working with beeswax while minimizing any potential risks or accidents.
*Image provided for visual representation purposes only, and does not depict any specific safety measures mentioned in the article.
Cleaning Up After DIY Beeswax Projects
Once you have completed your DIY beeswax projects, it’s important to clean up your workspace properly. This ensures that any spilled wax or residue is removed, leaving your area clean and ready for future endeavors. Follow these simple steps to efficiently clean up after your DIY beeswax projects:
- Preheat your oven: Preheat your oven to a low temperature, around 200°F (93°C). This gentle heat will help melt any spilled wax, making it easier to clean.
- Place wax-covered items in the oven: If you have any utensils, containers, or surfaces with spilled wax, place them in the preheated oven. Make sure to use oven-safe materials and avoid placing any plastic or heat-sensitive items in the oven.
- Wait for the wax to melt: Allow the wax to melt completely in the oven. This usually takes around 10-15 minutes, but can vary depending on the amount of wax and the temperature of your oven.
- Clean the utensils and containers: Once the wax has melted, carefully remove the items from the oven using oven mitts or heat-resistant gloves. Wipe away the melted wax using a cloth or paper towel. For stubborn residue, you can use a gentle cleaning solution or warm soapy water.
By following these steps, you can easily clean up after your DIY beeswax projects and maintain a tidy workspace. Remember to exercise caution when handling hot wax and always use appropriate safety measures.
Tips for Effective Wax Removal:
- To clean utensils and containers, you can also try freezing them. Put them in the freezer for a few hours until the wax hardens, and then easily remove the hardened wax by gently scraping it off.
- For removing wax from fabrics or carpets, place a brown paper bag or a clean cloth over the wax and apply gentle heat with an iron. The heat will melt the wax, and the paper or cloth will absorb it. Repeat this process until the wax is completely removed.
- If you’re dealing with small wax spills on surfaces like countertops or floors, you can use a hairdryer to soften the wax and then wipe it away with a cloth or paper towel. Be careful not to use excessive heat or hold the hairdryer too close to the surface.
“Cleaning up after DIY beeswax projects doesn’t have to be a daunting task. With a little heat and some simple cleaning techniques, you can easily remove wax and keep your workspace clean and tidy.”
Conclusion
In conclusion, DIY beeswax projects provide an excellent opportunity to embrace a healthier and more eco-friendly lifestyle. By making your own natural homemade products, such as candles, wraps, skincare, and crafts, you can reduce your reliance on store-bought items and create personalized creations that are both sustainable and beneficial for the environment.
Throughout this step-by-step guide, we have explored various DIY beeswax projects and provided detailed instructions to help you get started. From the art of candle making to the benefits of beeswax in skincare and crafts, there are countless ways to unleash your creativity and dive into the world of beeswax.
Remember to follow our helpful tips for successful DIY beeswax projects and practice safety precautions while working with beeswax. Cleaning up after your projects is also a breeze with our simple method.
So why wait? Begin your DIY beeswax journey today and experience the satisfaction of crafting your own homemade creations while enjoying the beauty and benefits of beeswax. Start small and gradually explore new projects – the possibilities are endless!
FAQ
What can I make with beeswax?
Beeswax can be used to make various DIY projects such as candles, wraps, skincare products, and crafts.
How do I make beeswax candles?
To make beeswax candles, you will need beeswax beads, wicks, jars, and optional essential oils. Follow our step-by-step instructions for a delightful honey-scented all-natural candle.
What are beeswax wraps?
Beeswax wraps are a sustainable alternative to plastic wrap for food storage. They are made by coating fabric with a mixture of beeswax, jojoba oil, and pine resin.
Can I make my own beeswax wraps?
Yes, you can make your own beeswax wraps at home. Learn how to make them and reduce your plastic waste.
How can I use beeswax in skincare products?
Beeswax is a versatile ingredient in skincare products. It can be used to make lip balms, lotions, salves, and more. Discover the benefits of using beeswax in your skincare routine.
What can I make with beeswax for crafting?
Beeswax can be used to make ornaments, candle molds, encaustic art, and more. Explore the versatility of beeswax in crafting and unleash your creativity.
Where can I buy beeswax and other materials?
There are various suppliers where you can purchase beeswax beads, wicks, jars, and essential oils. We recommend reputable suppliers such as Carmel Pure Beeswax and Dadant for all your beeswax needs.
What are some tips for successful DIY beeswax projects?
Use strong scents like peppermint or lavender for beeswax candles, choose the right wicks, clean up spilled wax with the oven method, and let your candles cure before lighting them. Follow these tips for a rewarding DIY beeswax experience.
Are there any safety precautions when working with beeswax?
Keep an eye on lit candles, use caution when melting beeswax to avoid burns, and be aware of any allergies or sensitivities to beeswax or essential oils. Follow safety guidelines for a risk-free DIY beeswax process.
How can I clean up after DIY beeswax projects?
Preheat your oven to melt spilled wax for easy removal, clean utensils and containers with soap and water. Keep your workspace tidy for future DIY beeswax endeavors.
What are the benefits of DIY beeswax projects?
DIY beeswax projects offer a fun and rewarding way to create natural and eco-friendly products at home. Embrace the beauty and benefits of beeswax and enjoy the satisfaction of crafting your own homemade creations.