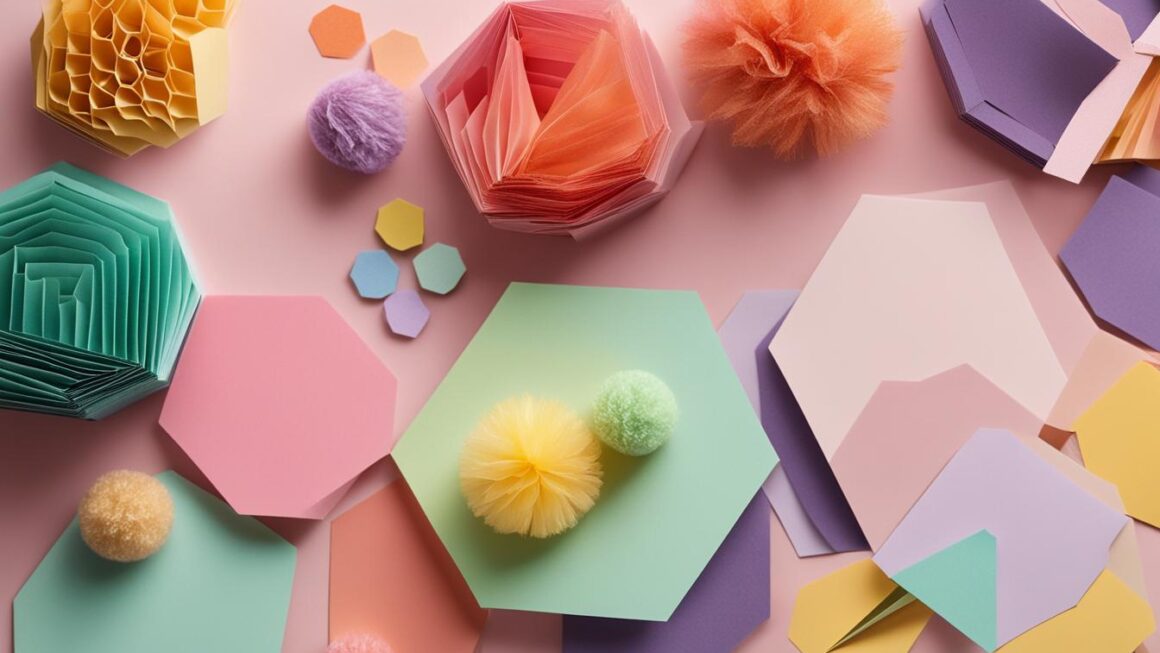
Are you looking for creative and fun DIY projects to add a unique touch to your home decor or special events? Look no further than honeycomb crafts! With their geometric patterns and eye-catching designs, honeycomb crafts are a trendy and stylish way to enhance any space. From wall art and shelves to decorations and organizers, there are endless possibilities when it comes to incorporating honeycomb design into your creations.
Whether you’re a seasoned DIY enthusiast or just starting out, honeycomb crafts are perfect for all skill levels. You can find plenty of inspiration and ideas on platforms like Pinterest, where you’ll discover a plethora of honeycomb craft projects that are easy to make and oh-so charming.
Key Takeaways:
- Honeycomb crafts are a trendy and stylish way to enhance home decor or special events.
- They offer endless possibilities for creativity and customization.
- Popular DIY honeycomb crafts include wall art, shelves, decorations, and organizers.
- These crafts are fun, easy to make, and add a unique touch to any space.
- Get inspired and unleash your creativity with honeycomb crafts!
DIY Honeycomb Hexagon Popsicle Stick Wall Art
Looking for a creative and budget-friendly way to add a touch of honeycomb design to your home decor? Look no further than this delightful DIY project – honeycomb hexagon popsicle stick wall art. With just a few simple materials and easy-to-follow steps, you can create a visually appealing piece of art that will impress your guests. Plus, it’s a fun activity that both kids and adults can enjoy!
To create your own honeycomb hexagon popsicle stick wall art, you’ll need the following materials:
- Popsicle sticks
- Hot glue gun
- Acrylic paint (optional)
- Paintbrushes (optional)
Start by arranging the popsicle sticks in a honeycomb pattern. Apply hot glue to the ends of the sticks and press them together firmly to create a sturdy structure. Repeat this step until you have enough hexagons to form your desired design. You can get creative with the colors and patterns by painting the popsicle sticks before assembling them into hexagons.
Once your honeycomb hexagons are ready, you can attach them to a piece of backing board or directly to your wall using removable adhesive strips. Arrange the hexagons in a visually pleasing layout, and voila – your honeycomb hexagon popsicle stick wall art is complete! Step back and admire your handiwork, knowing that you’ve added a modern and unique touch to your home.
Benefits of DIY Honeycomb Hexagon Popsicle Stick Wall Art
This DIY project offers several benefits beyond just its aesthetic appeal. Here are a few reasons why you should give it a try:
- Cost-effective: Popsicle sticks are inexpensive, making this a budget-friendly craft option.
- Customizable: You can personalize your wall art by choosing different colors and designs for your popsicle sticks.
- Easy to make: This project is beginner-friendly and doesn’t require any complex techniques.
- Versatile: Honeycomb hexagon popsicle stick wall art can be placed in any room, from living rooms to bedrooms and even nurseries.
Now that you have all the information you need to create your own DIY honeycomb hexagon popsicle stick wall art, it’s time to get started. Gather your materials, unleash your creativity, and embark on a crafting adventure that will elevate your home decor to new heights!
How to DIY Your Own Honeycomb Wall Shelves
If you’re looking for a stylish and functional way to display small decor items or store books and plants, then DIY honeycomb wall shelves are the perfect solution. These hexagon-shaped shelves resemble a honeycomb pattern and can add a touch of visual interest to any wall. In this section, we’ll guide you through the process of creating your own honeycomb wall shelves using simple materials and tools.
Materials You’ll Need
- Wooden boards or plywood
- Saw
- Sanding paper
- Screws
- Drill
- Paint or stain
- Paintbrush or roller
- Level
- Measuring tape
Step-by-Step Instructions
- Measure and mark the desired size of each hexagon shelf on the wooden boards or plywood.
- Use a saw to cut out the hexagon shapes. Take your time and make precise cuts.
- Sand the edges of each hexagon shelf to ensure a smooth finish.
- Arrange the hexagon shelves in a honeycomb pattern on the wall, making sure they are level.
- Drill pilot holes in the back of each hexagon shelf and attach them to the wall using screws.
- Once the shelves are securely attached, you can paint or stain them to match your desired color scheme. Allow the paint or stain to dry completely.
- Finally, you can start decorating your honeycomb wall shelves with books, plants, or other small decor items.
With these easy-to-follow instructions, you’ll be able to create your own honeycomb wall shelves and transform any wall into a stylish and functional display space. Get creative with different sizes and arrange the hexagon shelves in unique patterns to add a personal touch to your home decor.
Hexagonal Dessert Table Backdrop
A hexagonal dessert table backdrop is a popular choice for parties and events. By using honeycomb shapes in different sizes and colors, you can create a stunning backdrop that adds a whimsical and playful touch to any celebration. This DIY project is easy to execute and can be customized according to the theme or color scheme of the event.
Materials
- Honeycomb paper
- Scissors
- Double-sided tape
- String or fishing line
Instructions
- Start by cutting out hexagonal shapes from the honeycomb paper. You can use different sizes to create variation in the backdrop.
- Arrange the honeycomb shapes in a pattern that you like. You can create a uniform look or mix different sizes and colors for a more eclectic style.
- Use double-sided tape to attach the honeycomb shapes to a wall or a backdrop stand. Make sure to secure them tightly to prevent them from falling.
- If desired, you can add some string or fishing line to hang the honeycomb shapes from the ceiling. This adds depth and movement to the backdrop.
- Step back and admire your hexagonal dessert table backdrop. It’s ready to enhance the ambiance of your party or event!
Quote
A hexagonal dessert table backdrop is a fun and creative way to make your party stand out. The honeycomb shapes add a touch of whimsy and playfulness, making it a perfect choice for birthdays, weddings, or any special occasion. Plus, with the easy DIY instructions, you can customize the backdrop to match your event’s theme or color scheme. It’s a simple yet effective way to create a visually stunning focal point that will wow your guests.
Table: Different Sizes of Honeycomb Shapes
| Size | Dimensions |
|---|---|
| Small | 4 inches |
| Medium | 6 inches |
| Large | 8 inches |

Having a hexagonal dessert table backdrop at your event will add a touch of charm and create the perfect backdrop for photos and memories. It’s a simple and budget-friendly DIY project that will impress your guests and make your celebration truly unforgettable.
DIY Honeycomb with Toilet Paper Rolls
Making honeycomb decorations using toilet paper rolls is a fun and eco-friendly craft project. By cutting and folding the rolls into a honeycomb shape, you can create unique and colorful decorations for walls or party displays. This DIY project is perfect for kids and can be a great way to teach them about recycling and upcycling materials.
To create your own DIY honeycomb with toilet paper rolls, follow these simple steps:
- Start by collecting empty toilet paper rolls. You will need several rolls to create a honeycomb design.
- Cut each toilet paper roll into equal-sized rings. You can use a ruler to measure the width of the rings for consistency.
- Take one ring and flatten it using your fingers or a rolling pin. This will create a hexagon shape.
- Repeat this process with the remaining rings until you have enough hexagon shapes to form your honeycomb.
- Arrange the hexagon shapes in a honeycomb pattern on a flat surface.
- Secure the hexagon shapes together using glue, tape, or a stapler, making sure they are firmly attached.
- Once the glue is dry, you can paint or decorate the honeycomb with your preferred colors and designs.
- Hang the finished honeycomb decoration on your wall or use it as a centerpiece for a party display.
By using simple materials like toilet paper rolls, you can transform waste into beautiful honeycomb crafts. This DIY project is not only a creative way to decorate your space, but it also encourages sustainability and teaches kids about the importance of recycling.
“Creating honeycomb decorations with toilet paper rolls is a fantastic craft activity for kids. It allows them to use their imagination and learn about the value of repurposing materials. Plus, the end result is a colorful and eye-catching decoration that adds a touch of whimsy to any space.”
DIY Honeycomb with Toilet Paper Rolls: A Fun and Eco-Friendly Craft
Transforming ordinary toilet paper rolls into honeycomb decorations is a simple and enjoyable project that brings creativity and sustainability together. It’s a great opportunity for kids to explore their artistic side while learning about the importance of recycling and repurposing materials. Whether it’s for home decor or a special event, DIY honeycomb crafts with toilet paper rolls are sure to impress with their unique and colorful designs.
How to Make Easy DIY Hexagon Shelves
Creating easy DIY hexagon shelves is a budget-friendly way to add a honeycomb pattern to your home decor. By using popsicle sticks and glue, you can assemble hexagon-shaped shelves that can be painted or stained to match your desired color scheme. These shelves provide both storage and a unique decorative touch to any room.

To make these easy DIY hexagon shelves, you will need the following materials:
- Popsicle sticks
- Wood glue
- Paint or stain in your desired color
- Paintbrush
- Saw
- Sandpaper
Here are the steps to create your own DIY hexagon shelves:
- Start by cutting the popsicle sticks in equal lengths, depending on the size of the shelves you want to create. Sand the edges of the sticks to ensure a smooth finish.
- Arrange the popsicle sticks in a hexagon shape, with the ends overlapping slightly. Apply wood glue to the overlapping ends and press them together firmly to secure the shape.
- Let the glue dry completely before moving on to the next step.
- Once the glue is dry, you can paint or stain the hexagon shelves in your desired color. Apply multiple coats if needed, allowing each coat to dry before adding the next.
- Once the paint or stain is dry, your DIY hexagon shelves are ready to be displayed. You can hang them on the wall using nails or adhesive hooks, or place them on a tabletop or mantel.
These easy DIY hexagon shelves are versatile and can be used in any room of your home. They are perfect for displaying small decor items, books, or plants. Get creative with the colors and arrangements to make your shelves truly unique!
Honeycomb Organizer
Transforming a plain desk organizer into a honeycomb-inspired decor piece is a simple way to add a touch of style and organization to your workspace. By using colorful honeycomb stickers, you can easily decorate the surface of the organizer and create a visually appealing and functional accent piece for your desk.
Here’s a step-by-step guide to creating your own honeycomb organizer:
- Clean the surface of the desk organizer to remove any dust or debris.
- Measure the dimensions of the organizer and create a template for the honeycomb shapes using paper or cardboard.
- Place the template on top of the honeycomb stickers and trace around it with a pencil.
- Carefully cut out the honeycomb shapes using scissors or a craft knife.
- Peel off the backing of each honeycomb sticker and carefully stick them onto the surface of the organizer, arranging them in a honeycomb pattern.
- Press down firmly on each sticker to ensure they adhere properly.
- Repeat this process until the entire surface of the organizer is covered with honeycomb stickers.
Once you’ve finished decorating the organizer, you can use it to store pens, pencils, paperclips, and other office supplies. The honeycomb design adds a playful and modern touch to your workspace, while keeping your desk tidy and organized.
“I love how the honeycomb organizer adds a pop of color to my desk. It’s not only functional but also a fun DIY project to do in my free time.” – Sarah, DIY enthusiast
Materials needed:
- Plain desk organizer
- Honeycomb stickers
- Pencil
- Scissors or craft knife
With just a few materials and some creativity, you can transform a simple desk organizer into a honeycomb-inspired masterpiece. Give it a try and enjoy the functional and decorative benefits of your newly customized honeycomb organizer!
Honeycomb Pin Board
Building a honeycomb pin board is a creative and practical way to bring honeycomb design into your workspace. By arranging hexagon-shaped cork tiles on a board, you can create a pin board that allows you to display notes, photos, and other important items. This DIY project is a fun way to personalize your workspace and stay organized.
Creating a honeycomb pin board is relatively simple and requires just a few materials. Start by gathering hexagon-shaped cork tiles, a wooden board, adhesive, and any decorative elements you would like to add. Place the cork tiles on the board, arranging them in a honeycomb pattern. Secure them in place using adhesive, ensuring that each tile is firmly attached.
Once the adhesive has dried, your honeycomb pin board is ready to use. Simply pin notes, reminders, photos, and other items onto the cork tiles. You can also add a touch of creativity by decorating the board with colorful paper or fabric, or even painting the wooden frame to match your workspace aesthetic.
Benefits of a Honeycomb Pin Board:
- Organization: With a honeycomb pin board, you can keep track of important tasks, deadlines, and ideas in one central location.
- Personalization: Customize your pin board with different colors and patterns, allowing it to reflect your unique style.
- Inspiration: Pin up motivational quotes, images, or artwork to inspire creativity and productivity as you work.
- Visual Appeal: The honeycomb design adds a visually interesting element to your workspace, making it stand out.
Whether you’re working from home, in an office, or a student trying to stay organized, a honeycomb pin board is a practical and stylish addition to any workspace. Get creative and make it your own by experimenting with different colors, patterns, and materials. Stay organized and inspired with this simple yet effective DIY project.
Conclusion
Honeycomb crafts offer a world of creative possibilities for DIY enthusiasts. Whether you’re looking to add a unique touch to your home decor or create eye-catching decorations for special events, honeycomb crafts are the way to go. With just a few simple materials and step-by-step instructions, you can create stunning honeycomb art pieces that are sure to impress.
From DIY hexagon popsicle stick wall art to honeycomb wall shelves, there are plenty of easy honeycomb craft ideas to explore. These crafts not only add a modern and stylish touch to any space but also provide functional storage solutions. Whether you’re a seasoned DIYer or just starting out, honeycomb crafts are accessible to everyone.
One of the great things about honeycomb crafts is that they can be customized to suit your personal style and preferences. You can experiment with different colors, patterns, and materials to create a truly unique piece of art. Additionally, many honeycomb crafts can be a fun and educational activity for kids, teaching them about recycling and upcycling materials.
So, why not give honeycomb crafts a try? With their versatility and ease of execution, you’ll be able to create beautiful and visually appealing pieces that will enhance your home decor or make your special events even more memorable.
FAQ
What are some popular honeycomb craft ideas?
Some popular honeycomb craft ideas include hexagon popsicle stick wall art, honeycomb wall shelves, honeycomb dessert table backdrops, and honeycomb decorations made from toilet paper rolls.
Are these honeycomb crafts easy to make?
Yes, these honeycomb crafts are fun and easy to make, suitable for both kids and adults.
How can honeycomb crafts be incorporated into home decor?
Honeycomb crafts can add a unique touch to home decor by creating wall art, shelves, decorations, organizers, and more.
Can honeycomb crafts be customized?
Yes, honeycomb crafts can be customized with different colors and designs to match personal preferences or specific themes.
What materials are commonly used in honeycomb crafts?
Common materials used in honeycomb crafts include popsicle sticks, wood, cork tiles, and recycled materials like toilet paper rolls.
Are honeycomb crafts budget-friendly?
Yes, honeycomb crafts can be made using inexpensive materials, making them a budget-friendly option for DIY enthusiasts.
Are honeycomb crafts suitable for events or parties?
Yes, honeycomb crafts like dessert table backdrops can add a whimsical and playful touch to parties and events.
Are there any educational benefits to honeycomb crafts?
Yes, honeycomb crafts can be a fun way to teach kids about recycling and upcycling materials while also fostering creativity.
Can honeycomb crafts be personalized for workspaces?
Yes, honeycomb crafts like pin boards and desk organizers can add a touch of style and organization to workspaces.
Can anyone make honeycomb crafts?
Yes, with simple materials and step-by-step instructions, anyone can enjoy the process of creating unique and visually appealing honeycomb crafts.