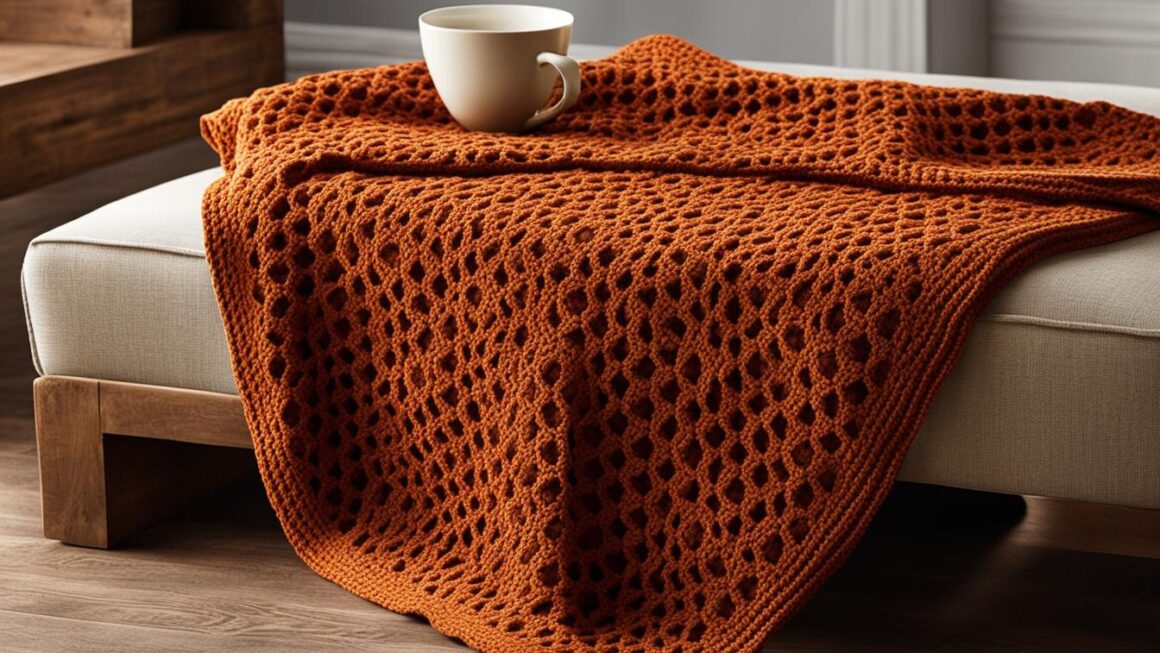
If you’re looking for a new and unique crochet project, look no further than our free honeycomb crochet blanket pattern. This pattern is designed for crocheters of all skill levels, from beginners to advanced. The resulting blanket is not only cozy and warm but also visually stunning, with a unique honeycomb texture created by the crochet stitch.
Whether you’re looking to spruce up your home decor or create a thoughtful gift for a loved one, the honeycomb crochet blanket is a perfect choice. And with our free pattern, you can get started on your project right away!
Key Takeaways:
- Our free honeycomb crochet blanket pattern is perfect for all skill levels.
- The honeycomb stitch creates a unique and visually stunning texture.
- This pattern is perfect for creating cozy and warm blankets for your home or as thoughtful gifts.
- Our free pattern makes it easy to get started on your honeycomb crochet blanket.
- With our tips and tricks, you can ensure successful crocheting and a professional-looking finished product.
Honeycomb Crochet Stitch Tutorial
The honeycomb stitch is a beautiful and unique crochet stitch that creates a textured pattern resembling honeycomb, hence its name. It’s a versatile stitch that can be used to create blankets, scarves, and even clothing items. Follow our step-by-step tutorial to learn how to crochet the honeycomb stitch.
Materials Required
Before we begin, gather the following materials:
- Yarn in your desired color
- Crochet hook of the appropriate size for your yarn
- Tapestry needle to weave in ends
Step-by-Step Instructions
1. Begin by chaining a multiple of 3 stitches, plus 1 additional chain stitch.
2. Next, double crochet in the 4th chain from the hook.
3. Skip the next 2 chain stitches and double crochet in the following chain stitch.
4. Chain 2 stitches, then double crochet in the same stitch as the previous double crochet stitch.
5. Repeat steps 3 and 4 across the row until you reach the last 2 chain stitches.
6. Skip the next 1 chain stitch, then double crochet in the final stitch.
7. Chain 2 stitches and turn your work.
8. Double crochet in the space between the first double crochet and the chain 2 space from the previous row.
9. Chain 1 stitch, then double crochet in the next chain 2 space from the previous row.
10. Double crochet in the next double crochet stitch from the previous row.
11. Chain 2 stitches, then double crochet in the same stitch as the previous double crochet stitch.
12. Repeat steps 10 and 11 across the row until you reach the end.
13. Double crochet in the last stitch of the row.
14. Chain 2 stitches and turn your work.
15. Repeat steps 8 through 14 to continue creating the honeycomb stitch pattern.
Tips and Tricks
Here are a few tips to help you successfully crochet the honeycomb stitch:
- Keep your tension consistent throughout the project to maintain a uniform texture.
- Use a stitch marker to keep track of where you are in the pattern.
- Practice the stitch with a smaller swatch before starting your project to get comfortable with the technique.
Getting Started with the Honeycomb Crochet Blanket
Before starting your crochet project, it’s important to gather the necessary materials and choose the right hook size and yarn weight. For our honeycomb crochet blanket pattern, you will need:
- 650-700 yards of worsted-weight yarn
- 5.5mm or 6mm crochet hook
- Scissors
- Tapestry needle
We recommend choosing a soft and durable yarn, such as acrylic or cotton, for the best results. Make sure to check the yarn label for the recommended hook size and gauge.
Once you have gathered your materials, it’s time to start crocheting! Follow the step-by-step instructions below to begin:
- Make a slip knot and chain a multiple of 3 stitches + 2 for your desired width.
- Row 1: Insert hook in 3rd chain from hook, work 1 double crochet (dc), *skip 2 chains, work 2 double crochets in next chain, repeat from * across, ending with 1 dc in last chain. Turn.
- Row 2: Chain 1, work 1 single crochet (sc) in first stitch, *work honeycomb pattern (see section 4 for details) over next 2 double crochets, repeat from * across, ending with 1 sc in top of turning chain. Turn.
- Repeat row 2 until your blanket reaches the desired length, approximately 60-65 inches.
- Fasten off and weave in ends.
Selecting the Right Yarn and Hook Size
The yarn weight and hook size you choose will affect the size and texture of your honeycomb blanket. A lighter weight yarn and smaller hook size will create a tighter stitch and smaller finished product, while a heavier weight yarn and larger hook size will create a looser stitch and larger finished product. Make sure to check the yarn label for the recommended hook size and gauge.
Special Techniques
The honeycomb crochet stitch is a combination of double crochets and front post double crochets. If you are not familiar with these stitches, check out our honeycomb crochet stitch tutorial in section 2 for step-by-step instructions and helpful visuals.
Blocking your finished blanket is also an important step to ensure a neat and professional appearance. To block your blanket, simply wet it with water, gently stretch it to the desired shape, and let it dry flat.
Pro Tip: If you’re having trouble maintaining the correct tension, try using a larger hook size for your foundation chain and switching to the recommended hook size for the honeycomb stitch pattern.
Understanding the Honeycomb Stitch Pattern
Before taking on crocheting your honeycomb blanket, understanding the Honeycomb Stitch pattern is crucial. This stitch creates a unique texture that is the highlight of this pattern. The honeycomb stitch is a combination of the half-double crochet (HDC) stitch and the front-post double crochet (FPDC) stitch.
To create this distinct stitch, you will first need to work a row of HDC stitches. The following row will be the FPDC stitches. Each FPDC stitch will fit around the HDC stitch of the previous row.
Here’s a step-by-step guide to practice the Honeycomb Stitch:
- Create a foundation chain with an even number of stitches.
- Work 1 HDC into the 3rd chain from the hook.
- *Skip the next chain. Work 1 HDC into the next chain. Repeat from * to the end of the row. Turn.
- Chain 2. Work 1 FPDC around the next stitch and the following stitch.
- *Skip the next stitch. Work 1 FPDC around the next stitch and the following stitch. Repeat from * to the last stitch of the row, then work 1 HDC into the top of the turning chain. Turn.
- Repeat rows 2 to 5 until you’ve reached your desired length.
By manipulating the HDC stitches and the FPDC stitches, the honeycomb stitch creates a beautiful and intricate pattern that is perfect for your crochet blanket.
Crocheting the Honeycomb Blanket
Now that you have all the necessary materials and a clear understanding of the honeycomb stitch, it’s time to start crocheting your honeycomb blanket. Here we provide you with detailed instructions, row by row, to guide you through the entire process.
- Begin by chaining a multiple of 4 stitches plus 3.
- Starting with the 3rd chain from the hook, work 1 single crochet (sc) in each chain stitch across the row.
- Chain 2 and turn your work.
- Work 1 half double crochet (hdc) into the first stitch, *skip 2 stitches and work 3 hdc in the next stitch. Repeat from * across the row, ending with 1 hdc in the last stitch.
- Chain 2 and turn your work.
- Work 1 hdc in the first stitch, *skip 2 stitches and work 1 hdc in the space between the 2nd and 3rd hdc from the previous row, skip 2 stitches, and work 3 hdc in the space between the next 2 hdc. Repeat from * across the row, ending with 1 hdc in the last stitch.
- Repeat step 5 until your blanket has reached the desired length.
- Fasten off and weave in any loose ends.
When working on a large project like a blanket, it can be helpful to use stitch markers to keep track of your progress and prevent mistakes. Feel free to customize your blanket by incorporating different colors or yarn weights. Add a border to your finished piece to provide a polished look.
Remember to maintain proper tension throughout your crochet work to ensure that your honeycomb stitch pattern is consistent and your stitches are not too tight or loose. Be patient and take your time with each row, and soon you’ll have a beautiful honeycomb blanket to enjoy.
Adding Your Personal Touch
While the honeycomb stitch creates a striking texture on its own, adding your personal touch can make your crochet blanket even more special. Here are some ideas:
- Experiment with color: Choose your favorite colors or create a specific color scheme to match your home decor. You can use a solid color, multiple colors, or even ombre or variegated yarn for a unique effect.
- Vary the size: The pattern can easily be adjusted to make a larger or smaller blanket. You can also use the honeycomb stitch to create other items such as scarves, cowls, or even a cushion cover.
- Add a border: A border can provide a finishing touch to your blanket and bring out the colors in the honeycomb stitch. You can use a simple single crochet border or choose a more intricate design.
- Combine with other stitches: The honeycomb stitch can be paired with other crochet stitches to create even more texture and interest. Try alternating rows of the honeycomb stitch with a simple single or double crochet.
Example Table
If you’re looking for inspiration for color combinations, here is an example of a table showcasing some popular options:
| Main Color | Accent Color 1 | Accent Color 2 |
|---|---|---|
| Grey | Blue | Green |
| Yellow | Orange | White |
| Pink | Purple | White |
Remember, there are no rules when it comes to personalizing your crochet project. Get creative and have fun!
Tips and Tricks for Successful Crocheting
Crocheting the honeycomb stitch can be both challenging and rewarding, but with the following tips and tricks, you can ensure success in your project:
1. Maintain Consistent Tension
One of the most important things to keep in mind when crocheting the honeycomb stitch is maintaining a consistent tension throughout your work. Varying tensions can result in inconsistent stitch size and uneven texture.
2. Use the Right Hook Size
Choosing the right hook size is crucial to achieving the desired result in your honeycomb crochet blanket. Make sure to select a hook that matches the recommended gauge in the pattern.
3. Practice the Stitch First
If you’re new to the honeycomb stitch, it can be helpful to practice the stitch on a small swatch of fabric before starting your blanket. This will allow you to get a feel for the stitch and work out any kinks before diving into the full project.
4. Count Your Stitches
Counting your stitches is crucial to ensuring an even pattern in your honeycomb blanket. Make sure to count your stitches at the end of each row and after completing each pattern repeat.
5. Fix Mistakes Early
If you make a mistake in your honeycomb stitch, it’s best to fix it as soon as possible. Unraveling a few rows to fix a mistake is much easier than waiting until the end of the project and having to rip out the entire blanket.
6. Block Your Blanket
Blocking your honeycomb crochet blanket can help to even out the stitches and give it a professional, polished look. Follow the blocking instructions in the pattern to achieve the best results.

“The key to successful crocheting is patience and perseverance. Keep practicing, and soon you’ll be creating beautiful honeycomb blankets with ease.”
Finishing and Blocking Your Honeycomb Blanket
Congratulations, you’ve completed crocheting your honeycomb blanket! Now, it’s time to give your creation a professional finish. Follow these steps to weave in ends, block your blanket, and care for it to ensure its longevity.
- Weave in Ends: Use a tapestry needle to weave in the ends of your yarn, ensuring they are secure and hidden. This step provides a polished finish to your project.
- Block Your Blanket: Wet blocking is the best way to achieve a professional finish for your crocheted honeycomb blanket. Fill a clean sink or basin with cool water and a wool wash or mild detergent. Submerge the blanket and gently squeeze out excess water. Do not wring or twist the fabric. Roll the blanket in a clean towel to absorb remaining water. Lay the blanket flat on a blocking board or clean surface, shaping it to the desired size and shape. Pin the edges in place using rust-proof pins, and allow to dry completely before removing the pins.
- Care for Your Blanket: To ensure the longevity of your crocheted honeycomb blanket, it’s important to care for it properly. Wash in cool water on a delicate cycle, using a mild detergent. Avoid using fabric softeners or bleach, as they can damage the fibers. Tumble dry on low heat or air dry flat.
With these finishing touches, your honeycomb crochet blanket is ready to use or display in your home.
Showcasing Your Honeycomb Blanket
After crocheting your honeycomb blanket, you’ll want to show off your hard work and creativity. Here are some ideas on how to display your blanket:
- On your bed: Your new honeycomb blanket will add a cozy and stylish touch to your bedroom decor.
- Over a couch: Drape your honeycomb blanket over the back of your couch for a pop of color and texture.
- As a throw: Fold your honeycomb blanket neatly and place it in a woven basket or on a shelf for a chic display.
- As a gift: If you created the honeycomb blanket as a gift, consider presenting it wrapped in a ribbon with a personalized note.
Remember, your honeycomb blanket is a unique creation and a reflection of your personal style. Have fun experimenting with different ways to showcase it in your home.

Conclusion
In conclusion, the free honeycomb crochet blanket pattern is a great way to create a cozy and unique blanket for yourself or a loved one. This pattern is perfect for both beginners and experienced crocheters, and with our step-by-step tutorial, you’ll be able to master the honeycomb stitch in no time.
Remember to select the right yarn and hook size for your project before you get started and follow our tips and tricks for successful crocheting. Once you’ve completed your blanket, don’t forget to add your personal touch with variations in color or stitch patterns.
To finish your blanket like a pro, follow our instructions for blocking and caring for your creation. And when your blanket is complete, consider showcasing it in your home or gifting it to someone special.
We hope you enjoy the process of crocheting your honeycomb blanket and creating a beautiful and cozy piece. Download our free honeycomb crochet blanket pattern today and get started.
FAQ
What is the difficulty level of the honeycomb crochet blanket pattern?
The honeycomb crochet blanket pattern is suitable for both beginners and experienced crocheters. The pattern includes detailed instructions to guide you through each step.
What materials do I need to crochet the honeycomb blanket?
You will need yarn in your preferred color, a crochet hook in the appropriate size for your yarn, scissors, and a yarn needle for weaving in ends.
Can I customize the size of the honeycomb blanket?
Yes, you can customize the size of the honeycomb blanket by adjusting the number of initial chains and the number of rows you crochet. The pattern provides instructions for a standard size, but feel free to make it larger or smaller to suit your preferences.
How can I block my finished honeycomb blanket?
To block your honeycomb blanket, gently wet it with water, making sure not to soak it. Then, lay it flat on a clean towel or blocking mat, shaping it to the desired size and smoothing out any wrinkles. Allow it to dry completely before removing the pins or weights used to hold it in place during blocking.
Can I use the honeycomb stitch for other crochet projects?
Absolutely! The honeycomb stitch can be used in various crochet projects, such as scarves, hats, and even garments. Experiment with different yarn weights and colors to create unique and textured items.
How can I troubleshoot common issues while crocheting the honeycomb stitch?
If you encounter any difficulties while crocheting the honeycomb stitch, try adjusting your tension or using a larger crochet hook. It can also be helpful to watch video tutorials or seek guidance from experienced crocheters who have worked with this stitch before.
How long does it take to complete the honeycomb blanket?
The time it takes to complete the honeycomb blanket will vary depending on your crochet speed and the size of the blanket. On average, it may take a few weeks to a month to finish the project.
Can I sell the honeycomb blankets I make using this pattern?
Yes, you can sell the honeycomb blankets you make using this pattern. However, please respect the copyright of the pattern and give appropriate credit to the original designer if you choose to sell your finished items.
Is there a video tutorial available for the honeycomb stitch?
Yes, you can find video tutorials demonstrating the honeycomb stitch on various online platforms. These tutorials can be helpful visual aids alongside the written instructions provided in the pattern.
Can I use different colors in the honeycomb stitch pattern?
Absolutely! The honeycomb stitch lends itself well to color changes. You can experiment with different color combinations to create unique patterns and effects within the honeycomb design.