Follow this step-by-step guide to create your own unique honeycomb shelves. These shelves are a trendy and fashionable addition to any room. With just a few tools and materials, you can easily make these DIY honeycomb shelves and add a touch of personal flair to your space.
Key Takeaways:
- Create stylish and functional honeycomb shelves with this step-by-step guide.
- Save money by making your own DIY honeycomb shelves instead of purchasing store-bought ones.
- Express your creativity and personalize your shelves to fit your specific needs and style.
- Explore different design options and materials to achieve a modern look.
- Maintain your honeycomb shelves with regular cleaning and care to ensure their longevity.
Tools and Materials
To create your own DIY honeycomb shelves, you will need a variety of tools and materials. Here is a list of what you’ll need:
Tools
- Miter saw
- Tape measure
- Pencil
- Nail gun
- Sander
- Tack cloth
- Paintbrush
- Drill
- Stud finder
Materials
- 1x12x96-inch pine board
- Wood glue
- 1-1/4-inch brad nails
- Painters tape
- Paint or stain
- 4 mounting brackets
- 4 1/2-inch wood screws
- 4 drywall and stud anchors
These tools and materials will help you create sturdy and stylish honeycomb shelves. Make sure you have everything you need before you begin your project.
| Tool | Quantity |
|---|---|
| Miter saw | 1 |
| Tape measure | 1 |
| Pencil | 1 |
| Nail gun | 1 |
| Sander | 1 |
| Tack cloth | 1 |
| Paintbrush | 1 |
| Drill | 1 |
| Stud finder | 1 |
| Material | Quantity |
|---|---|
| 1x12x96-inch pine board | 1 |
| Wood glue | 1 bottle |
| 1-1/4-inch brad nails | 1 box |
| Painters tape | 1 roll |
| Paint or stain | 1 can |
| Mounting brackets | 4 |
| 4 1/2-inch wood screws | 4 |
| Drywall and stud anchors | 4 |
Having the right tools and materials will make the process of creating your honeycomb shelves much easier and ensure a successful outcome. Now that you have everything you need, let’s move on to the next step: cutting the wood.
Cutting the Wood
Before you start assembling your honeycomb shelves, you’ll need to cut the wood into the appropriate dimensions. The hexagon-shaped pieces of wood will serve as the foundation for your shelves.
To begin, gather a 1x6x12-inch pine board and a miter saw. Measure and mark the dimensions of each hexagon on the board, which should be 1 x 6 x 12 inches. You will need a total of 20 pieces of wood with these dimensions.
Use the miter saw to trim the angles of the boards at 30 degrees. Make sure to align the edges and angles properly to ensure a precise fit when assembling the hexagons. This step is critical in achieving the desired shape and visual appeal of your honeycomb shelves.
Cutting the Wood Dimensions
| Quantity | Dimensions |
|---|---|
| 20 | 1 x 6 x 12 inches (mitered ends at 30 degrees) |
Once you have cut all the pieces, it’s essential to double-check the measurements to ensure accuracy. Taking the time to carefully cut the wood will result in well-crafted honeycomb shelves that will add a stylish touch to your space.
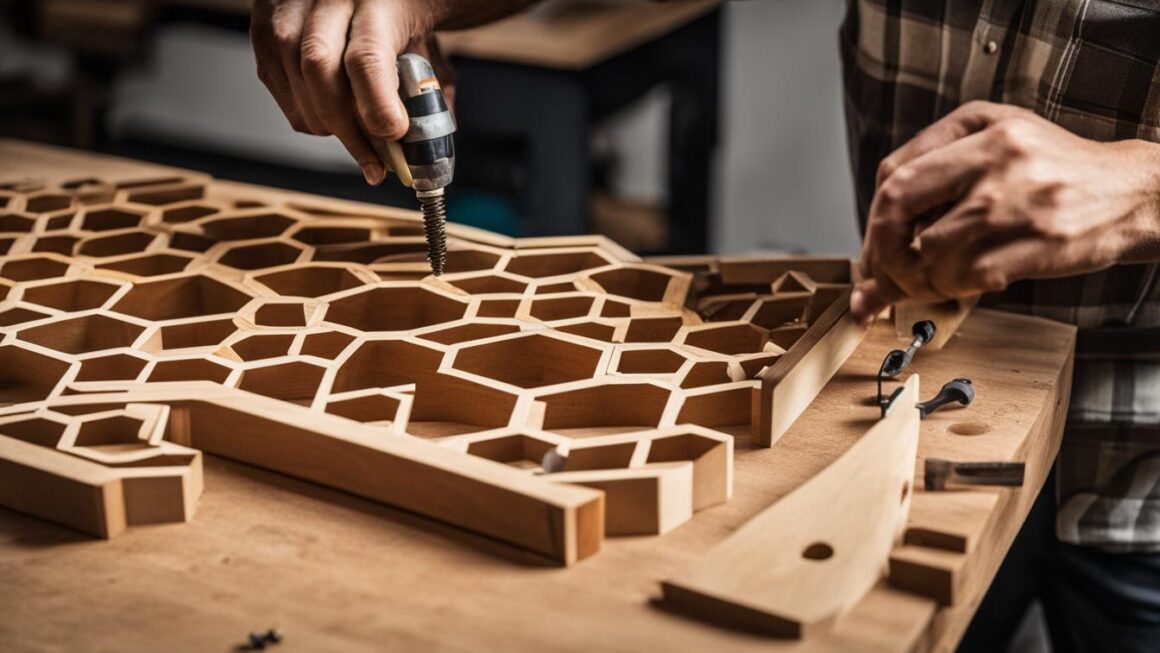
Assembling the Hexagons
Now that you have cut the wood into hexagon shapes, it’s time to assemble the honeycomb shelves. Follow these steps to attach the hexagons and create a sturdy structure for your shelves.
Step 1: Apply Wood Glue
Begin by applying wood glue to the cut angles of two boards that form a hexagon. Press the boards together firmly, making sure the edges align perfectly. Use painters tape to hold the boards in place as the glue dries. Repeat this process for each hexagon you want to create.
Step 2: Secure with Brad Nails
Once the wood glue has dried, use a nail gun to secure the boards together with brad nails. This will provide additional stability and ensure that the hexagons stay intact. Make sure to place the nails evenly along the edges of the hexagon for maximum strength.
Step 3: Repeat for Remaining Hexagons
Continue assembling the remaining hexagons by following the same steps of applying wood glue and securing with brad nails. Remember to align the edges and corners of each hexagon properly to maintain a uniform and seamless look.
Once all the hexagons are connected, you will have a beautiful honeycomb structure ready for the next steps in creating your DIY shelves.
Sanding and Finishing
Once all the hexagons are formed and the glue is dry, it’s time to sand and finish your honeycomb shelves. Sanding is an important step to ensure a smooth and polished surface. Use a sander to carefully sand the outside edges and corners of the shelves, removing any rough spots or imperfections. Be thorough but gentle to avoid damaging the wood.
After sanding, remove any sawdust using a tack cloth. This will ensure a clean surface for finishing. Cover your workspace to protect it from any drips or spills.
Now comes the fun part – applying the finish to your honeycomb shelves. You can choose to paint or stain the shelves, depending on your preference and the overall aesthetic you’re going for. Use a paintbrush to apply the paint or stain evenly, making sure to cover all surfaces, including the edges of the hexagons. Allow the finish to dry completely before proceeding to the next step.
Remember, the finish you choose can have a significant impact on the final look of your honeycomb shelves. Consider your decor style and the color scheme of the room when selecting a finish. Whether you opt for a bold color or a natural wood stain, the finishing step will bring your honeycomb shelves to life, adding a touch of elegance to your space.

Table: Comparison of Different Finishes
| Finish | Appearance | Pros | Cons |
|---|---|---|---|
| Paint | Smooth and opaque | Endless color options Easy to clean |
Can obscure wood grain May chip or scratch over time |
| Stain | Enhances natural wood grain | Natural and rustic look Allows wood texture to show through |
Limited color options Requires more maintenance |
| Varnish | Glossy and protective | Durable and long-lasting Provides a shiny finish |
May darken the wood Can be difficult to apply evenly |
Installing the Shelves
Once you have completed assembling and finishing your honeycomb shelves, it’s time to install them on the wall. Follow these steps to securely mount and hang your shelves:
- Choose the desired positioning for your shelves on the wall. Use a tape measure and level to ensure accurate placement.
- Attach the mounting brackets to the back of each shelf using 1/2-inch wood screws. Position the brackets evenly spaced along the width of the shelf.
- Locate the wall studs using a stud finder. Mark the locations of the studs on the wall with a pencil.
- Hold the shelf against the wall, aligning the mounting brackets with the marked stud locations. Use a drill to secure the brackets to the wall, drilling into the studs if possible.
- If there are sections of the wall without studs, use drywall and stud anchors to ensure proper support for those areas. Insert the anchors into the wall and then secure the brackets with screws into the anchors.
- Once the shelf is securely attached to the wall, use a level to ensure it is straight. Make any necessary adjustments before proceeding.
- Repeat the installation process for each shelf, ensuring proper spacing and alignment between them.
With the shelves securely mounted, you can now start arranging and displaying your favorite items. Enjoy the stylish and functional addition that honeycomb shelves bring to your space!
Tips for Painting
When it comes to painting your honeycomb shelves, there are a few tips to keep in mind to ensure a successful and beautiful finish. Whether you prefer a bold pop of color or a subtle neutral tone, the right paint job can elevate the look of your shelves and tie together your overall room design.
Color Options
Before you begin painting, consider the color options that will best complement your space. You can choose a color that matches your existing decor or opt for a contrasting shade to create a statement piece. Neutral colors like white, gray, or beige provide a timeless and versatile look, while bolder hues like navy blue, emerald green, or mustard yellow can add a vibrant touch to your shelves.
Additionally, you can experiment with different techniques such as ombre or color blocking to add visual interest and depth to your honeycomb shelves. Remember to take into account the overall color scheme of your room and select a paint color that harmonizes with the existing palette.
When it comes to applying the paint, start with a primer to create a smooth and even base. This will help the paint adhere properly to the wood and prevent any bleeding or discoloration. Once the primer is dry, apply multiple coats of paint, allowing each layer to dry completely before adding the next. This will ensure a rich and even color.
If you want to add a touch of shine or protection to your shelves, consider applying a varnish or clear coat. This will not only enhance the durability of your shelves but also add a glossy or satin finish, depending on your preference.
By following these tips, you can achieve a professional-looking paint job for your honeycomb shelves, bringing your DIY project to life and creating a stunning focal point in your room.
“Choose a color that matches your existing decor or opt for a contrasting shade to create a statement piece.”
| Color Options for Honeycomb Shelves | Popular Paint Colors | Effect |
|---|---|---|
| Neutral Colors | White, Gray, Beige | Timeless and versatile |
| Bold Colors | Navy Blue, Emerald Green, Mustard Yellow | Vibrant and eye-catching |
| Color Techniques | Ombre, Color Blocking | Visual interest and depth |
Additional Design Ideas
Take your honeycomb shelves to the next level with these additional design ideas. Explore modern variations, create honeycomb floating shelves, and experiment with different designs to achieve a unique look for your space.
To add a modern touch to your honeycomb shelves, consider using sleek materials like acrylic or metal. These materials can give your shelves a contemporary and minimalist aesthetic, perfect for modern or industrial-inspired interiors. Pairing the geometric honeycomb design with these modern materials creates a visually striking contrast.
If you prefer a floating shelf look, you can attach the hexagons directly to the wall without visible support. This creates the illusion of floating shelves and gives your space a clean and seamless appearance. To achieve this, use heavy-duty wall anchors or brackets hidden within the structure of the hexagons.
When exploring different designs, don’t be afraid to mix and match sizes and configurations. Play around with placing smaller hexagons inside larger ones or creating irregular patterns. This allows you to create a honeycomb shelves design that is truly unique to your space and personal style.

Modern Honeycomb Shelves
H3: Modern Honeycomb Shelves
| Material | Color | Dimensions |
|---|---|---|
| Acrylic | Clear | 12 x 12 x 6 inches |
| Metal | Black | 18 x 18 x 9 inches |
| Wood and Metal | Walnut and Gold | 24 x 24 x 12 inches |
Table showcasing different materials, colors, and dimensions for modern honeycomb shelves.
Maintenance and Care
Maintaining your honeycomb shelves is crucial to ensure their longevity and keep them looking their best. By following a few simple care tips, you can preserve the beauty and functionality of your DIY shelves for years to come.
Regular Cleaning
Periodically dust your honeycomb shelves with a soft cloth or duster to remove any accumulated dirt or debris. Pay attention to the corners and crevices of the hexagons to ensure a thorough clean. Avoid using harsh chemicals or abrasive cleaning agents, as they can damage the finish of the shelves.
Avoid Heavy or Unstable Items
When placing items on your honeycomb shelves, it’s important to consider their weight and stability. Avoid placing heavy objects that could potentially cause the shelves to sag or warp over time. Additionally, avoid placing items that are not stable or could easily topple over, as this could lead to damage or injury.
Gentle Stain Removal
If your honeycomb shelves become stained or dirty, use a mild detergent and water solution to gently clean the affected area. Dampen a soft cloth with the solution and gently blot the stain, being careful not to rub or scrub aggressively. Rinse the cloth with clean water and blot the area again to remove any residue. Allow the shelves to air dry completely before placing any items back on them.
| Care Tips for Honeycomb Shelves | Do | Don’t |
|---|---|---|
| Regular Cleaning | Dust with a soft cloth or duster | Use harsh chemicals or abrasive cleaners |
| Avoid Heavy Items | Consider weight and stability | Place heavy objects that could cause sagging |
| Gentle Stain Removal | Use mild detergent and water | Rub or scrub aggressively |
By following these maintenance and care tips, you can ensure that your DIY honeycomb shelves remain not only functional but also visually appealing. Regular cleaning, careful item placement, and gentle stain removal will help you enjoy your unique shelves for years to come.
Benefits of DIY Honeycomb Shelves
DIY honeycomb shelves offer numerous advantages and benefits for those looking to enhance their living spaces with unique and stylish storage solutions. Whether you are a seasoned DIY enthusiast or just starting out, these shelves are a fantastic option that can be personalized to suit your specific needs and preferences.
One of the key benefits of DIY honeycomb shelves is the opportunity to express your creativity and showcase your personal style. By designing and creating your own shelves, you have full control over the shape, size, and finish, allowing you to tailor them to perfectly complement your existing decor or create a standout focal point in any room.
Another advantage is the cost-effectiveness of DIY honeycomb shelves. Store-bought shelves can often be expensive, especially if you’re looking for something unique and on-trend. By making your own, you can significantly reduce costs while still achieving a high-quality and visually appealing result. Additionally, you can customize the materials to fit your budget without compromising on style.
Lastly, DIY honeycomb shelves are versatile and adaptable. You can easily modify and rearrange the hexagons to cater to changing needs or preferences. Whether you want to add more shelves, change the configuration, or even explore different finishes, these shelves offer flexibility and room for experimentation.
With their ability to unleash creativity, cost-effectiveness, and adaptability, DIY honeycomb shelves are a fantastic choice for anyone looking to add a touch of modern elegance and functionality to their living spaces.
Conclusion
Creating easy DIY honeycomb shelves is a rewarding project that allows you to showcase your creativity and add a modern touch to any room. With just a few tools and materials, you can design and build your own stylish and functional honeycomb bookshelves.
By following this step-by-step guide, you’ll be able to cut the wood pieces to the right dimensions, assemble the hexagons, sand and finish the shelves, and install them securely on your wall. The process is straightforward and can be customized to suit your personal style and space.
With their unique hexagonal design, honeycomb bookshelves offer a trendy and eye-catching alternative to traditional shelving options. Whether you’re displaying books, plants, or decorative items, these shelves will add a touch of elegance and charm to your home.
FAQ
How do I make DIY honeycomb shelves?
Follow the step-by-step guide provided to create your own unique honeycomb shelves.
What tools and materials do I need for DIY honeycomb shelves?
You will need a miter saw, tape measure, pencil, nail gun, sander, tack cloth, paintbrush, drill, stud finder, 1x12x96-inch pine board, wood glue, 1-1/4-inch brad nails, painters tape, paint or stain, 4 mounting brackets, 4 1/2-inch wood screws, and 4 drywall and stud anchors.
How do I cut the wood for honeycomb shelves?
Use a miter saw to cut the pine board into hexagon-shaped pieces, with dimensions of 1 x 6 x 12 inches, with mitered ends.
How do I assemble the hexagons for honeycomb shelves?
Apply wood glue to the cut angles of two boards, press them together, and use a nail gun to secure the boards with brad nails. Repeat this process to connect the remaining boards and complete the hexagon.
How do I sand and finish honeycomb shelves?
Use a sander to smooth the outside edges and corners. Remove any sawdust with a tack cloth. Cover your workspace and apply paint or stain to the shelves, according to your preference.
How do I install honeycomb shelves?
Decide on the desired positioning of your shelves on the wall. Install mounting brackets to the back of the shelf and attach the shelf to the wall using wood screws. Use drywall and stud anchors for sections without studs.
What are some tips for painting honeycomb shelves?
Use paints that are safe for interior use and free of harmful substances. Apply multiple coats of paint, allowing each layer to dry before applying the next. Consider mixing different colors or using varnish for added protection and aesthetic appeal.
Can I explore additional design ideas for honeycomb shelves?
Yes, you can create modern honeycomb shelves using sleek materials like acrylic or metal. You can also make honeycomb floating shelves by attaching the hexagons to the wall without visible support. Experiment with various configurations and sizes to achieve your desired aesthetic.
How do I maintain and care for honeycomb shelves?
Periodically dust and clean the shelves with a soft cloth or duster. Avoid placing heavy or unstable items on the shelves to prevent damage. If they become stained or dirty, gently clean them with a mild detergent and water solution.
What are the benefits of DIY honeycomb shelves?
DIY honeycomb shelves allow you to express your creativity and personal style, are a cost-effective alternative to store-bought shelves, and can be easily personalized and modified to fit your specific needs and space.