Beeswax is a natural product created by bees to store honey. When honey is harvested, the wax is extracted from the hive. Beeswax has a wide range of uses, including the production of candles, crayons, lip balms, and food wraps. To understand how beeswax is made, we will explore the step-by-step process of cleaning and processing raw beeswax.
Key Takeaways:
- Beeswax is created by bees to store honey.
- The wax is extracted from the hive during honey harvesting.
- Beeswax is used in the production of candles, crayons, lip balms, and food wraps.
- Cleaning and processing raw beeswax is necessary before it can be used.
- Understanding the step-by-step process of beeswax production is essential for utilizing its benefits.
Cleaning and Processing Beeswax: A Beginner’s Guide
After extracting honey from beehives, raw beeswax is left behind. This wax is sticky and contains debris from the hive, such as propolis and dead bees. Cleaning and processing beeswax involves melting the raw wax to remove impurities. This can be done at home with some basic equipment, including a pot, spoon, plastic bucket, and straining materials. The melted wax is poured through a fabric strainer to separate it from the debris.
To start the cleaning and processing process, gather the necessary equipment: a large pot, a spoon for stirring, a plastic bucket, newspapers or cloth to cover the work surface, muslin cloth or an old t-shirt for straining the wax, and paper towels. It is also recommended to have mineral oil on hand for cleaning up any wax spills. Once the equipment is ready, cover the work surface and prepare the plastic bucket with a fabric cover secured by clips or a rubber band.
To melt the beeswax, place it in a pot and cover it with water. Heat the pot on a stove over medium-low heat, being careful not to overheat the wax as it is flammable. Bring the water to a simmer, stirring the wax regularly. As the wax melts, it will float to the surface while the debris settles on the bottom. Carefully lift the pot from the stove once the wax has melted.
Equipment and Preparation
Before embarking on the beeswax processing journey, it’s essential to gather the necessary equipment to ensure a smooth and efficient workflow. Here is a list of items you’ll need:
- A large pot: Choose a pot that can accommodate the amount of beeswax you’ll be processing.
- A spoon for stirring: A sturdy spoon will come in handy for mixing and scraping the wax.
- A plastic bucket: This will serve as your wax collection container.
- Newspapers or cloth: Cover your work surface to protect it from any wax spills or stains.
- Muslin cloth or an old t-shirt: This will be used to strain the melted wax and separate it from any debris.
- Paper towels: Keep them nearby for quick clean-ups and wiping off any excess wax.
- Mineral oil: Have some on hand to easily clean up any wax spills or residue.
Once you have gathered all the necessary equipment, it’s important to prepare your workspace. Cover your work surface with newspapers or cloth to catch any drips or spills. Then, place your plastic bucket nearby, ensuring it has a fabric cover secured by clips or a rubber band. This cover will prevent any debris or insects from contaminating your melted wax. With your equipment and workspace prepared, you’re now ready to begin the beeswax processing process.
Table: Equipment Checklist
| Equipment | Description |
|---|---|
| Large pot | Used for melting the raw beeswax. |
| Spoon for stirring | Helps in mixing and scraping the wax. |
| Plastic bucket | Collects the melted wax. |
| Newspapers or cloth | Covers the work surface to avoid spills and stains. |
| Muslin cloth or old t-shirt | Used for straining the melted wax. |
| Paper towels | Used for cleaning up and wiping off excess wax. |
| Mineral oil | For easy clean-up of wax spills and residue. |
Melting the Wax
Melting beeswax is a crucial step in the beeswax processing process. By carefully controlling the temperature, we can ensure the wax melts efficiently without any risk of overheating or burning. To melt the beeswax, we begin by placing it in a pot and covering it with water. This water bath method helps regulate the temperature and prevents direct heat exposure to the wax. It’s important to note that beeswax is flammable, so caution must be exercised throughout the melting process.
Once the pot is prepared, it is heated over medium-low heat on a stove. The water in the pot should be brought to a simmer, but never allowed to reach boiling point. Stirring the wax regularly helps evenly distribute the heat and promote a smooth melting process. While the wax melts, it will rise to the surface of the water, while any impurities and debris settle at the bottom of the pot.
Temperature Control during Melting
Proper temperature control is essential to ensure the quality of the melted beeswax. The ideal temperature for melting beeswax is around 145-150°F (63-66°C). It’s crucial to avoid exceeding this temperature as higher heat can damage the wax and impact its quality. To ensure precise temperature control, a candy thermometer can be used to monitor the heat. This way, we can maintain the optimal temperature range throughout the melting process.
Remember, beeswax has a relatively low melting point compared to other waxes, so it’s important to keep a close eye on the temperature and never leave it unattended. By following these guidelines, we can safely and effectively melt beeswax, setting the stage for further processing and utilization.
| Temperature Range | Effect on Beeswax |
|---|---|
| Below 145°F (63°C) | The wax will not melt properly, resulting in uneven or incomplete melting. |
| 145-150°F (63-66°C) | The ideal temperature range for melting beeswax. The wax will melt smoothly without compromising its quality. |
| Above 150°F (66°C) | Excessive heat can damage the wax, reducing its quality and potentially causing discoloration or burning. |
Pouring and Straining
Once the beeswax has melted, it’s time to pour it and strain out any debris. Carefully lift the pot from the stove, ensuring you have a secure grip. Take your plastic bucket with the fabric strainer set up and slowly pour the liquid wax into the strainer. The fabric will catch any impurities, while allowing the clean wax and water mixture to pass through. If you have more wax to melt, you can repeat the pouring and straining process.
Now that you have strained the wax, you will notice a yellow layer forming on top of the water in the bucket. This is the clean beeswax that you have separated from any debris. The strained wax can be used for various applications, such as candle-making or crafting. It’s important to note that the wax will harden as it cools, so make sure to work efficiently during this step.
Straining Tips
When straining the melted wax, it’s helpful to have a second set of hands to hold the fabric strainer and guide the flow of the wax. This will ensure that the wax passes through the strainer smoothly, while any debris is left behind. Additionally, you can place a paper towel or cloth under the strainer to catch any wax drips and prevent a messy clean-up.
| Debris | Clean Wax | Water |
|---|---|---|
| Dead bees | Yellow layer on top | Remnants of impurities |
“Pouring and straining the melted wax is a crucial step in the beeswax processing process. By separating the clean beeswax from any debris, you ensure that your final product is of high quality. This clean wax can be used for various purposes and crafts, allowing you to fully utilize the natural resource created by bees.” – Beekeeping Enthusiast
Remember, pouring and straining the melted wax is an important part of the beeswax processing process. By separating the debris from the clean wax, you ensure that your final product is pure and free from impurities. So take your time, pour carefully, and strain diligently to create high-quality beeswax for all your crafting needs.
Cooling and Collecting
After all the wax has been melted and strained, the fabric cover is removed from the bucket, and the wax is left to cool overnight. During this time, the wax will harden into a firm yellow layer on top of the water. Once cooled, the wax disc can be removed from the bucket, and the water can be poured out.
The cooled beeswax should be rinsed in cool water to remove any remaining honey residue. This step is important to ensure that the beeswax is free from impurities and is ready for use in various applications. Any visible dirt can be carefully scraped off using a spatula or a similar tool.
To collect the cleaned beeswax, it is recommended to place it on a clean, dry surface or a wire rack. This allows any remaining water to evaporate and the beeswax to dry completely. Once dry, the beeswax can be further processed or stored for future use.
Table: Recommended Steps for Cooling and Collecting
| Steps | Description |
|---|---|
| Cooling | Leave the melted beeswax to cool overnight |
| Removal | Remove the hardened wax disc from the bucket |
| Rinsing | Rinse the beeswax in cool water to remove residue |
| Drying | Allow the beeswax to dry on a clean surface or wire rack |
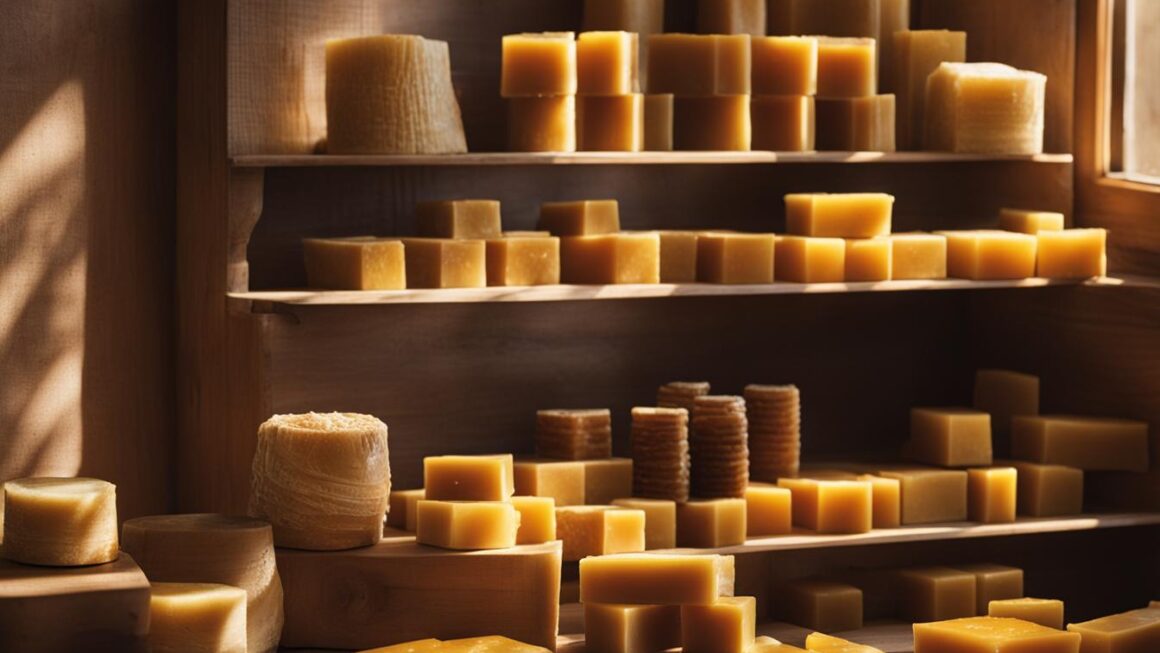
Storing and Using Beeswax
Once you have cleaned and processed your beeswax, it’s important to store it properly to ensure its longevity and usability. Wrap the cleaned beeswax in muslin or baking paper to protect it from dust and moisture. Then, store it in a cool place away from direct sunlight and heat sources.
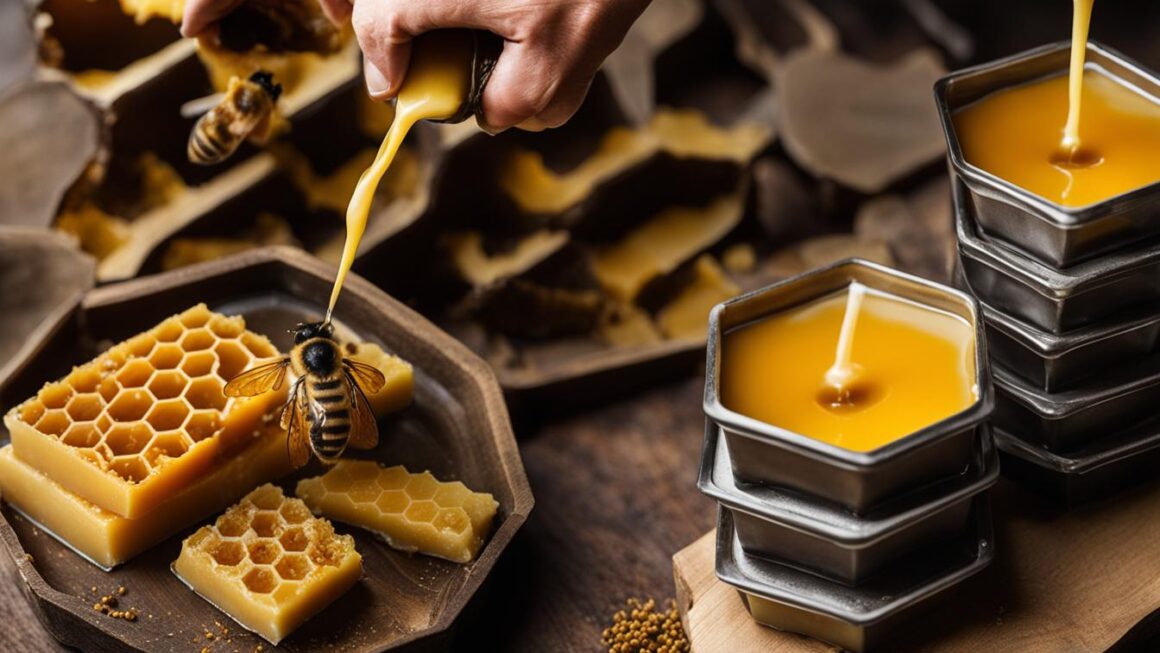
When you’re ready to use your beeswax, there are countless ways to incorporate it into your projects. Beeswax is widely used in crafts such as candle-making, soap-making, and furniture polishing. Its natural properties make it a popular choice for homemade beauty products like lip balms and lotions.
Beeswax can also be given or sold to friends and family who appreciate its many uses. Whether you’re using it in your own creations or sharing it with others, proper storage ensures that your beeswax remains in top condition.
Tips for Clean Up
After the beeswax processing is complete, it is important to properly clean up any wax spills or residue. Here are some tips to make the cleanup process easier:
- Protect your surfaces: Place drop cloths or used newspapers on your work surface before starting the beeswax processing. This will help catch any spills or drips, making cleanup much simpler.
- Wash with hot water: When cleaning the pot and utensils used in the process, use hot water to help melt and remove any remaining wax. Scrub the surfaces thoroughly to ensure all wax residue is eliminated.
- Use mineral oil: If you have wax splatters on surfaces such as countertops or floors, mineral oil can be used to remove them. Apply some mineral oil on a paper towel or cloth and gently rub the affected area until the wax is lifted.
By following these tips, you can ensure a smooth and hassle-free cleanup after beeswax processing. Remember to properly dispose of any used drop cloths or newspapers and store your cleaned equipment for future use.
Beeswax in Various Applications
Beeswax is a versatile natural substance that finds its application in a wide range of products and industries. Its unique properties make it a valuable ingredient in various crafts, beauty products, and household items.
One of the most common uses for beeswax is in candle-making. Its high melting point and slow burn rate make it an ideal choice for creating long-lasting and fragrant candles. Beeswax candles also emit a sweet aroma when burned, adding a cozy and natural ambiance to any space.
In addition to candles, beeswax is commonly used in the production of lip balms, lotions, and other beauty products. Its natural moisturizing properties help to soothe and protect the skin, making it a popular choice for those seeking natural and nourishing skincare solutions. Beeswax is also used in the creation of crayons, providing a non-toxic and eco-friendly alternative for children’s art supplies.
Another fascinating application of beeswax is in the production of food wraps. These wraps are made by coating fabric with a mixture of beeswax, jojoba oil, and tree resin. The wax coating creates a natural barrier that helps to preserve food and reduce waste, offering a sustainable and reusable alternative to plastic wrap.
| Application | Benefits |
|---|---|
| Candle-making | Long-lasting, fragrant, natural ambiance |
| Beauty products | Moisturizing, nourishing, non-toxic |
| Crayons | Non-toxic, eco-friendly |
| Food wraps | Sustainable, reusable, natural food preservation |
Aside from these applications, beeswax is also used in furniture polishing, where it provides a protective and lustrous finish. It can be melted and applied to wooden surfaces, leaving them with a warm and smooth shine. Additionally, beeswax is a key ingredient in the production of certain waterproof coatings, making it useful for outdoor gear and textile treatments.
Beeswax: A Sustainable and Versatile Resource
With its countless applications and natural properties, beeswax continues to be a valuable and sustainable resource. From creating beautiful candles to producing nourishing beauty products, the versatility of beeswax opens up a world of possibilities for various industries and DIY enthusiasts alike. Harnessing the power of bees and their remarkable creations, beeswax is a renewable and eco-friendly choice that can enhance our daily lives in numerous ways.
Rendering Beeswax at Home
Rendering beeswax at home is a simple and cost-effective process that allows you to transform raw beeswax into clean and usable form. By utilizing basic equipment and following a few easy steps, you can harness the natural resource created by bees and unlock its potential for various applications.
The Wax Rendering Process
To begin the wax rendering process, gather the necessary materials including unrendered beeswax, a microwaveable liquid measuring cup, disposable chopsticks, a deep plastic container, cheap and see-through straining material, and binder clips. Remember to use inexpensive equipment that can be dedicated solely to beeswax processing.
| Materials | Tools |
|---|---|
| Unrendered beeswax | Microwaveable liquid measuring cup |
| Disposable chopsticks | Deep plastic container |
| Cheap and see-through straining material | Binder clips |
Once you have all the materials ready, follow these simple steps:
- Melt the unrendered beeswax in a microwaveable liquid measuring cup, stirring frequently to ensure even melting.
- Strain the melted wax through a cheap and see-through straining material, allowing the impurities to be caught while the wax flows through.
- Pour the strained wax into a deep plastic container and let it harden.
Depending on the desired purity of the final product, the rendering process may need to be repeated multiple times. However, once the beeswax has been rendered, it can be used in a variety of homemade products, such as lip balm, soap, lotion, candles, and furniture polish.
By rendering beeswax at home, you can not only save money but also have the satisfaction of creating your own natural products. Experiment with different recipes and explore the versatility of beeswax in your DIY projects. Start your journey into the world of homemade beeswax today!
Materials and Tools for Wax Rendering
Rendering beeswax at home requires a few essential materials and tools. To start, you will need unrendered beeswax, which can be obtained from beekeepers or purchased online. It’s important to ensure that the beeswax is clean and free from any contaminants. Additionally, you will need a microwaveable liquid measuring cup for melting the wax, as well as disposable chopsticks for stirring.
For straining the melted wax, you will need a deep plastic container, such as an empty 5 lb. honey tub. This container will hold the strained wax as it cools and hardens. To strain the wax, you will also need cheap and see-through straining material, such as cheesecloth or nylon mesh. These materials will help remove any impurities or debris from the wax.
Table: Materials and Tools for Wax Rendering
| Materials | Tools |
|---|---|
| Unrendered beeswax | Microwaveable liquid measuring cup |
| Disposable chopsticks | Deep plastic container |
| Cheap and see-through straining material |
Lastly, binder clips can be useful for securing the straining material to the container, ensuring a secure and tight fit. These materials and tools are readily available and affordable, making it easy for beginners to start rendering beeswax at home without breaking the bank.

With these materials and tools in hand, you’ll be well-equipped to begin the wax rendering process. Remember to handle the beeswax with care, as it can be sticky and difficult to clean. By using simple and inexpensive tools, you can enjoy the many benefits of rendered beeswax in various DIY projects and applications.
The Wax Rendering Process
The wax rendering process is a crucial step in cleaning and purifying beeswax for various applications. This process involves melting the beeswax, straining it to remove impurities, and allowing it to harden. Let’s dive into each step in detail:
Melting the Beeswax
To begin the rendering process, the unrendered beeswax is melted down using a microwaveable container. It is important to stir the wax frequently to ensure even melting. The gentle heat helps to transform the solid beeswax into a liquid state, ready for the next step.
Straining to Remove Impurities
Once the beeswax has melted, it needs to be strained to remove any impurities. A loose-weave material, such as cheesecloth or muslin, can be used as a strainer. The beeswax is poured through the strainer, allowing the impurities to be caught while the clean wax flows through. This step helps to ensure that the final product is free from debris and unwanted substances.
Letting the Wax Harden
After straining, the clean beeswax is left to harden. It is typically poured into a deep plastic container, such as an empty 5 lb. honey tub. The wax should be left undisturbed for several hours or overnight until it solidifies completely. Once hardened, the beeswax is ready for further use in various homemade products.
The wax rendering process provides a simple and effective way to transform raw beeswax into a clean and usable form. By following these steps, you can ensure that the beeswax you use in your projects is of high quality and free from impurities.
Repeat the Process and Uses for Rendered Beeswax
Rendering beeswax is a process that may need to be repeated multiple times to achieve the desired purity. Depending on the quality of the unrendered beeswax and the intended use of the rendered wax, multiple rounds of melting and straining may be necessary. This ensures that any impurities, such as debris or remnants of honey, are removed, resulting in clean and usable beeswax.
Once the beeswax has been rendered and purified, it can be utilized in a wide range of applications. Beeswax has numerous uses, making it a versatile ingredient in various homemade products. For example, rendered beeswax can be used to create lip balms, soaps, lotions, candles, and furniture polish. Its natural properties, such as its moisturizing and protective qualities, make it a valuable ingredient that enhances the effectiveness of these products.
When it comes to exploring the uses for rendered beeswax, the possibilities are endless. Crafters and DIY enthusiasts can let their creativity soar by incorporating beeswax into their projects. Whether it’s making beeswax wraps for eco-friendly food storage, creating hand-poured beeswax candles, or formulating all-natural beauty products, there are countless opportunities to utilize rendered beeswax. Online resources, tutorials, and courses can provide further guidance and inspiration for incorporating rendered beeswax into various applications.
| Uses for Rendered Beeswax | Description |
|---|---|
| Lip Balms | Beeswax acts as a natural emollient, providing moisture and protection to dry, chapped lips. |
| Soaps | Rendered beeswax adds hardness and longevity to homemade soaps, while also contributing to a creamy lather. |
| Lotions | Beeswax helps to lock in moisture and provides a protective barrier on the skin, making it a valuable ingredient in lotions and creams. |
| Candles | Hand-poured beeswax candles create a warm, natural ambiance and have a longer burn time compared to traditional paraffin candles. |
| Furniture Polish | Beeswax can be combined with natural oils to create a homemade furniture polish that nourishes and protects wood surfaces. |
By understanding the process of rendering beeswax and exploring its diverse uses, individuals can fully appreciate the value of this natural resource. Whether for personal use or as a potential business venture, working with rendered beeswax provides a rewarding and sustainable option for crafting and creating a variety of products.
Conclusion
In conclusion, beeswax processing is a fascinating and rewarding process that allows individuals to tap into the natural resource created by bees. By following simple steps and using basic equipment, beeswax can be cleaned and processed at home. The resulting beeswax offers a multitude of benefits and versatile applications, making it a valuable ingredient in various homemade products.
One of the major benefits of beeswax is its natural properties. It is a non-toxic and environmentally friendly material, making it a popular choice for those who prefer natural and sustainable options. Beeswax also has moisturizing and protective qualities, making it an excellent ingredient for lip balms, lotions, and beauty products.
Furthermore, beeswax is widely used in crafting and practical applications. It can be used to create candles, crayons, food wraps, and furniture polish. Its versatility allows individuals to explore their creativity and make unique handmade items. Additionally, beeswax can be given or sold to friends and family, sharing the benefits of this natural resource.
Overall, understanding how beeswax is made and processed provides a deeper appreciation for the magical world of bees. By harnessing the power of beeswax, individuals can enjoy the benefits of a natural and versatile material that has been used for centuries.
FAQ
How is beeswax made?
Beeswax is a natural product created by bees to store honey. It is extracted from beehives after harvesting the honey.
What is the process of cleaning and processing raw beeswax?
Cleaning and processing beeswax involves melting the raw wax to remove impurities. The melted wax is then strained to separate it from debris.
What equipment is needed for beeswax processing?
The necessary equipment includes a pot, spoon, plastic bucket, fabric strainer, and paper towels. Mineral oil can also be used for cleaning up spills.
How do you melt beeswax?
Beeswax is melted by placing it in a pot and covering it with water. The pot is then heated over medium-low heat, stirring regularly.
How do you pour and strain melted beeswax?
Once the beeswax has melted, it is poured through a fabric strainer into a plastic bucket. The strainer catches debris while allowing the wax to pass through.
How do you cool and collect beeswax?
After pouring and straining, the beeswax is left to cool overnight. Once cooled, the hardened wax can be removed from the bucket and rinsed to remove any remaining debris.
How should beeswax be stored and used?
Cleaned and processed beeswax should be wrapped in muslin or baking paper and stored in a cool place. It can be remelted for use in various crafts and products.
How do you clean up beeswax spills and residue?
Wax spills can be cleaned with mineral oil, and equipment can be washed with hot water. Paper towels or cloth can be used to remove wax splatters from surfaces.
What are the various applications of beeswax?
Beeswax can be used to make candles, lip balms, crayons, food wraps, beauty products, and furniture polish.
How do you render beeswax at home?
To render beeswax at home, it is melted down in a microwaveable container, strained, and left to harden.
What materials and tools are needed for wax rendering?
Materials include unrendered beeswax, a microwaveable liquid measuring cup, disposable chopsticks, a deep plastic container, straining material, and binder clips.
What is the wax rendering process?
The wax rendering process involves melting the beeswax, straining it to remove impurities, and letting it harden in a container.
Can the wax rendering process be repeated?
Depending on desired purity, the wax rendering process may need to be repeated multiple times. Rendered beeswax can be used in various applications.
What are the benefits of beeswax processing?
Beeswax processing allows individuals to utilize a natural resource, create homemade products, and explore the wide range of uses for beeswax.