Harvesting honeycomb is an exciting and rewarding process for beekeepers. With the right equipment and knowledge, it can be a straightforward task. In this step-by-step guide, we will cover everything you need to know about harvesting honeycomb, from the equipment required to helpful tips for a successful harvest.
Before we dive into the details, let’s take a quick look at some key takeaways:
Key Takeaways:
- Harvesting honeycomb requires the right equipment and knowledge.
- Essential equipment includes uncapping knives, fine mesh strainers, food-safe containers, and honey jars with tight-fitting lids.
- Choose a suitable space for honey extraction to ensure a clean and efficient process.
- Check honey stores and remove frames that are full and capped.
- Set up the extraction space with an extractor, mesh strainer, capping trays, and uncapping knife.
Essential Equipment for Honeycomb Harvesting
When it comes to harvesting honeycomb, having the right equipment is essential to ensure a smooth and successful process. Here are some key pieces of equipment that every beekeeper should have:
- Uncapping knife or hot knife: Used to scrape the wax cappings from the honeycomb cells, allowing the honey to be extracted.
- Fine mesh strainer: Helps to remove any dirt, debris, or wax particles from the harvested honey, ensuring a pure and clean final product.
- Food-safe tanks or buckets: These are used to store the harvested honey before it is transferred to jars for consumption or sale.
- Tray for wax cappings: Provides a dedicated space for collecting the wax cappings that are removed during the honey extraction process.
- Honey jars with tight-fitting lids: These are necessary for storing and preserving the harvested honey, keeping it fresh and free from contamination.
- Measuring jug with a spout: Allows for easy pouring of honey into jars, ensuring accurate measurements and minimal mess.
- Extractor (optional): While not essential for small-scale beekeepers, an extractor can greatly simplify the honey extraction process, making it faster and more efficient.
Having these essential pieces of equipment will help beekeepers harvest honeycomb with ease and efficiency, resulting in high-quality honey that can be enjoyed by all.
Comparison of Honey Harvesting Equipment
| Equipment | Pros | Cons |
|---|---|---|
| Uncapping knife | Easy to use | Can be time-consuming for large-scale harvesting |
| Hot knife | Quick and efficient | Requires electricity or a heat source |
| Fine mesh strainer | Removes impurities from honey | May need frequent cleaning |
| Food-safe tanks or buckets | Ample storage capacity | May be heavy and cumbersome to handle |
| Tray for wax cappings | Keeps work area organized | Requires regular emptying |
Having the right equipment not only makes the honeycomb harvesting process more efficient but also ensures the quality of the final product. With the right tools, beekeepers can enjoy the rewards of their hard work in an organized and effective manner.
Remember, the equipment listed here is just a starting point. As beekeepers gain more experience, they may discover additional tools or modifications that suit their specific needs and preferences. The key is to invest in high-quality, food-safe equipment that will help you harvest honeycomb effectively and safely.
Finding a Suitable Space for Honey Extraction
When it comes to extracting honey from honeycomb, finding a suitable space to perform the process is crucial. This space should be clean, well-ventilated, and away from irritable bees. Whether it’s a garage, kitchen, or basement, having enough room to spread out the equipment and honeycomb frames is essential for a smooth extraction process.
For beekeepers with limited space, renting purpose-built extraction rooms from local Bee Clubs can be a convenient option. These rooms are designed specifically for honey extraction and provide an ideal environment for the process.
It’s also important to consider the cleanliness of the extraction space. Ensure that the surfaces you’ll be working on are sanitized and free from any potential contaminants. This will help maintain the quality and purity of your honey during the extraction process.

Choosing the Right Equipment and Tools
In addition to finding a suitable space, having the right equipment and tools is essential for a successful honey extraction. Make sure you have all the necessary items, such as uncapping knives, fine mesh strainers, food-safe tanks or buckets, and honey jars with tight-fitting lids. These tools will help you remove the wax cappings, filter out any debris, and store the extracted honey properly.
Consider investing in an extractor if you have a larger scale operation. This machine makes the honey extraction process much more efficient and less labor-intensive. However, for small-scale beekeepers, manual extraction methods can still yield excellent results.
By finding a suitable space and equipping yourself with the right tools, you’ll be well-prepared to extract honey from honeycomb frames effectively. The next steps in the process involve checking honey stores and removing frames, which we’ll explore in the following section.
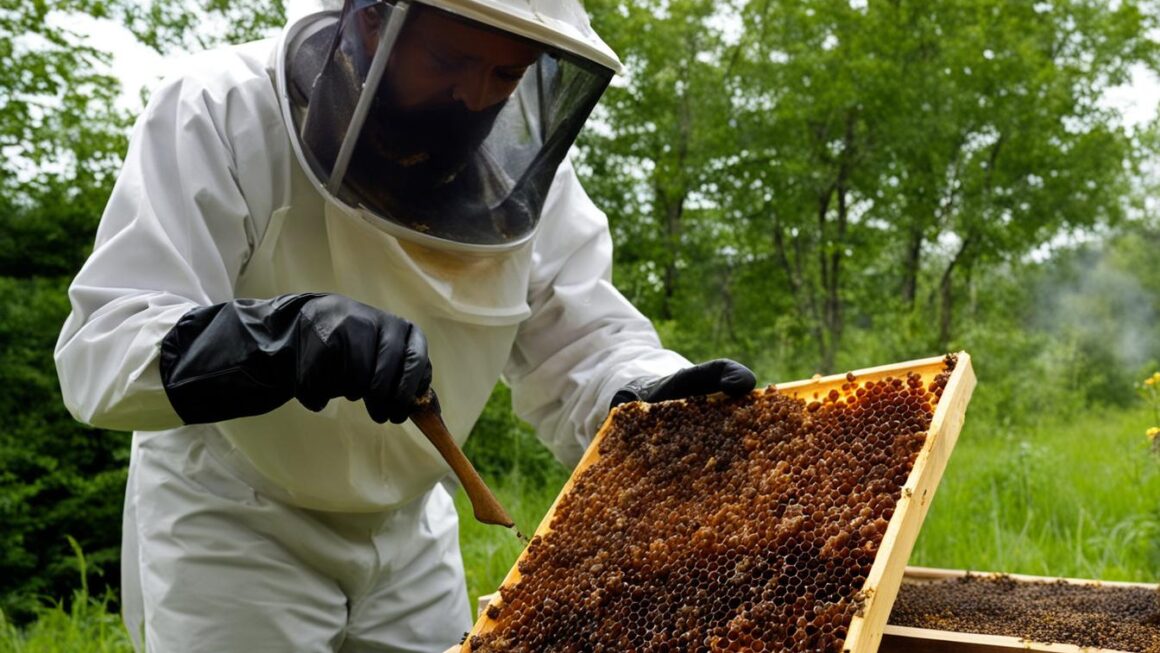
Honey Harvesting Techniques: Checking Honey Stores and Removing Frames
Before beginning the honey harvesting process, it is crucial for beekeepers to assess the honey stores in their hives. This ensures that enough honey is left for the bees to sustain themselves throughout the winter months. When checking honey stores, beekeepers should ensure that the frames in their hives are full and that the honey is completely covered with a white cap of wax. This indicates that the honey is ripe and ready to be harvested.
Once the beekeeper has confirmed that the frames are full and capped, they can proceed with removing the frames from each hive. It is recommended to leave around eight frames of fully capped honey per hive to ensure that the bees have enough food for the winter. The frames should be carefully removed and placed on a clean and stable surface, taking care not to damage the delicate honeycomb structure.
Checking Honey Stores
| Hive | Frames with Fully Capped Honey |
|---|---|
| Hive 1 | 8 frames |
| Hive 2 | 7 frames |
| Hive 3 | 9 frames |
“Checking the honey stores is a crucial step in the honey harvesting process. By ensuring that there is enough honey left for the bees, we are promoting their survival and well-being during the winter months.” – Experienced Beekeeper
Once the frames have been removed, beekeepers can proceed with the honey extraction process, which will be covered in the following sections.
Next, we will discuss the proper setup of the extraction space, including the positioning of the extractor, strainer, and capping trays, to ensure a smooth honey extraction process.
Setting Up the Extraction Space
Once you have a suitable space for honey extraction, it’s time to set up your equipment for a smooth and efficient process. Follow these steps to ensure everything is ready for extracting honey from your honeycomb frames.
Table: Equipment Setup Checklist
| Equipment | Position |
|---|---|
| Extractor | In the center of the room for easy access |
| Mesh strainer | Hooked to the top edge of the collection bucket |
| Capping trays | Placed on a bench or table for wax cappings |
| Uncapping knife | Plugged in and placed on a stable surface |
Start by positioning the extractor in the center of the extraction space. This allows easy access to the extractor while working with the honeycomb frames. Next, hook the mesh strainer to the top edge of the collection bucket. This will ensure that any dirt or debris is filtered out as the honey flows into the bucket. Place the capping trays on a bench or table next to the extraction area. These trays will catch the wax cappings as you scrape them off the frames.
Don’t forget to plug in your uncapping knife and place it on a stable surface within reach. You’ll need the knife to scrape off the wax cappings from the frames before extracting the honey. Having it readily available will save you time and provide a smoother workflow.
With the equipment properly set up, you are now ready to move on to the next step of the honey extraction process: removing the wax from the frames.
Wax Removal from Frames
When it comes to honey extraction methods, removing wax from frames is a crucial step. To begin, beekeepers should use a heated knife, such as an uncapping knife, to scrape off the wax cappings from both sides of each frame. This process helps expose the honey-filled cells and prepares the frames for extraction.
While uncapping, it’s important to stand over a capping tray to collect any wax and honey that falls. This ensures minimal waste and allows beekeepers to collect any excess honey for further processing. It may take a bit of practice to find the right depth for scraping the wax, as beekeepers must strike a balance between removing the wax and avoiding unnecessary honey loss.
Remember, efficient wax removal is essential for effective honey extraction methods. By carefully uncapping the frames, beekeepers can ensure a smooth extraction process and maximize their honey yield.
| H3: Pros and Cons of Wax Removal Methods | ||
|---|---|---|
| Method | Pros | Cons |
| Uncapping Knife | Effective for small-scale beekeepers | Can be time-consuming for large honey extraction operations |
| Hot Knife | Efficient, especially for large-scale honey extraction | Requires careful handling to prevent injury |
| Electric Uncapping Knife | Quicker and easier than manual uncapping knives | Higher cost compared to manual options |
As shown in the table above, there are various wax removal methods available for beekeepers. Each method has its pros and cons, and beekeepers should choose the one that best suits their needs and scale of honey extraction. Whether using a manual uncapping knife, a hot knife, or an electric uncapping knife, the key is to ensure thorough and efficient wax removal to facilitate the subsequent honey extraction process.

“Wax removal is an important step in the honey extraction process. By carefully uncapping the frames, beekeepers can ensure a high-quality honey yield and minimize honey loss.”
Honey Extraction Process
Once the frames have been uncapped, it’s time to move on to the honey extraction process. This crucial step is where the sweet rewards of beekeeping truly come to fruition. The process begins by filling the brackets of the extractor with the uncapped frames. It’s important to ensure that the frames are securely in place to prevent any accidents during the extraction.
Once the frames are secured, the extractor is started, spinning the frames at a high speed. This spinning motion generates centrifugal force, which effectively extracts the honey from the cells of the honeycomb. As the frames spin, the honey will gradually drip down the sides of the tank and flow out through the opening at the bottom.
The honey extraction process should be repeated until all frames are empty. Depending on the size of the extraction, this process can take some time. It’s important to be patient and let the extractor do its job. With each round of extraction, the beekeeper will be rewarded with more jars of golden, delicious honey.
| Key Steps of the Honey Extraction Process | Details |
|---|---|
| 1. Fill the extractor brackets with uncapped frames | Ensure that the frames are securely in place |
| 2. Start the extractor | The spinning motion generates centrifugal force to extract the honey |
| 3. Repeat the process until frames are empty | Patience is key during this step |
Honey Extraction Tips:
- Ensure that the frames are uncapped properly before placing them in the extractor
- Start the extractor slowly and gradually increase the speed to prevent honey from splattering
- Regularly check the collection bucket to ensure it doesn’t overflow
- Keep the extraction area clean to avoid cross-contamination between different honey batches
- Use a honey gate or valve at the bottom of the tank for easy control of honey flow
By following the honey extraction process and incorporating these tips, beekeepers can successfully extract and enjoy the fruits of their labor. With each jar filled with golden honey, the hard work and dedication of the beekeeper are rewarded, providing a sweet delight for all.
Dripping and Straining
Once the honey extraction process is complete, the honey will start to drip down the walls of the extractor. It is important to note that it may take some time for the honey to reach the collection bucket through the mesh strainer. As the honey sits in the strainer, it gradually drips through the fine mesh into the bucket. The duration of this process can vary depending on factors such as the extraction room temperature and the number of frames that have been processed.
While waiting for the honey to drip and strain, beekeepers can take advantage of this time to prepare their honey jars and lids. It is crucial to sterilize the jars and ensure that they are set up and ready for filling. Once the honey has finished flowing, the beekeeper should remove the collection bucket and replace it with a smaller bowl to catch any remaining droplets.
Using a measuring jug, the beekeeper can then scoop and pour the honey into the prepared jars. It is recommended to start with the larger jars and fill any remaining smaller jars. Once filled, the jars should be tightly capped to ensure the freshness and quality of the harvested honey. Finally, the jars can be stored in a cool, dark cupboard or pantry until ready to be enjoyed or sold.
Honey Extraction Time and Temperature Considerations
Throughout the dripping and straining process, it is important to consider the extraction room temperature and the duration it takes for the honey to flow through the strainer. Warmer room temperatures can speed up the dripping process, while cooler temperatures may result in slower extraction. Beekeepers should keep this in mind and adjust their expectations accordingly.
| Room Temperature | Extraction Time |
|---|---|
| 25°C (77°F) | Approximately 1 hour |
| 20°C (68°F) | Approximately 2 hours |
| 15°C (59°F) | Approximately 3 hours |
Quote: “The dripping and straining process is a crucial step in honey extraction. Patience is key as the honey gradually flows through the strainer, ensuring a pure and high-quality final product.” – Experienced Beekeeper
Filling and Storing the Jars
After the honey extraction process, beekeepers need to fill and store the jars to preserve the quality and flavor of the honey. Here, we will discuss the necessary steps and equipment for this final stage of the honey harvesting process.
Equipment Needed
Before filling the jars, beekeepers should ensure they have the necessary equipment ready. This includes sterilized honey jars with tight-fitting lids, a measuring jug with a spout for pouring the honey, and a smaller bowl to catch any remaining droplets. It’s important to use food-safe, BPA-free jars to maintain the purity of the honey and avoid any potential chemical contamination. Additionally, beekeepers should have a clean, dark cupboard or pantry to store the filled jars.
Filling the Jars
Once the honey has finished flowing through the extractor and dripping through the mesh strainer, beekeepers can start filling the jars. They should begin with larger jars and gradually move to smaller ones, ensuring each jar is tightly capped after filling. The measuring jug with a spout makes it easy to scoop and pour the honey, minimizing spillage and mess. The beekeeper should work carefully but efficiently to fill the jars, ensuring they are properly sealed to prevent any air or moisture from entering.
Storing the Jars
To maintain the quality of the honey, beekeepers should store the filled jars in a cool, dark cupboard or pantry. Direct sunlight and heat can affect the flavor, aroma, and texture of the honey, so it’s important to choose a storage location away from these factors. Additionally, keeping the honey in a cool environment helps slow down the crystallization process, keeping it liquid for longer. Properly sealed jars and the right storage conditions will ensure the honey remains fresh and delicious for an extended period.
By following these steps and using the right equipment, beekeepers can successfully fill and store their honey jars after the honey extraction process. This final stage completes the honey harvesting journey, allowing beekeepers to enjoy and share the fruits of their hard work with others.
| Jar Size | Quantity of Honey |
|---|---|
| 8 oz | Approximately 1 cup (237 mL) |
| 16 oz | Approximately 2 cups (473 mL) |
| 32 oz | Approximately 4 cups (946 mL) |
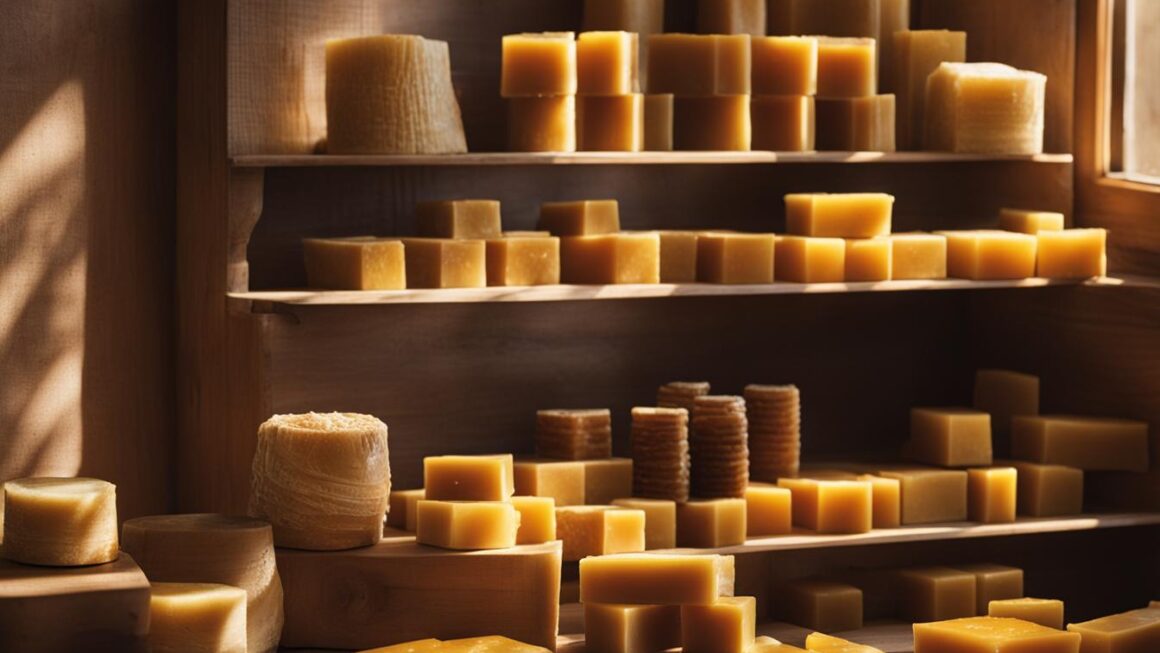
Honeycomb Wax: A Valuable Byproduct
After the honey extraction process, beekeepers are left with a valuable byproduct: beeswax. Beeswax can be used for various purposes, such as making candles, lip balm, and other useful products. To separate the wax from the honey, beekeepers can melt the wax in a pot of hot water on a stove. As the wax melts, it will float to the top and can be scooped out and stored in a clean, lidded container for future use.
The process of melting beeswax is relatively simple. Start by filling a pot with water and placing it on the stove. Place a heat-resistant container filled with beeswax into the pot and turn the stove on low heat. Allow the water to simmer gently, melting the beeswax. As the wax melts, it will rise to the top of the container, forming a layer. Use a spoon or a strainer to scoop out the melted wax and transfer it to a clean, lidded container for storage.
Storing beeswax properly is essential to maintain its quality. Make sure the container is clean and dry before placing the melted wax inside. It is also important to keep the container tightly capped to prevent any dust or debris from contaminating the wax. Store the container in a cool, dry place away from direct sunlight. With proper storage, beeswax can be kept for an extended period, ready to be used in various DIY projects.
Benefits of Beeswax Uses
- Beeswax candles are a natural alternative to paraffin candles and can provide a warm, honey-scented glow to any room.
- Beeswax can be used as an ingredient in homemade beauty products like lip balm, hand creams, and lotions due to its moisturizing and protective properties.
- Beeswax can also be used in woodworking to improve the glide of tools, condition wood surfaces, and create a protective finish.
- The natural properties of beeswax make it an excellent ingredient for preserving and waterproofing leather goods, such as shoes, bags, and belts.
- Beeswax can be used to make natural, non-toxic food wraps that can be used as a sustainable alternative to plastic wrap.
Legal Requirements for Honey Harvesting
When it comes to honey harvesting, beekeepers must comply with certain legal requirements to ensure food safety and maintain the health of their hives. These regulations are in place to protect consumers and prevent the spread of diseases that can affect both bees and humans. Here are some key legal requirements that beekeepers should be aware of:
Registration and Labeling
Beekeepers are typically required to register their hives with local government bodies. This registration process involves providing information about the location and number of hives, as well as marking the hives with registration numbers. This helps authorities keep track of bee populations and monitor any potential disease outbreaks.
When selling honey, beekeepers must also adhere to labeling guidelines. This includes clearly identifying the country of origin on the label. The label may also need to provide additional information such as the beekeeper’s contact details, the specific type of honey, and any relevant certifications or quality standards.
Food Safety Measures
Food safety is of utmost importance when it comes to honey harvesting. Beekeepers must ensure that their honey extraction and packaging processes meet food safety requirements. This includes maintaining cleanliness and hygiene throughout the entire process, from handling the honeycomb frames to storing the final product. For example, beekeepers should use food-safe containers and equipment, and they should ensure that the honey is not contaminated with foreign substances.
It’s also important to note that honey should not be sold if it contains high levels of certain chemicals or contaminants. Beekeepers should monitor their hives and honey production to ensure that the honey meets the necessary quality standards.
By following these legal requirements, beekeepers can contribute to the overall safety and integrity of the honey industry. These regulations help protect both consumers and the hardworking bees that produce this natural and delicious sweetener.
Conclusion
Harvesting honeycomb is an exciting and rewarding process for beekeepers. By following the step-by-step guide and using the right equipment and techniques, beekeepers can successfully extract honey from honeycomb frames. It’s important to check honey stores, set up the extraction space, remove wax, and comply with legal requirements for honey harvesting.
Remember to enjoy the fruits of your labor and share the delicious honey with others. You can also consider selling your honey at local markets or fairs. Harvesting honeycomb may seem like a lengthy process at first, but with practice, you will become more proficient and experienced as a beekeeper.
As you continue your beekeeping journey, keep in mind these honeycomb harvest tips. Ensure that your honey frames are fully capped before removing them, providing enough food for the bees during the winter. Find a suitable space for honey extraction, away from irritable bees. And don’t forget to meet the legal requirements for honey harvesting to ensure food safety and compliance.
FAQ
What equipment do I need for honeycomb harvesting?
You will need an uncapping knife or hot knife, a fine mesh strainer, food-safe tanks or buckets, a tray for wax cappings, honey jars with lids, and a measuring jug with a spout for pouring honey into jars. An extractor can also be helpful but is not necessary for small-scale beekeepers.
Where should I perform the honey extraction process?
You should find a clean and suitable space such as a garage, kitchen, or basement, away from irritable bees. If space is limited, you can consider renting purpose-built extraction rooms from local Bee Clubs.
How do I check if the frames are ready for harvest?
Make sure the frames in your hives are full and the honey is completely covered with a white cap of wax. Only remove fully capped frames, leaving around eight frames per hive for the bees’ winter food.
How should I set up the extraction space?
Place the extractor in the center of the room, hook the mesh strainer to the collection bucket, place capping trays on a bench or table, and make sure the uncapping knife is plugged in and stable.
How do I remove wax from frames?
Use a heated knife to scrape the white wax cappings from both sides of each frame, standing over a capping tray to collect any wax and honey that falls.
How does the honey extraction process work?
Fill the brackets of the extractor with uncapped frames and start the extractor, which will spin the frames at a high speed to extract honey using centrifugal force. The honey will drip down the sides of the tank and flow out through the bottom opening.
How long does the dripping and straining process take?
Depending on the extraction room temperature and the number of frames processed, this process can take an hour or more.
How do I fill and store the honey jars?
Sterilize and set up your honey jars and lids while the honey is dripping. Once the honey has finished flowing, remove the collection bucket, replace it with a smaller bowl, and scoop and pour the honey into the jars. Tightly cap and store the jars in a cool, dark cupboard or pantry.
What should I do with the leftover wax?
You can melt the wax in a pot of hot water on a stove to separate it from the honey. The melted wax will float to the top and can be scooped out and stored in a clean, lidded container for future use.
What legal requirements do I need to follow for honey harvesting?
Beekeepers must register their hives with local government bodies, mark their hives with registration numbers, follow labeling guidelines when selling honey, and meet food safety requirements when extracting and packaging honey.