Beeswax soap is a popular choice for those looking for a natural, homemade alternative to commercial soaps. Adding beeswax to soap recipes provides hardness and can help combat ash. The label appeal of using beeswax in soap adds a natural, warm, and honey-like scent. In this step-by-step guide, we will walk you through the process of making beeswax soap, including the necessary ingredients and the unique mold technique for creating a honeycomb pattern.
Key Takeaways:
- Beeswax soap is a natural alternative to commercial soaps.
- Adding beeswax to soap recipes provides hardness and combats ash.
- Using beeswax in soap adds a natural, warm, and honey-like scent.
- Making homemade beeswax soap involves specific ingredients and a unique mold technique.
- The process of making beeswax soap can be a rewarding and enjoyable experience.
Ingredients for Beeswax Soap
If you’re a beginner looking to make your own beeswax soap, it’s essential to gather the right ingredients. The key components for beeswax soap include various oils such as olive oil, coconut oil, beef tallow, castor oil, and almond oil. These oils provide the base for your soap and contribute to its lathering and moisturizing properties.
The most important ingredient, of course, is beeswax. Adding beeswax to your soap recipe not only adds hardness to the soap but also enhances its scent and appearance. Typically, you’ll want to use beeswax at a percentage of 1 to 3 of the total oils in your recipe. This ratio ensures that the beeswax is properly incorporated into the soap without overpowering the other ingredients.
Aside from oils and beeswax, you’ll also need water and lye. Water is used to dissolve the lye and activate the saponification process, while lye is responsible for converting the oils into soap. It’s crucial to handle lye with care, as it can be caustic. Make sure to wear protective gloves and eyewear when working with lye and follow proper safety precautions throughout the soap-making process.
Table: Ingredients for Beeswax Soap
| Ingredients | Properties |
|---|---|
| Olive oil | Moisturizing and conditioning |
| Coconut oil | Creates a rich lather |
| Beef tallow | Produces a hard bar of soap |
| Castor oil | Boosts lather and moisturizes |
| Almond oil | Provides additional moisture |
| Beeswax | Hardens soap and adds a natural scent |
| Water | Dissolves lye and activates saponification |
| Lye | Converts oils into soap |
Incorporating these ingredients into your beeswax soap recipe will result in a natural and nourishing soap that is perfect for beginners to try. The combination of oils, beeswax, water, and lye will give you a well-balanced soap that cleanses and moisturizes your skin.
Now that we’ve discussed the key ingredients for making beeswax soap, let’s move on to exploring the unique mold technique that will give your soap a beautiful honeycomb pattern.
Mold Technique for Beeswax Soap
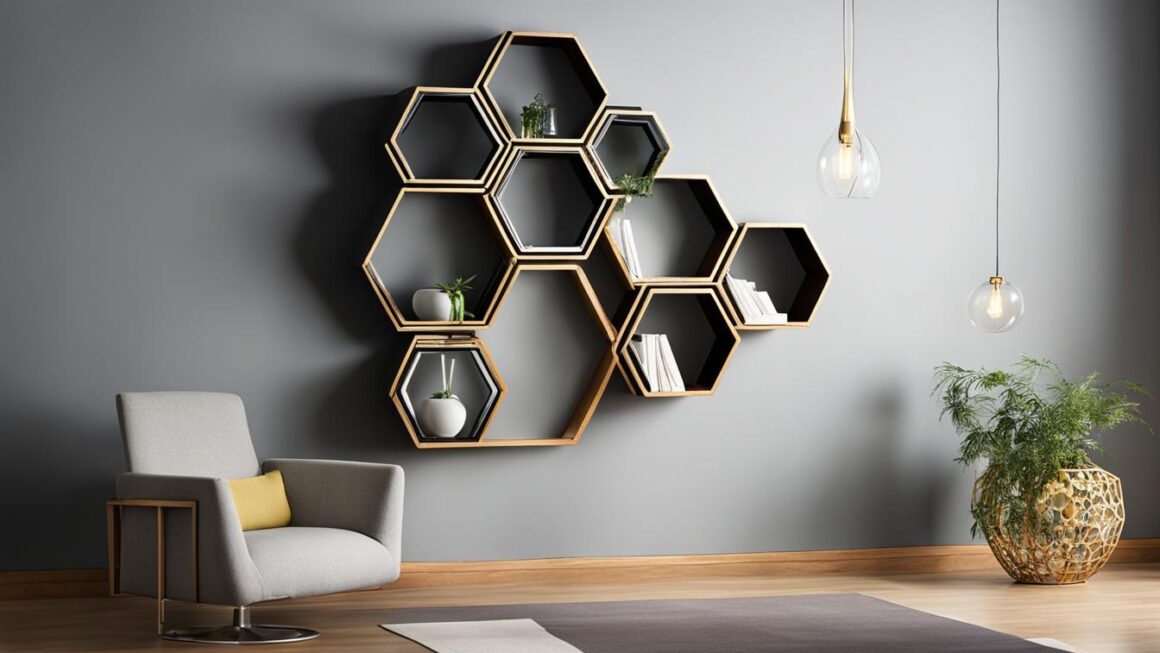
One of the unique aspects of making beeswax soap is the mold technique used to create a honeycomb pattern. This technique adds visual appeal to the soap, complementing the beeswax and honey theme. To achieve this pattern, you will need to use bubble wrap. Cut two pieces of bubble wrap to fit the dimensions of your soap mold.
Place one piece at the bottom of the mold with the bubbles facing up. This will create the honeycomb pattern on the bottom of the soap. Save the other piece of bubble wrap for the top. Once you have poured the soap into the mold, cover it with the second piece of bubble wrap, ensuring that the bubbles are facing towards the soap. The bubble wrap will press into the soft soap, creating the honeycomb pattern on the top of the soap.
This mold technique not only enhances the visual appeal of the soap but also adds a touch of uniqueness. It is a simple yet effective way to elevate your beeswax soap to another level.
Benefits of Beeswax Soap
In addition to the aesthetic appeal of the honeycomb pattern, beeswax soap offers a range of benefits. The inclusion of beeswax in soap recipes provides hardness, making the soap more durable and long-lasting. The beeswax also helps combat ash, a white powdery substance that can sometimes form on the surface of soap.
Furthermore, beeswax gives the soap a natural, warm, and honey-like scent. This adds to the sensory experience of using beeswax soap and makes it a pleasant choice for those who enjoy the aroma of honey.
Overall, the mold technique and the benefits of using beeswax in soap make the process of making beeswax soap a rewarding and enjoyable experience.
Melting and Cooling the Soap Oils
Before you can add the beeswax to your soap, it’s important to melt and cool the soap oils to the correct temperature. Beeswax has a higher melting point than other ingredients, so the oils need to be heated to a higher temperature to ensure that the beeswax fully melts and incorporates into the soap mixture.
Start by heating the soap oils in a double boiler or microwave until they reach a temperature of around 145F (63C). This will allow the beeswax to melt completely and blend evenly with the oils. Stir the mixture constantly to ensure even heat distribution.
Once the beeswax is fully melted, the soap oils should be cooled down to around 120F (49C). Cooling the oils to this temperature is crucial, as going lower may cause the oils to thicken and become difficult to work with. Use a thermometer to monitor the temperature and take your time during this step to achieve the desired cooling point.
Note: It’s important to handle hot oils with caution to avoid any accidents. Always use appropriate protective equipment such as gloves and goggles when working with hot soap oils.
Adding Honey to the Soap Oils
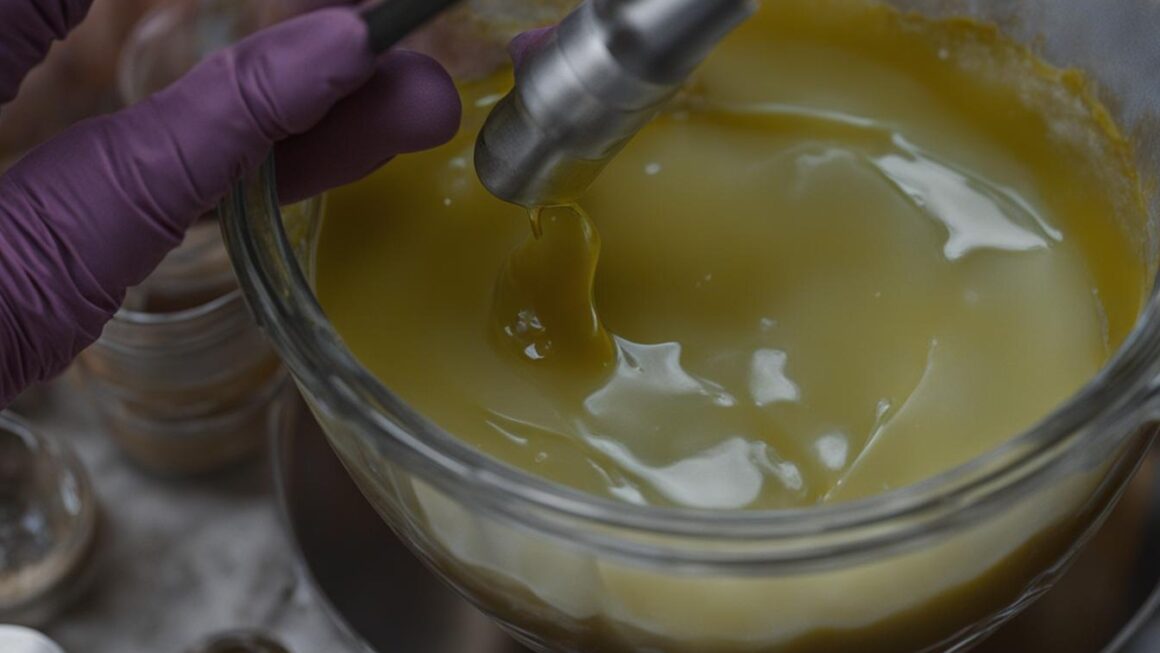
In this step, the honey is added to the soap oils before adding the lye. Separating out a portion of the soap oils and blending it with the honey ensures that the honey is well incorporated into the soap. Due to the water-based nature of honey, it may not blend completely with the oils, but it should be blended as much as possible. After blending the honey-oil mixture back into the pot, it is essential to make sure the entire mixture is well blended before adding the lye.
“Adding honey to the soap oils enhances the natural scent and adds a touch of sweetness to the soap. It also contributes to the unique properties of natural beeswax soap, making it moisturizing and nourishing for the skin. The incorporation of honey requires careful blending to ensure a uniform distribution throughout the soap mixture, providing both visual appeal and moisturizing benefits.”
Once the honey is added to the soap oils, it is important to blend everything thoroughly to guarantee an even distribution. This step ensures that the honey will be evenly dispersed and that every bar of soap will have a consistent scent and moisturizing effect. Proper blending is crucial for the success of the soap-making process.
Adding honey to the soap oils is an essential step in creating natural beeswax soap. The inclusion of honey enhances the soap’s moisturizing properties and adds a delightful scent. By carefully blending the honey with the soap oils, you ensure that each bar of soap will provide a luxurious bathing experience.

Adding Lye and Fragrance Oil
Now that the oils, beeswax, and honey are well blended, it’s time to add the lye. This crucial step in the soap-making process initiates saponification, the chemical reaction that transforms the oils into soap. Gently stir the lye into the oils, ensuring a thorough mixture.
Once the lye is incorporated, it’s time to add the fragrance or essential oil. Choose a scent that complements the natural beeswax and honey theme of the soap. It’s important to select a fragrance or essential oil that won’t accelerate trace, allowing you more time to work with the soap.
A few short blasts with a stick blender will help the soap reach trace, the point at which the mixture has thickened to a pudding-like consistency. Once trace is achieved, the soap is ready to be poured into the mold.
Adding Lye and Fragrance Oil
- Stir the lye gently into the soap oils to ensure thorough mixture
- Choose a fragrance or essential oil that won’t accelerate trace
- Use short bursts of a stick blender to reach trace, the desired consistency
“The addition of fragrance or essential oils is a creative opportunity to personalize your beeswax soap and enhance the sensory experience.”
Adding lye and fragrance oil is a critical step that takes your beeswax soap closer to completion. Once the soap reaches trace, it’s important to work efficiently as it will begin to set. Pour the soap into the mold, ensuring it is evenly distributed. This step sets the stage for the final steps of the soap-making process.
| Step | Actions |
|---|---|
| 1 | Stir lye into oil mixture |
| 2 | Add fragrance or essential oil |
| 3 | Use stick blender to reach trace |
| 4 | Pour soap into mold |
Using Bubble Wrap for Mold Covering
One of the unique techniques in making beeswax soap involves using bubble wrap to create a honeycomb pattern on the soap’s surface. This method adds an aesthetic appeal to the soap and complements the natural properties of beeswax. To use bubble wrap for mold covering, begin by cutting two pieces of bubble wrap to fit the dimensions of your soap mold.
| Step | Description |
|---|---|
| Step 1 | Place one piece of bubble wrap at the bottom of the mold with the bubbles facing up. |
| Step 2 | Pour the soap mixture into the mold, ensuring that the bubbles of the bubble wrap are fully pressed into the soft soap. |
| Step 3 | Cover the soap with the second piece of bubble wrap, ensuring that the bubbles are facing towards the soap. |
| Step 4 | Press the second piece of bubble wrap down onto the soap to create a firm seal. |
This technique allows the soap to take on the texture and appearance of a honeycomb, adding visual interest to the final product. The bubble wrap molds the soap as it sets, leaving a unique pattern on both the top and bottom of each bar.
Using bubble wrap for mold covering is a simple yet effective way to enhance the visual appeal of your beeswax soap. It adds a touch of creativity to your homemade soap, making it stand out from commercially available options.
Gel Stage and Cutting the Soap
During the gel stage, the beeswax and honey combination generates a super hot, full gel stage in the soap mold. This stage is crucial for the soap to saponify and set properly. Once the soap has cooled down, it can be removed from the mold, and the bubble wrap covering can be taken off to reveal the unique honeycomb pattern on both the top and bottom of each bar.
Cutting the soap is the next step after removing it from the mold. This is where the true beauty of the honeycomb pattern comes to life. Each bar of soap will showcase the intricate design, resembling a stunning honeycomb. It’s important to note that during the gel stage, some oil may separate from the soap. However, as the soap continues to saponify and cool, the oil will re-incorporate, resulting in a smooth and luxurious final product.
The gel stage and cutting process are crucial steps in the soap-making journey. As the soap sets and solidifies, the honeycomb pattern becomes more defined, enhancing the overall aesthetic appeal of the beeswax soap. Whether you’re making the soap for personal use or as a handmade gift, the cutting stage is where you’ll truly appreciate the artistry and craftsmanship that goes into creating each bar.

Benefits of Beeswax Soap
Aside from the beautiful honeycomb pattern, beeswax soap offers a range of benefits that make it an excellent choice for skincare. Beeswax is known for its natural moisturizing properties, helping to lock in moisture and keep the skin hydrated. It also provides a protective barrier on the skin’s surface, shielding it from environmental pollutants.
In addition to moisturizing and protecting the skin, beeswax soap has a gentle and nourishing formula that is suitable for all skin types, including sensitive and dry skin. The natural ingredients in beeswax soap help to soothe inflammation, prevent acne, and promote healthy, glowing skin.
Using beeswax soap can be a luxurious and indulgent experience, offering not only the benefits of natural skincare but also a sensory treat with its warm, honey-like scent. Incorporating beeswax soap into your daily skincare routine can elevate your self-care ritual and provide a moment of relaxation and rejuvenation.
Table: The Benefits of Beeswax Soap
| Benefits | Description |
|---|---|
| Moisturizing | Beeswax helps to lock in moisture and keep the skin hydrated. |
| Protective | Creates a barrier on the skin’s surface, shielding it from environmental pollutants. |
| Soothing | Helps to calm inflammation and soothe sensitive skin. |
| Acne Prevention | The natural ingredients in beeswax soap can help prevent acne and breakouts. |
| Healthy Glow | Regular use of beeswax soap can promote healthy, glowing skin. |
Personal Reflection
Making your own beeswax soap can be a rewarding and fulfilling DIY project. Not only do you get to create a natural and eco-friendly product, but you also have the opportunity to customize it according to your preferences. The process of crafting homemade beeswax soap allows you to experiment with different ingredients, scents, and designs, making each bar unique and special.
With a homemade beeswax soap recipe, you have control over the ingredients that go into your soap. You can choose high-quality oils and add-ons like essential oils or botanical extracts. This gives you the freedom to create a soap tailored to your skin’s needs, whether it’s moisturizing, soothing, or exfoliating. Plus, knowing that you are using natural ingredients without any harsh chemicals or additives can provide peace of mind.
Another benefit of making your own beeswax soap is the sense of accomplishment and pride that comes with it. Crafting something with your own hands and seeing the finished product can be incredibly satisfying. It’s a great way to unleash your creativity and express your personal style. Whether you prefer a simple and rustic look or a more intricate design, the possibilities are endless.
In addition to the personal satisfaction, homemade beeswax soap also makes for a thoughtful and unique gift. You can create customized soap bars for special occasions such as birthdays, weddings, or holidays. Adding a personal touch to your gifts shows that you care and took the time to create something special for your loved ones.
Overall, diving into the world of DIY beeswax soap can be a fun and fulfilling journey. From choosing the ingredients to designing the soap bars, every step allows you to unleash your creativity and create a product that is truly your own. So why not give it a try and start crafting your homemade beeswax soap today?
Conclusion
In conclusion, crafting beeswax soap is a rewarding and fulfilling process that allows you to create a homemade, natural product with unique features. By following the step-by-step tutorial and using the necessary ingredients, you can make your own beeswax soap and embrace the art of homemade soap making.
Beeswax soap offers a natural alternative to commercial soaps, providing hardness and combating ash while adding a warm, honey-like scent. The honeycomb pattern created through the mold technique adds aesthetic appeal and complements the beeswax and honey theme.
With its label appeal and natural scent, beeswax soap is a great addition to your eco-conscious lifestyle. Making your own soap allows you to control the ingredients and create a product that is personalized to your preferences. So why not give it a try and experience the satisfaction of using a handmade, natural beeswax soap?
FAQ
What are the key ingredients for making beeswax soap?
The key ingredients for making beeswax soap include oils such as olive oil, coconut oil, beef tallow, castor oil, and almond oil. Beeswax, water, and lye are also essential components.
How do I create a honeycomb pattern on my beeswax soap?
To create a unique honeycomb pattern on your beeswax soap, you can use a mold technique with bubble wrap. Cut two pieces of bubble wrap to fit the dimensions of your soap mold. Place one at the bottom of the mold with the bubbles facing up and save the other for the top. This technique adds an aesthetic appeal to the soap and complements the beeswax and honey theme.
What temperature should the oils be cooled to before adding beeswax?
Before adding the beeswax, the soap oils need to be melted and cooled to a higher temperature than usual. The oils should be cooled down to around 120F to ensure the beeswax fully melts.
Can I add honey to the soap oils?
Yes, honey can be added to the soap oils before adding the lye. Separating out a portion of the soap oils and blending it with the honey ensures that the honey is well incorporated into the soap.
What should I add after adding the lye to the soap oils?
Once the oils, beeswax, and honey are well blended, it is time to add the lye. The lye should be added to the oils and stirred gently, ensuring a thorough mixture. Soon after, the fragrance or essential oil can be added.
How do I create a honeycomb pattern on the soap using bubble wrap?
After pouring the soap into the mold, cover it with the other piece of bubble wrap cut to fit the size of the mold. Ensure that the bubbles are facing towards the soap and are fully pressed into the soft soap. This step is essential to create the honeycomb pattern on both the top and bottom of the soap.
What will the gel stage do to the soap?
The beeswax and honey combination will generate a super hot, full gel stage in the mold. Once cooled down, the soap can be removed from the mold, and the bubble wrap can be taken off. Cutting the soap will reveal the honeycomb pattern on both the top and bottom of each bar.
Why is making beeswax soap a rewarding experience?
Making beeswax soap can be a rewarding and fun experience. The label appeal, natural scent, and unique honeycomb pattern make the soap stand out. Beeswax soap offers a natural alternative to commercial soaps and can be a great addition to your eco-conscious lifestyle.