Are you interested in learning how to render beeswax? Whether you’re a beekeeper or simply someone who appreciates the many uses of beeswax, this guide will provide you with step-by-step instructions on how to efficiently extract pure beeswax. From the necessary tools to important safety precautions, we’ll cover everything you need to know to successfully render beeswax.
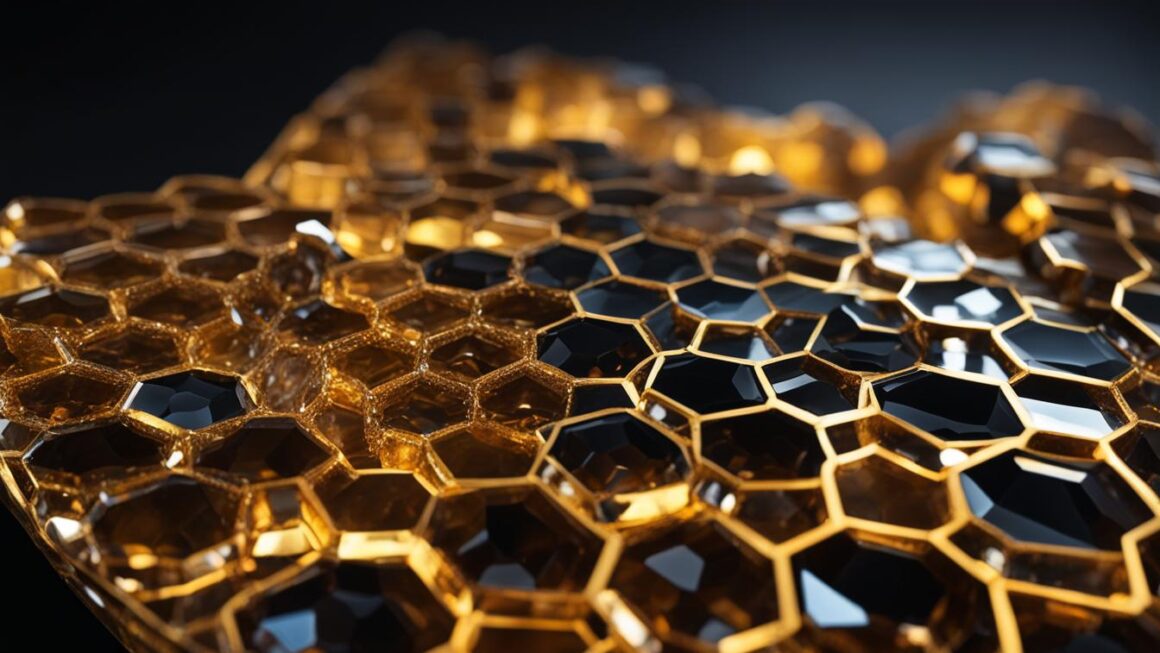
Before we dive into the process of rendering beeswax, let’s first understand what it is and how honeybees create it. Beeswax is produced by worker bees who have wax-producing glands in their abdomen. These bees use wax to build hexagonal cells called honeycomb, which store honey, pollen, and brood. The creation of beeswax involves bees hanging together in chains or scaffolds, working collaboratively to measure space and create comb.
Key Takeaways:
- Rendering beeswax is the process of extracting pure beeswax for various uses.
- Beeswax is produced by worker bees and is used to build honeycomb.
- The process of rendering beeswax requires specific tools and safety precautions.
- Once you have clean beeswax, there are numerous creative and practical applications for it.
- Beekeepers play a crucial role in the production of beeswax.
What Do You Need to Render Beeswax?
When it comes to rendering beeswax, having the right tools and ingredients is essential. Here is a list of everything you will need to successfully extract pure beeswax:
- Beeswax or honeycomb: This is the primary source material for rendering beeswax.
- Double boiler or homemade double boiler: This is used to melt the beeswax without direct heat.
- Beeswax molds: These are used to shape the melted beeswax into desired forms.
- Mesh strainer: This is used to filter out any impurities from the melted beeswax.
- Cheesecloth: This is used in combination with the mesh strainer to further refine the beeswax.
- Hosiery: This can be used as an alternative filter to achieve a cleaner result.
By having these tools and ingredients on hand, you will be well-equipped to start the beeswax rendering process.
It’s important to note that the quality of your beeswax will greatly depend on the beeswax or honeycomb you choose. Look for high-quality sources that are free from any chemicals or contaminants.
Additionally, if you don’t have a double boiler, you can create a homemade version by using a pot of water and a wax pouring pitcher. This makeshift double boiler setup works just as effectively.
Table: Tools and Ingredients for Beeswax Rendering
| Tools | Ingredients |
|---|---|
| Double boiler or homemade double boiler | Beeswax or honeycomb |
| Beeswax molds | Mesh strainer |
| – | Cheesecloth |
| – | Hosiery |
Having the right tools and ingredients will make all the difference in efficiently rendering beeswax. With these essentials in your arsenal, you can embark on the process with confidence and achieve pure, high-quality beeswax for various uses.
Important Things to Know About Rendering Beeswax
When it comes to rendering beeswax, there are a few crucial things to keep in mind to ensure a safe and efficient process. First and foremost, never leave the beeswax unsupervised during the rendering process. Beeswax is highly flammable, and leaving it unattended can lead to a kitchen fire. It’s always best to have someone present in the kitchen while rendering beeswax.
Another important consideration is the heating element used. It is recommended to use an electric heating element instead of an open flame. This significantly reduces the risk of fire and minimizes the chances of accidents. If possible, invest in an electric heating element to ensure a safer rendering process.
To maintain the purity of the beeswax and avoid contamination, it’s advisable to designate dedicated pots and utensils specifically for beeswax rendering. This prevents any cross-contamination with other types of food and ensures that you are working with clean and uncontaminated wax.
Finally, one crucial point to remember is to never pour the wax or wax water down the drain. Beeswax can solidify and clog the drain, causing plumbing issues. Instead, collect the wax in a container or discard it safely according to your local waste disposal guidelines.
Safety Precautions for Rendering Beeswax:
- Never leave beeswax unsupervised during the rendering process to avoid the risk of kitchen fires.
- Use an electric heating element rather than an open flame for enhanced safety.
- Designate dedicated pots and utensils solely for beeswax rendering to prevent contamination.
- Dispose of wax and wax water responsibly by avoiding pouring it down the drain.
“Rendering beeswax requires caution and attention to safety measures to minimize the risk of accidents. By following these important guidelines, you can ensure a smooth and safe rendering process.”
Table: Comparison between electric heating element and open flame
| Factors | Electric Heating Element | Open Flame |
|---|---|---|
| Safety | Safe to use as there is no exposed flame. | Higher risk of accidents, including kitchen fires. |
| Control | Allows precise temperature control for a consistent melting process. | Difficult to control the heat, increasing the risk of overheating and scorching the wax. |
| Convenience | Easy to use and can be adjusted as needed. | Requires more attention and constant monitoring. |
Step #1: Wrap Up the Beeswax
One effective way to render dirty beeswax is to wrap it in cheesecloth. Cut a square of cheesecloth, place some dirty beeswax in the center, tie two corners together, and then tie the other two corners together. Place the bundle in a pot of simmering water until all the beeswax has melted. Squeeze out the melted wax using two spoons.
Step #1: Wrap Up the Beeswax
- Cut a square of cheesecloth
- Place dirty beeswax in the center
- Tie two corners together, and then tie the other two corners together
- Place the bundle in a pot of simmering water
- Melt the beeswax completely
- Squeeze out the melted wax using two spoons
“Wrapping the beeswax in cheesecloth helps contain the wax and prevents it from mixing with the boiling water. This method allows for easy extraction of the melted wax once it has reached the desired consistency.”
Table:
| Materials/Ingredients | Steps | Notes |
|---|---|---|
| Cheesecloth | Cut a square of cheesecloth | Ensure the cheesecloth is clean and free of any debris |
| Dirty beeswax | Place the dirty beeswax in the center of the cheesecloth | Use beeswax that has been sourced from a reliable and sustainable supplier |
| Pot of simmering water | Place the wrapped beeswax in a pot of simmering water | Use a heat-resistant pot and adjust the heat to maintain a gentle simmer |
| Two spoons | Squeeze out the melted wax using two spoons | Ensure the spoons are clean and free of any residue |
Step #2: Let the Beeswax Cool
After melting the beeswax, the next step is to let it cool. This allows the wax to solidify and separate from any impurities present. The cooled wax will rise to the top of the pot, while any remaining debris and water will settle at the bottom. It’s important not to disturb the cooling process to ensure a clean and pure final product.
During the cooling process, it’s common for the water in the pot to become murky. This is due to the separation of the beeswax from impurities. It is crucial not to pour this water down the drain, as it can lead to clogs. Instead, it can be discarded in an environmentally friendly manner or used for other purposes such as composting.
Once the beeswax has cooled completely, it will form a solid disk of yellow wax at the top of the pot. At this stage, it is ready to be further processed or used for various purposes. If the cooled wax is too large to fit into beeswax molds, it can be broken into smaller pieces using a utensil or knife. This will ensure that the wax fits snugly into the molds, allowing for easier removal once it has fully hardened.

Cooled Beeswax: A Solid and Pure Resource
“The cooling process is an essential step in rendering beeswax. It not only allows impurities to separate from the wax but also ensures a solid and pure end product. By being patient and allowing the beeswax to cool completely, you can achieve a high-quality material for your beeswax projects.”
Now that the beeswax has cooled and solidified, it is ready to move on to the next step in the rendering process. This will further refine the wax and remove any remaining impurities, resulting in a beautiful and usable beeswax product.
Step 3: Melt the Beeswax in Your Double Boiler
After the initial melting process to remove debris, the beeswax may still be not as clean as desired. To achieve a purer result, it is recommended to re-melt the beeswax in a double boiler. The double boiler provides a gentle and controlled heat source, preventing the wax from scorching or overheating.
To create a makeshift double boiler, you can use a pot of simmering water and a candle wax melting pitcher. Place the wax in the pitcher and place the pitcher in the pot, ensuring that the bottom of the pitcher does not touch the water. Heat the water on low to medium heat, allowing the wax to gradually melt.
Keep the wax in the double boiler until it is fully melted and any remaining impurities have risen to the surface. Stir occasionally to aid in the melting process. Once the wax is completely melted, it will be ready for the next step of the rendering process.
Expert Tip:
For optimal results, it is important to avoid overheating the beeswax during the melting process. High temperatures can affect the quality of the wax and result in a less desirable final product. Keep a close eye on the temperature and adjust the heat accordingly to ensure a smooth and clean beeswax.
By re-melting the beeswax in a double boiler, you can further purify the wax and remove any remaining impurities. This step is crucial for achieving a high-quality and clean beeswax that can be used for various purposes, from candles to skincare products.
Step #4: Pour the Wax Through a Filter and Into a Mold
Once the beeswax has been fully melted, it’s time to filter out any remaining impurities before pouring it into molds. This step is crucial to ensure that only clean beeswax goes into the final product. To filter the wax, you will need a metal mesh strainer and cheesecloth. Alternatively, using hosiery as a filter can yield even cleaner results.
Start by placing the metal mesh strainer over a heat-resistant container or a large pot. Then, layer the cheesecloth over the strainer, making sure it covers the entire surface. Carefully pour the melted beeswax through the filter, allowing it to strain through the mesh and cheesecloth.
This filtering process removes any remaining debris or impurities, such as bee parts or dirt, resulting in a purer beeswax. If necessary, repeat this step multiple times until the desired level of purity is achieved. Remember to handle the hot wax with caution and use protective gloves to avoid burns.
| Materials Needed: | Instructions: |
|---|---|
| Metal mesh strainer | Place the metal mesh strainer over a heat-resistant container or large pot. |
| Cheesecloth or hosiery | Layer the cheesecloth or hosiery over the strainer, ensuring it covers the entire surface. |
| Heat-resistant container or large pot | Position the heat-resistant container or pot under the strainer to catch the filtered beeswax. |
| Filtered beeswax | Carefully pour the melted beeswax through the filter, allowing it to strain through the mesh and cheesecloth into the container or pot. |
| Repeat if necessary | If desired, repeat the filtering process multiple times to achieve a higher level of purity. |
Filtering the melted beeswax is an essential step to remove any impurities and ensure a clean final product. By using a metal mesh strainer and cheesecloth or hosiery, you can effectively strain out debris and achieve a higher level of purity. Remember to handle the hot wax with care and repeat the process if needed to achieve the desired level of cleanliness.
Step #5: Allow the Beeswax to Fully Cool in the Molds
Once you have poured the filtered beeswax into the molds, it is crucial to allow it to cool completely. Patience is key during this step, as removing the cooled beeswax too soon may cause it to break or warp. The cooling process allows the beeswax to harden and set, ensuring that it maintains its desired shape and structure.
If you are using silicone molds, the cooled beeswax will naturally release from the mold once fully hardened. Simply press on the bottom of the mold, and the beeswax will pop out effortlessly. Silicone molds are popular due to their flexibility and ease of use, making them a great option for beginners.
Alternatively, if you prefer to use metal molds, you may need to gently tap the mold on a flat surface to release the cooled beeswax. Metal molds provide a classic and elegant shape to your beeswax creations, but they may require a bit more effort to remove the hardened beeswax.
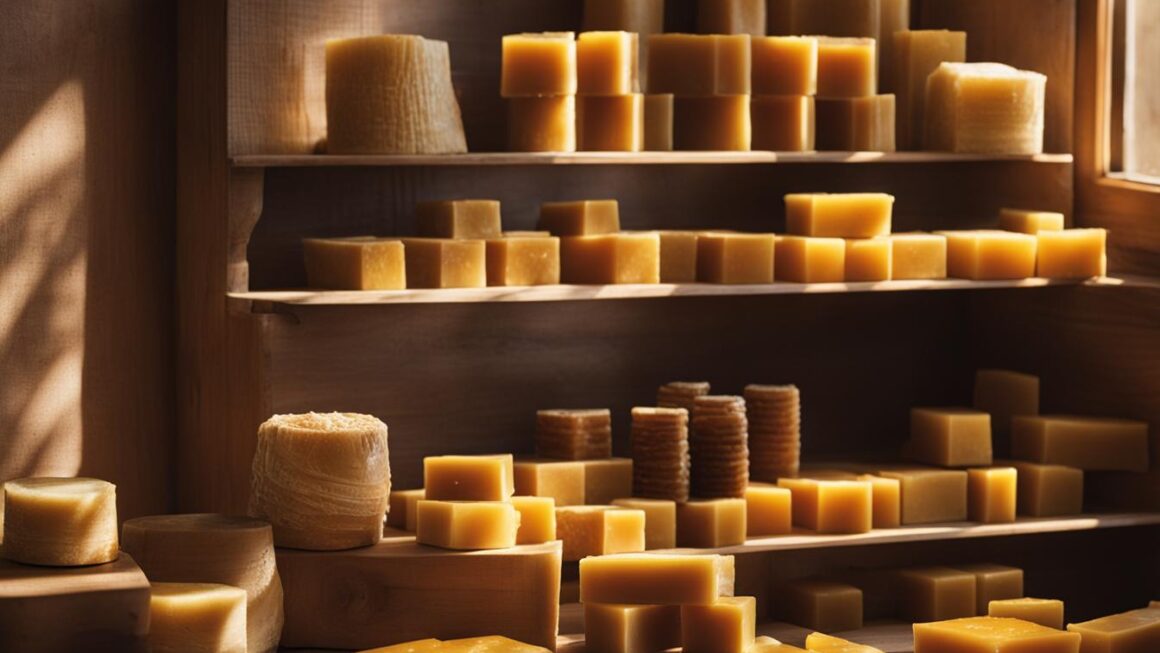
Remember to handle the cooled beeswax with care to avoid any breakage or damage. Once your beeswax is fully cooled and released from the mold, it is ready to be used in various projects or crafts. The beautiful and versatile beeswax can be transformed into candles, lip balm, furniture polish, or even turned into unique artistic creations. Let your creativity soar and enjoy the benefits of your rendered and cooled beeswax!
What to Do With Clean Beeswax that has Been Rendered
Once you have successfully rendered and cleaned your beeswax, you can explore a wide range of uses for this versatile natural material. From practical applications to creative projects, beeswax offers a multitude of possibilities. Here are some ideas to inspire you:
- Beeswax candles: Use your clean beeswax to create beautiful, long-burning candles. Whether you prefer traditional tapered candles or unique shapes and designs, beeswax candles add a warm and natural ambiance to any space.
- Beeswax skincare products: Harness the nourishing properties of beeswax to make your own skincare products. From lip balms and lotions to salves and creams, beeswax can provide moisturizing and protective benefits for your skin.
- Furniture polish: Create a non-toxic and natural furniture polish by combining your beeswax with a carrier oil, such as olive oil or jojoba oil. This polish will help restore shine and protect wood surfaces.
- Beeswax wraps: Say goodbye to plastic wrap and opt for eco-friendly beeswax wraps. These reusable food covers can be molded with the warmth of your hands to create a seal, keeping your food fresh.
If you’re looking for more inspiration and detailed instructions, there are several books available that focus on beeswax projects and recipes. Two highly recommended titles are “Beehive Alchemy” by Petra Ahnert and “The Beeswax Workshop” by Chris Dalziel. These books provide step-by-step guides and a wealth of creative ideas for utilizing your rendered beeswax.
Alternatively, you can also consider selling your clean beeswax or using it as a crafting material for various DIY projects. The natural color, pleasant scent, and unique properties of beeswax make it a sought-after ingredient in handmade cosmetics, candles, and other artisanal products.

Get creative with your rendered beeswax and explore the endless possibilities it offers. Whether you choose to make candles, skincare products, or eco-friendly wraps, the natural beauty and versatility of beeswax are sure to enhance your DIY endeavors.
What Is Beeswax and How Do Honeybees Make Beeswax?
Beeswax is a natural substance produced by worker bees in the bee colony. The bees have specialized glands in their abdomen that secrete tiny flakes of wax. These flakes are then chewed and manipulated by the bees to make beeswax. The beeswax is used to build honeycomb cells, which serve various purposes within the bee colony.
Honeycomb cells are hexagonal in shape and provide an efficient way for honeybees to store honey, pollen, and brood. The bees consume a significant amount of honey to produce beeswax. The production of beeswax involves a complex process where bees hang together in chains or scaffolds, collaborating and working diligently to measure space and create comb.
Table: Beeswax Production Process
| Process | Description |
|---|---|
| Wax Secretion | The worker bees secrete tiny flakes of wax from their specialized abdominal glands. |
| Wax Manipulation | The bees chew and manipulate the wax flakes to soften them and make them pliable. |
| Honeycomb Construction | The bees use the beeswax to build hexagonal honeycomb cells, which store honey, pollen, and brood. |
| Hive Maintenance | The bees continuously maintain and repair the honeycomb cells as needed. |
“The production of beeswax is a remarkable feat of cooperation and ingenuity within the bee colony. The bees work diligently to create the intricate honeycomb cells, which are essential for the colony’s survival and organization.” – Beekeeping Expert
Understanding the process of beeswax production gives us insight into the incredible abilities and complex social structure of honeybees. The creation of beeswax is a vital part of the bees’ lifecycle and is instrumental in their ability to store food, raise brood, and maintain the colony’s function.
Conclusion
Rendering beeswax is a vital process that allows for the efficient extraction of pure beeswax, which can be used in a myriad of ways. By following the proper steps and using the necessary tools, you can obtain clean beeswax that is suitable for various applications.
From candles to skincare products, the uses of beeswax are diverse and abundant. Its natural properties make it an excellent choice for creating soothing balms, long-lasting candles, and nourishing creams. The versatility of beeswax opens up endless possibilities for creative endeavors and practical solutions.
The production process of beeswax involves the hard work and dedication of honeybees. Through their intricate construction of honeycomb and the consumption of honey, bees transform their efforts into this valuable resource. Beekeepers play a crucial role in fostering the production of beeswax, ensuring its availability for various purposes.
FAQ
What do you need to render beeswax?
To render beeswax, you will need beeswax or honeycomb, a double boiler or a homemade double boiler using a pot of water and a wax pouring pitcher, beeswax molds, a mesh strainer, cheesecloth, and hosiery.
What are important things to know about rendering beeswax?
When rendering beeswax, it’s important to never leave it unsupervised as beeswax is flammable. Using an electric heating element is safer than exposing the wax to an open flame, and it’s recommended to designate specific pots and utensils for beeswax cleaning. Additionally, it is crucial not to pour wax or wax water down the drain to avoid clogging.
How do you wrap up the beeswax?
One effective way to render dirty beeswax is to wrap it in cheesecloth. Cut a square of cheesecloth, place some dirty beeswax in the center, tie two corners together, and then tie the other two corners together. Place the bundle in a pot of simmering water until all the beeswax has melted. Squeeze out the melted wax using two spoons.
What should you do after letting the beeswax cool?
After melting the beeswax, let it cool until it forms a disk of yellow beeswax that has risen to the top of the pot. The water in the pot may be murky, so it’s essential not to pour it down the drain. Break the cooled beeswax into smaller pieces if necessary to fit into beeswax molds.
How do you melt the beeswax in a double boiler?
The initial melting process removes debris, but the wax may still be not as clean as desired. Re-melt the beeswax in a double boiler, using a candle wax melting pitcher and a pot of simmering water or a makeshift double boiler. Keep the wax in the double boiler until it is fully melted.
How do you pour the beeswax through a filter and into a mold?
To remove any remaining debris, carefully pour the melted beeswax through a filter made of a metal mesh strainer and cheesecloth. This will ensure that only clean beeswax goes into the mold. It is advisable to use hosiery as a filter, as it helps achieve a cleaner result. Repeat this step if necessary.
What should you do after pouring the beeswax into the molds?
After pouring the filtered wax into the molds, allow it to cool completely. Be patient and resist the urge to remove the cooled beeswax too soon. Beeswax may pull away from the sides of the mold once it is fully hardened. Silicone molds are easier to remove, but other options like metal molds can also be used.
What can you do with clean beeswax that has been rendered?
Once you have rendered and cleaned beeswax, there are numerous ways to use it. You can make candles, lip balm, furniture polish, beeswax cream, and more. Books such as “Beehive Alchemy” and “The Beeswax Workshop” provide detailed instructions for different beeswax projects and recipes. Alternatively, you can sell your clean beeswax or use it to make various crafts.
What is beeswax and how do honeybees make beeswax?
Beeswax is produced by worker bees who have wax-producing glands in their abdomen. The bees use wax to build hexagonal cells called honeycomb, which store honey, pollen, and brood. Bees consume a significant amount of honey to produce beeswax. The creation of beeswax involves bees hanging together in chains or scaffolds, working collaboratively to measure space and create comb.
What are the steps to render beeswax?
The steps to render beeswax include wrapping up the beeswax in cheesecloth, letting it cool and breaking it into smaller pieces, melting it in a double boiler, pouring it through a filter and into molds, and allowing it to fully cool. The process requires specific tools, attention to safety precautions, and proper filtering.