Making your own homemade beeswax lip balm is a simple and natural way to keep your lips nourished and moisturized. By using all-natural ingredients like beeswax, coconut oil, and shea butter, you can create a lip balm that is free from harmful chemicals and synthetic fragrances.
Key Takeaways:
- Create your own homemade lip balm using beeswax, coconut oil, and shea butter.
- By making your own lip balm, you have control over the ingredients and can avoid harmful chemicals.
- Beeswax provides a protective barrier, locks in moisture, and promotes lip health.
- Adding essential oils can provide a pleasant scent and additional healing benefits.
- There are safe and natural lip balm options available if DIY is not your preference.
Why Make Your Own Lip Balm
Store-bought lip balms often contain harmful ingredients that can be detrimental to our health. Parabens, petroleum jelly, and synthetic colors are commonly found in commercial lip balms and can have negative effects on the body. By making your own lip balm at home, you have complete control over the ingredients you use, ensuring that your lip balm is free from these harmful substances.
Creating your own lip balm also allows you to choose natural and organic ingredients. By using beeswax, coconut oil, and other nourishing substances, you can create a lip balm that is not only safe for your body but also provides excellent moisturization and protection for your lips.
In addition to being a healthier alternative, making your own lip balm can also be a fun and rewarding DIY project. It allows you to tap into your creativity and customize your lip balm with different scents and flavors. You can experiment with essential oils like peppermint or lavender to create a lip balm that suits your preferences and offers additional therapeutic benefits.
Why Make Your Own Lip Balm:
- Control over ingredients
- Avoid harmful substances
- Customization options
- Fun and rewarding DIY project
By making your own lip balm, you have control over the ingredients and can ensure that you are using only natural and organic substances. Plus, it’s a fun and rewarding DIY project!
Organic Lip Balm Ingredients:
| Ingredient | Benefits |
|---|---|
| Beeswax | Provides a protective barrier, locks in moisture, and prevents chapping |
| Coconut Oil | Moisturizes and nourishes the lips |
| Shea Butter | Hydrates and softens the lips |
| Essential Oils | Adds scent and therapeutic benefits |
So, why not give it a try? Making your own lip balm is a simple and enjoyable way to take care of your lips naturally, while also avoiding harmful ingredients found in store-bought options.
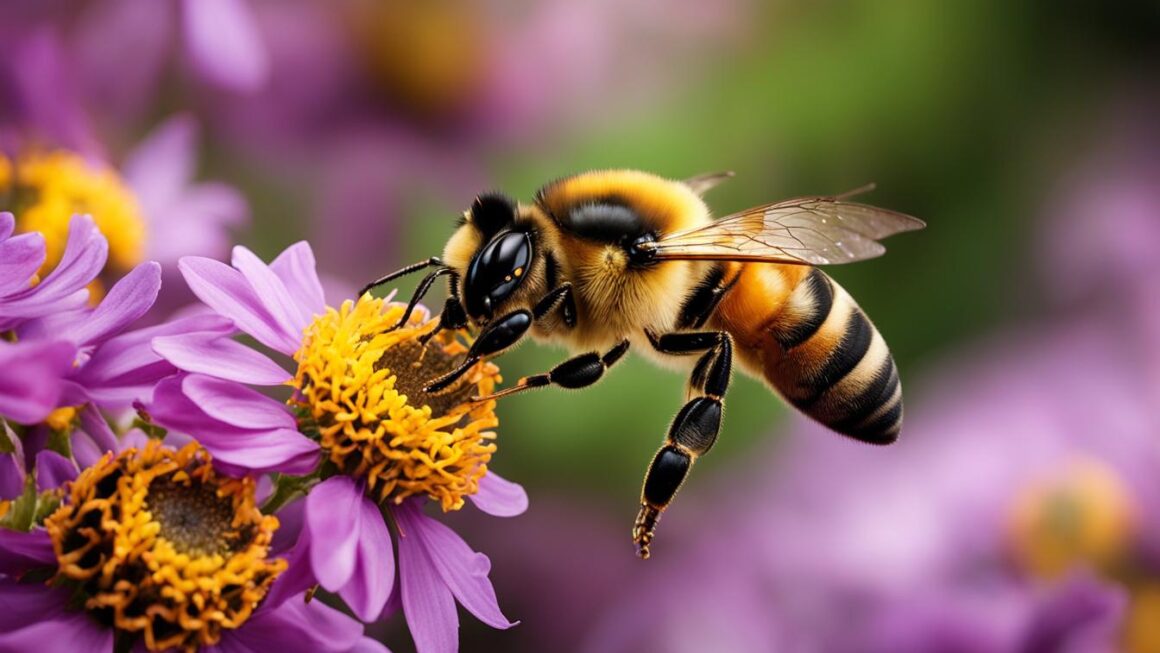
Benefits of Beeswax in Lip Balm
Beeswax is a crucial ingredient in homemade lip balm due to its numerous benefits for the lips. When applied to the lips, beeswax forms a protective barrier that locks in moisture and prevents chapping. This is especially beneficial during harsh weather conditions or in dry climates where lips can easily become dry and cracked. By creating a barrier, beeswax helps to retain the natural moisture of the lips, keeping them soft and supple.
Another advantage of beeswax is its nourishing properties. It contains natural emollients that penetrate the skin and provide deep hydration. This helps to heal and soothe dry, irritated, and chapped lips, leaving them feeling revitalized and smooth. Beeswax also contains vitamin A, which aids in cell regeneration and promotes healthy skin.
Furthermore, beeswax possesses natural antibacterial properties. This makes it an excellent ingredient for promoting lip health and preventing infections. The antimicrobial properties of beeswax help to keep the lips clean and protected from harmful bacteria. This is particularly beneficial for individuals with sensitive or easily irritated lips.
| Benefits of Beeswax in Lip Balm |
|---|
| Forms a protective barrier |
| Locks in moisture and prevents chapping |
| Provides deep hydration and nourishment |
| Contains vitamin A for cell regeneration |
| Has natural antibacterial properties |
Overall, beeswax is an essential ingredient in lip balm due to its ability to protect, moisturize, nourish, and promote lip health. By incorporating beeswax into your homemade lip balm, you can ensure that your lips receive the care and hydration they need, naturally.
Add a Heading if Relevant
If there is any additional information or specific aspect related to the benefits of beeswax in lip balm that requires further discussion, it can be highlighted and elaborated upon using an H3 heading. This ensures that all aspects of the topic are covered in a structured and organized manner.
Essential Oils for Scent and Healing
Adding essential oils to your homemade lip balm can not only provide a pleasant scent but also offer additional healing benefits. Essential oils are highly concentrated plant extracts that contain various therapeutic properties. When applied topically, they can help soothe, nourish, and rejuvenate the lips.
One popular essential oil for lip balms is peppermint oil. Known for its refreshing and cooling effect, peppermint oil can provide relief for dry and chapped lips. It also has antibacterial properties that can help keep the lips healthy.
Other essential oils like lavender, chamomile, and rosemary can also be used to enhance your lip balm. Lavender oil is known for its calming properties, while chamomile oil can soothe irritated skin. Rosemary oil, on the other hand, has antioxidant and anti-inflammatory benefits that can promote overall lip health.
When incorporating essential oils into your lip balm recipe, it’s important to use them in the appropriate dilution. Essential oils are highly concentrated and should be diluted with a carrier oil, such as coconut oil or almond oil, to prevent skin irritation. A general rule of thumb is to use about 5-10 drops of essential oil per ounce of lip balm mixture.
| Essential Oil | Benefits |
|---|---|
| Peppermint | Provides a cooling effect and soothes dry lips |
| Lavender | Calms and nourishes the lips |
| Chamomile | Soothes and reduces irritation |
| Rosemary | Has antioxidant and anti-inflammatory properties |
“The addition of essential oils not only enhances the scent of your homemade lip balm but also brings therapeutic benefits. Peppermint oil can refresh and soothe, while lavender and chamomile oils provide calming and nourishing effects. Get creative with your essential oil combinations and discover a lip balm that not only looks great but feels amazing too!”
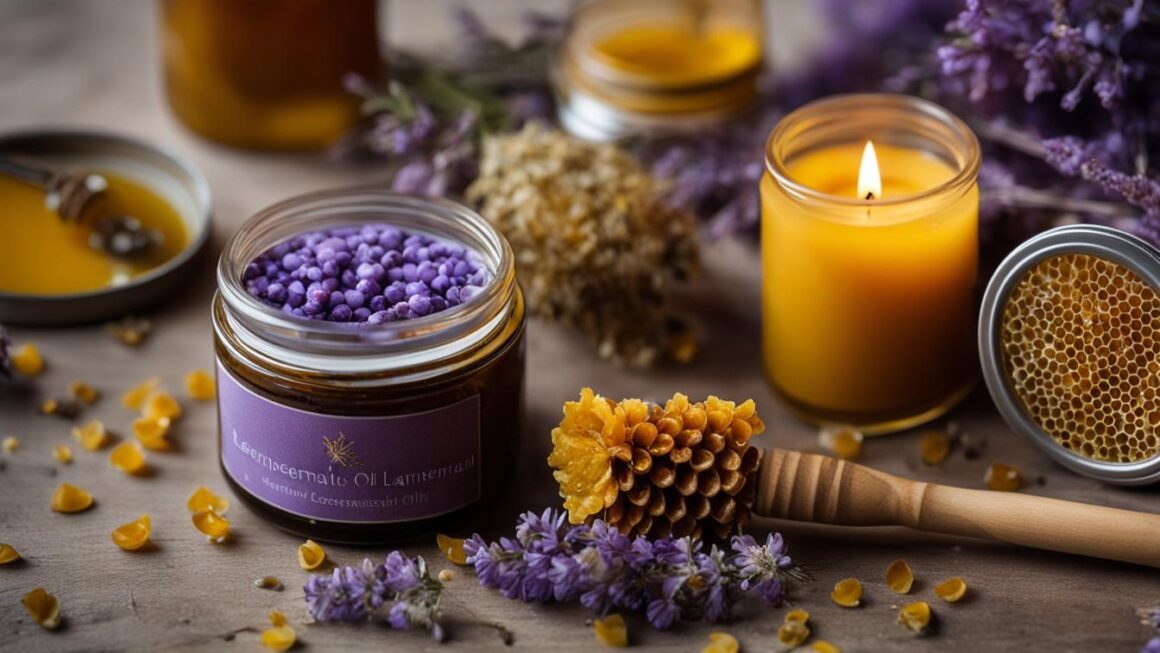
Lip Balm Recipe with Beeswax
Creating your own lip balm with beeswax is a simple and satisfying DIY project that allows you to customize the ingredients and scents. The following recipe will guide you through the process of making a nourishing and all-natural lip balm.
Ingredients:
- 1 tablespoon beeswax pastilles (or grated beeswax)
- 1 tablespoon shea butter
- 1 tablespoon coconut oil
- 10-15 drops of essential oils (such as peppermint, lavender, or citrus)
Instructions:
- In a double boiler or a heat-safe bowl placed over a pot of simmering water, melt the beeswax, shea butter, and coconut oil together until fully liquid.
- Remove the mixture from heat and let it cool slightly. Add the essential oils and stir well to combine.
- Pour the mixture into lip balm tubes or small tins, leaving a little space at the top for expansion.
- Allow the lip balm to cool and solidify completely before use. This usually takes about 1-2 hours.
Your homemade lip balm is now ready to use! Apply it to your lips as needed to keep them moisturized and protected. Remember to store your lip balm in a cool place away from direct sunlight to maintain its quality and prolong its shelf life.
| Ingredient | Benefits |
|---|---|
| Beeswax | Provides a protective barrier, locks in moisture, and promotes lip health. |
| Shea Butter | Moisturizes, nourishes, and soothes dry and chapped lips. |
| Coconut Oil | Hydrates and softens the lips while protecting against environmental damage. |
| Essential Oils | Adds pleasant scents and can provide additional healing properties. |
By making your own lip balm with beeswax, you can enjoy the benefits of natural ingredients while avoiding harmful chemicals that may be present in store-bought products. Plus, it’s a fun and rewarding way to express your creativity and craft something that is both nourishing and personalized.
Choosing Safe and Natural Lip Balms
While making your own lip balm can be a fun and rewarding DIY project, it’s understandable that not everyone has the time or inclination to do so. Fortunately, there are many safe and natural lip balm options available on the market. When choosing a ready-made lip balm, it’s important to look for brands that prioritize using organic and natural ingredients.
Some recommended natural lip balm brands include Beautycounter, Primally Pure, and Perfect Supplements. These brands are known for their commitment to sourcing high-quality ingredients that are free from harmful chemicals and additives. They offer a range of lip balm options that cater to different preferences, whether you prefer a scented balm or a plain one.
By opting for natural lip balm brands, you can be confident that you are nourishing your lips with ingredients that are safe and beneficial. These brands often use plant-based waxes, organic oils, and natural extracts to create their lip balms, ensuring that you are giving your lips the care they deserve. So, whether you choose to make your own lip balm or go for a trusted natural brand, prioritizing the health of your lips with safe and natural ingredients is always a smart choice.
| Brand | Key Features |
|---|---|
| Beautycounter | – Uses organic and natural ingredients – Free from harmful chemicals – Offers a variety of scents and flavors |
| Primally Pure | – Handcrafted with organic ingredients – Minimal and clean ingredient list – Provides soothing and nourishing properties |
| Perfect Supplements | – Made with natural and organic ingredients – Cruelty-free and eco-friendly – Offers unscented options for sensitive lips |
Tips for Packaging and Gifting Lip Balm
When it comes to packaging and gifting homemade lip balm, there are a few tips and creative ideas that can make it extra special. Whether you’re making lip balm as a personal treat or as gifts for friends and family, the presentation can add a thoughtful touch.
Choosing the Right Containers
One of the first things to consider is the type of containers you’ll use to hold the lip balm. Lip balm tubes or small tins are popular choices that are convenient and easy to use. Lip balm tubes are great for on-the-go application, while tins allow for a more customizable approach. You can find empty lip balm tubes and tins online or at local craft stores.
When selecting containers, opt for ones that are BPA-free and made from safe materials like aluminum or food-grade plastic. It’s also important to clean the containers thoroughly before filling them with your homemade lip balm to ensure hygiene and freshness.
Personalize with Decorative Touches
To make your homemade lip balm gifts even more special, you can personalize them with decorative touches. Consider adding washi tape around the lip balm tubes or tins for a colorful and whimsical look. You can also attach custom labels with the recipient’s name or a personalized message.
If you’re feeling crafty, you can create your own custom labels using printable sticker paper or vinyl. There are also online platforms and templates that allow you to design labels with ease. Get creative and have fun with it, as the packaging is an important part of the gifting process.
Avoid Packaging Until the Lip Balm is Set
Before you start packaging the lip balm, make sure it has cooled and solidified completely. This will prevent any mess or leakage during the packaging process. Allow the lip balm to sit undisturbed for at least a few hours or overnight, depending on the consistency.
Once the lip balm is set, carefully insert the tubes or tins into their respective packaging. Double-check that the lids are secure to prevent any air exposure or contamination. And voila! Your homemade lip balm is now ready to be gifted or enjoyed.
| Containers | Pros | Cons |
|---|---|---|
| Lip Balm Tubes | – Convenient for on-the-go application – Easy to use and apply – No need for fingers to touch the lip balm |
– Limited customization options – Difficulty in accessing the last bit of lip balm |
| Small Tins | – More customizable in terms of design – Can hold more lip balm than tubes – Easy to clean and reuse |
– Requires fingers to apply the lip balm – May melt in high temperatures |
Troubleshooting and Substitutions
While making your own DIY beeswax lip balm is a fun and rewarding project, it’s not uncommon to encounter a few hiccups along the way. Here are some common troubleshooting tips to help you overcome any issues you may face:
Grainy Texture:
If your lip balm has a grainy texture, it could be due to the beeswax not fully melting and incorporating with the other ingredients. To fix this, try melting the mixture again using gentle heat and stirring continuously until the beeswax is completely melted and smooth. Alternatively, you can strain the mixture through a fine mesh strainer to remove any grainy bits.
Hardness or Softness:
If your lip balm turns out too hard, it means you may have added too much beeswax. To soften it, you can remelt the lip balm and add a small amount of coconut oil or shea butter to achieve your desired consistency. On the other hand, if your lip balm is too soft, you can melt it again and add a bit more beeswax to thicken it up.
Substitutes for Beeswax:
If you prefer not to use beeswax in your lip balm recipe, there are alternatives you can try. Candelilla wax is a popular vegan substitute for beeswax and can be used in the same proportions. Soy wax or carnauba wax can also be used, but keep in mind that they may have slightly different properties and may require some experimentation to achieve the desired texture.
Remember, troubleshooting is all part of the DIY process, and it’s normal to encounter challenges along the way. Don’t be discouraged by minor setbacks – with a little patience and experimentation, you’ll be able to create the perfect homemade lip balm that suits your preferences.

| Issue | Possible Cause | Solution |
|---|---|---|
| Grainy Texture | Inadequate melting of beeswax | Remelt and stir continuously until smooth or strain through a fine mesh strainer |
| Hardness or Softness | Too much or too little beeswax | Remelt and add coconut oil or shea butter for softness, or more beeswax for hardness |
| Substitutes for Beeswax | Preference for a vegan alternative | Use candelilla wax, soy wax, or carnauba wax in the same proportions |
Shelf Life and Storage
Proper storage is crucial to maintain the quality and effectiveness of your homemade lip balm. By following a few simple guidelines, you can ensure that your lip balm remains fresh and usable for an extended period.
The shelf life of homemade lip balm can vary depending on the ingredients used. Generally, it can last for at least 6 months when stored properly in a cool place with the lid tightly closed. Exposure to heat, sunlight, and air can accelerate the degradation process and cause the lip balm to spoil.
To prolong the shelf life of your lip balm, consider adding vitamin E oil. Vitamin E acts as a natural preservative and helps prevent the oils in the lip balm from going rancid. Simply add a few drops of vitamin E oil to the mixture during the melting phase to extend the freshness of your homemade lip balm.
If you notice any changes in texture, smell, or color, it’s best to discard the lip balm and make a fresh batch. This indicates that the lip balm may have reached its expiration date or has been exposed to unfavorable conditions. It’s always better to err on the side of caution when it comes to the health and safety of your lips.
Recipe Variations and Customizations
When it comes to creating your own lip balm, the possibilities for customization are endless. By experimenting with different variations and ingredients, you can tailor your lip balm to suit your preferences and needs. Here are some ideas for recipe variations and customizations that you can try:
Variations in Carrier Oils
While coconut oil is commonly used as the base oil in lip balm recipes, you can explore other carrier oils to provide different benefits. For example, argan oil is rich in vitamin E, which can help moisturize and nourish the lips. Almond oil has emollient properties that can help soften and protect the lips. Avocado oil is known for its deeply hydrating and soothing effects. By substituting coconut oil with these oils or using a combination, you can create a lip balm that caters to your specific needs.
Natural Sweeteners
If you prefer a slightly sweeter lip balm, you can add natural sweeteners like stevia or honey. Stevia is a plant-based sweetener that adds a touch of sweetness without the use of artificial sugars. Honey not only adds a hint of sweetness but also has moisturizing properties that can benefit your lips. Just remember to use these sweeteners sparingly, as a little goes a long way.
Incorporating Micas for Color and Shimmer
If you want to add a pop of color or a touch of shimmer to your lip balm, micas are the perfect choice. Micas are natural minerals that come in a wide range of colors and can be used to create vibrant and eye-catching lip balms. Mix your desired mica color into the melted lip balm ingredients before pouring them into the tubes or tins. This allows you to personalize your lip balm and create unique shades that reflect your style and personality.

Customizing your own lip balm not only allows you to create a product that suits your preferences but also provides an opportunity for self-expression and creativity. Whether it’s experimenting with different carrier oils, adding natural sweeteners, or incorporating micas for color, the choices are yours to explore. Get creative, have fun, and enjoy the process of making a lip balm that is truly one-of-a-kind.
Conclusion
In conclusion, making your own DIY beeswax lip balm is a wonderful way to prioritize the health and well-being of your lips. By using natural and nourishing ingredients like beeswax, coconut oil, and shea butter, you can create a lip balm that is free from harmful chemicals and synthetic fragrances. Whether you choose to make your own lip balm or opt for a natural brand, the benefits are undeniable.
Store-bought lip balms often contain ingredients that can be harmful to your health, such as parabens and petroleum jelly. By making your own, you have full control over the ingredients, ensuring that only safe and natural substances touch your lips. Plus, the process of making lip balm is a fun and rewarding DIY project, allowing you to customize scents and textures to your liking.
So why not give it a try? Your lips will thank you for the extra care and nourishment. Whether you choose to whip up a batch of homemade lip balm or explore natural brands on the market, your lips will benefit from the natural and nourishing ingredients. Prioritizing the health of your lips is an essential part of your self-care routine, and by making your own lip balm, you can take control of what you put on your lips.
FAQ
Why should I make my own lip balm?
Making your own lip balm allows you to control the ingredients and ensure that you are using natural and organic substances. It also eliminates harmful chemicals found in store-bought lip balms.
What are the benefits of beeswax in lip balm?
Beeswax provides a protective barrier, locks in moisture, and prevents chapping. It also has nourishing properties and natural antibacterial benefits.
Can I add essential oils to my homemade lip balm?
Yes, essential oils can add a pleasant scent and provide additional healing benefits. Different oils offer different effects, such as soothing dry lips or promoting relaxation.
What ingredients do I need to make homemade lip balm?
You will need beeswax pastilles (or grated beeswax), shea butter, coconut oil, and essential oils of your choice.
Are there safe and natural lip balm options available for purchase?
Yes, there are brands that use organic and natural ingredients and are free from harmful chemicals. Some recommended brands include Beautycounter, Primally Pure, and Perfect Supplements.
How should I package and gift homemade lip balm?
You can use lip balm tubes or small tins and decorate them with washi tape or custom labels for a personal touch. Clean the packaging before labeling and ensure the lip balm has cooled and solidified before packaging.
What should I do if I encounter issues with my homemade lip balm?
If your lip balm has a grainy texture or is too hard, you can add more beeswax. If it is too soft, add more coconut oil. You can also substitute beeswax with other natural waxes like candelilla wax for a vegan option.
How long does homemade lip balm last?
Homemade lip balm can typically last for at least 6 months if stored properly in a cool place with the lid on. Adding vitamin E oil can help prolong its shelf life as a natural preservative.
Can I customize the lip balm recipe?
Yes, you can experiment with different variations and customizations, such as using different carrier oils, adding natural sweeteners like stevia, or incorporating micas for color and shimmer.
Is making DIY lip balm a rewarding process?
Yes, making your own DIY lip balm is a rewarding and enjoyable process that allows you to create a natural and nourishing product for your lips.