Welcome to our step-by-step guide on how to make your own DIY beeswax lip balm! Say goodbye to dry and chapped lips with this homemade lip balm recipe that uses natural ingredients. By creating your own nourishing lip balm, you can have control over what goes into your lip care routine.
Key Takeaways:
- Create your own DIY lip balm with beeswax using this step-by-step guide.
- Discover the benefits of using natural ingredients for your lip care.
- Customize your lip balm with different essential oils and flavors.
- Explore various container options for your homemade lip balm.
- Apply a thin layer of lip balm whenever needed for moisturized and healthy lips.
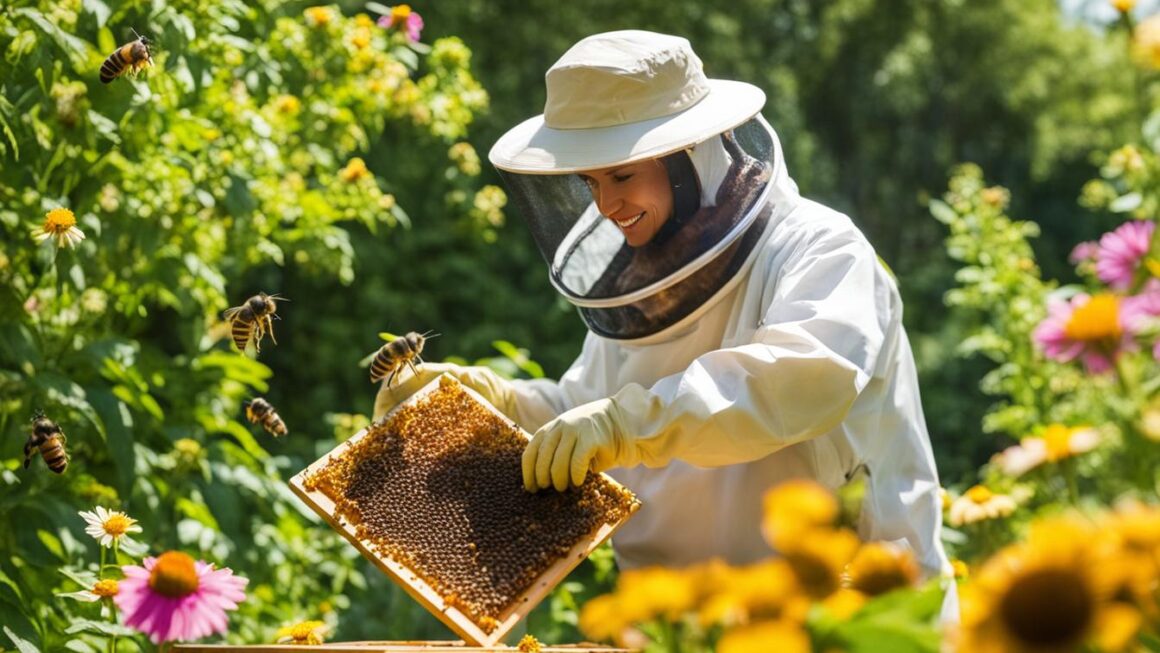
Why Beeswax is Great for Lip Balm
When it comes to creating your own DIY lip balm, beeswax is an ingredient you’ll want to include. Beeswax has been used for centuries in skincare products, and for good reason. Its unique properties make it an excellent choice for lip balms.
One of the key benefits of beeswax is its ability to lock in moisture. When applied to the lips, it forms a protective barrier, preventing moisture loss and keeping your lips hydrated for longer periods of time. This makes beeswax lip balm a great solution for dry and chapped lips.
In addition to its moisturizing properties, beeswax is also organic and natural. This means that when you make your own lip balm with beeswax, you can avoid the use of harmful chemicals often found in commercial lip care products. Instead, you can enjoy the benefits of a natural and nourishing lip balm.
Benefits of Beeswax for Lip Balm:
- Locks in moisture and prevents dryness
- Forms a protective barrier on the lips
- Organic and natural alternative to commercial lip balms
By incorporating beeswax into your DIY lip balm, you can create a product that not only moisturizes your lips but also provides them with a layer of protection. Enjoy the benefits of beeswax and say goodbye to dry lips.
| Benefit | Beeswax Lip Balm | Commercial Lip Balm |
|---|---|---|
| Moisturizes | ✓ | ✓ |
| Forms Protective Barrier | ✓ | ✕ |
| Organic and Natural | ✓ | ✕ |
Ingredients for DIY Beeswax Lip Balm
Creating your own DIY beeswax lip balm is a rewarding and enjoyable process. To get started, gather the essential ingredients that will help you create a nourishing and natural lip balm:
- Beeswax: Beeswax serves as the base ingredient for your lip balm recipe. It provides a protective barrier on your lips, sealing in moisture and preventing dryness.
- Carrier oils: These oils, such as coconut oil or olive oil, add moisturizing properties to your lip balm and help to enhance its texture.
- Solid butter: Shea butter or cocoa butter are excellent options to incorporate into your lip balm. These solid butters deeply hydrate the lips, leaving them soft and supple.
- Optional essential oils: Adding essential oils to your lip balm not only infuses it with a pleasant fragrance but also offers additional benefits. Some popular choices include lavender oil for relaxation, peppermint oil for a cooling sensation, or citrus oils for a refreshing scent.
Remember, when gathering your ingredients, opt for high-quality, organic options whenever possible. This ensures that your DIY lip balm is free from unnecessary additives and provides the best results for your lips.
Now that you have your ingredients ready, let’s move on to the next section and learn how to create your own DIY beeswax lip balm using these natural and nourishing components.
Method 1: Step-by-Step Guide
Follow this easy lip balm tutorial to make your own nourishing lip balm at home. Using natural ingredients, you can create a personalized lip balm that will keep your lips hydrated and protected.
Here’s a step-by-step guide:
Gather Your Ingredients
Before you begin, gather all the ingredients you’ll need. This includes 1 part beeswax, 2 parts carrier oil (such as coconut oil or olive oil), and 1 part solid butter (like shea butter or cocoa butter). You can also add a few drops of essential oils for fragrance.
| Ingredients: | Measurement: |
| Beeswax | 1 part |
| Carrier oil | 2 parts |
| Solid butter | 1 part |
| Essential oils (optional) | A few drops |
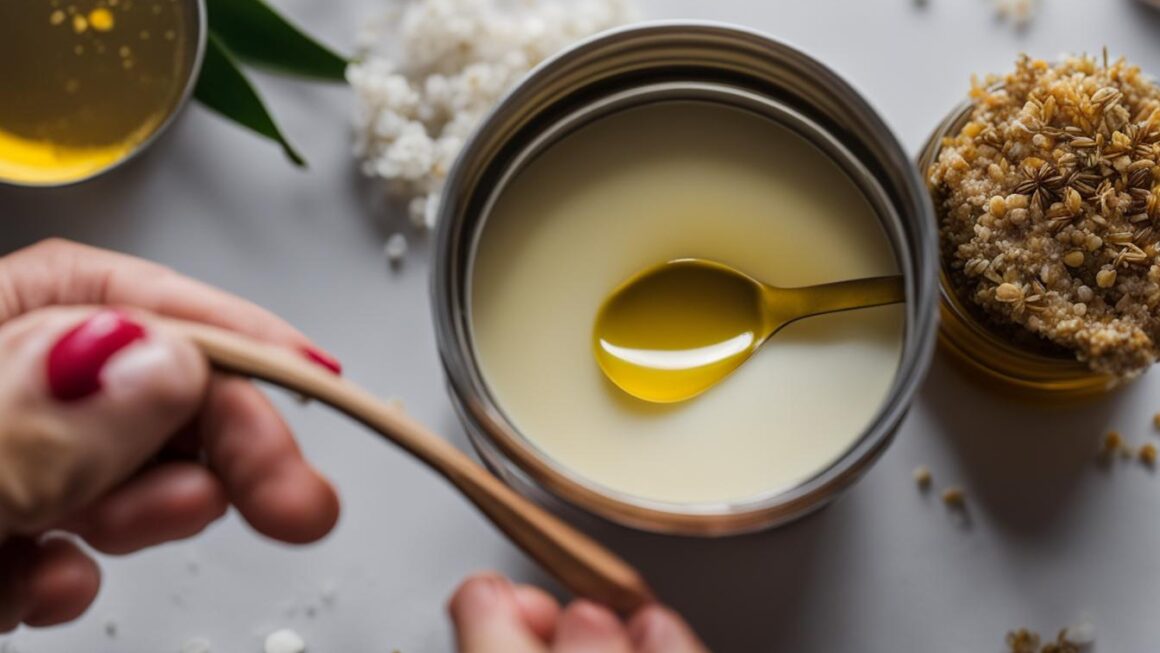
Melt and Mix
In a double boiler or a heat-safe bowl placed over a pan of simmering water, melt the beeswax, carrier oil, and solid butter together. Stir gently until everything is fully melted and well combined.
Tip: Be careful not to overheat the mixture as this can affect the consistency of your lip balm.
Add Fragrance
If desired, add a few drops of your chosen essential oils to the melted mixture. Stir well to distribute the fragrance evenly.
Pour and Cool
Carefully pour the mixture into lip balm tubes or tins. Allow the lip balm to cool and solidify completely before moving or using.
Now, you have your homemade lip balm ready to keep your lips moisturized and protected. Enjoy the benefits of your own DIY creation!
Method 2: Step-by-Step Guide
If you prefer a simpler method for making your DIY lip balm with beeswax, this step-by-step guide is for you. With just a few ingredients, you can create your own natural lip balm.
To begin, you will need:
- 1 tablespoon of beeswax
- 1 tablespoon of coconut oil
- 1 tablespoon of shea butter
- A few drops of flavoring oil (such as peppermint or vanilla)
Here’s how to make it:
- Place the beeswax, coconut oil, and shea butter in a heat-safe container.
- Fill a saucepan with a few inches of water and place it on the stove over medium heat.
- Set the heat-safe container in the saucepan, creating a double boiler. Stir the ingredients occasionally until they are fully melted and well combined.
- Remove the container from heat and add a few drops of your preferred flavoring oil. Stir well.
- Pour the mixture into small lip balm jars and allow it to cool and solidify.
- Your homemade beeswax lip balm is now ready to use!
With this simple method, you can quickly create a nourishing lip balm that will keep your lips moisturized and protected throughout the day.
Comparison of Methods:
| Method | Ingredients | Difficulty Level | Preparation Time |
|---|---|---|---|
| Method 1 | Beeswax, carrier oils, solid butter, essential oils | Intermediate | 30 minutes |
| Method 2 | Beeswax, coconut oil, shea butter, flavoring oil | Beginner | 15 minutes |
Tips for Making Beeswax Lip Balm
When it comes to making your own beeswax lip balm, there are a few tips that can help ensure success. By following these guidelines, you can create a nourishing and long-lasting lip balm that will keep your lips moisturized and protected.
Mind the Ingredients
First and foremost, it’s important to use high-quality cosmetic-grade beeswax and oils. This ensures that your lip balm is safe for use on your lips and provides the desired benefits. Look for beeswax that is free from contaminants and oils that are pure and natural.
Additionally, be cautious about overheating the ingredients when melting them together. Overheating can affect the texture and quality of the lip balm. Use gentle heat and stir frequently to prevent overheating.
Pour with Care
When pouring your lip balm mixture into containers, take your time and pour carefully. This helps to ensure that the lip balm is evenly distributed and that there are no air bubbles or gaps in the containers. A clean and precise pour will result in a professional-looking finished product.
Proper Storage
After making your beeswax lip balm, it’s important to store it correctly to maintain its quality. Keep the lip balm in a cool place, away from direct sunlight, as heat can cause the balm to melt or lose its desired consistency. Storing the lip balm in a cool environment will help it stay solid and last longer.
Lastly, it’s best to avoid sharing your lip balm with others to prevent the spread of germs. While sharing is caring, when it comes to lip balm, it’s best to keep it to yourself for hygiene reasons.

| Tips for Making Beeswax Lip Balm |
|---|
| Use cosmetic-grade beeswax and oils |
| Be cautious about overheating the ingredients |
| Pour the balm carefully into containers |
| Store the lip balm in a cool place |
| Avoid sharing it with others |
Benefits of Homemade Beeswax Lip Balm
Making your own DIY lip balm with beeswax offers a multitude of benefits. By creating your lip balm at home, you have complete control over the ingredients you use, ensuring that you avoid harmful chemicals and artificial additives. Instead, you can opt for natural and nourishing ingredients that promote healthy lip care.
One of the advantages of homemade lip balm is the ability to customize the scent and flavor. By adding essential oils of your choice, you can create a lip balm that suits your preference and provides additional benefits. For example, you can use lavender essential oil for a calming effect or peppermint essential oil for a refreshing and minty scent. This customization allows you to create a lip balm that is uniquely yours.
Another benefit of making your own lip balm is the cost-effectiveness. While store-bought lip balms can be expensive, especially those with natural and organic ingredients, DIY lip balm allows you to save money in the long run. With a few simple ingredients and containers, you can make a batch of lip balm that will last for months, providing you with a constant supply of nourishing lip care.
Table: Benefits of Homemade Beeswax Lip Balm
| Benefits | Description |
|---|---|
| Control over ingredients | Create a lip balm free from harmful chemicals and artificial additives |
| Customizable scent and flavor | Add essential oils of your choice to create a lip balm tailored to your preference |
| Cost-effectiveness | Save money by making your own lip balm instead of purchasing expensive store-bought options |
Different Lip Balm Container Options
When it comes to storing your homemade lip balm, there are various container options available to suit your needs and preferences. Consider factors such as convenience, portability, and the overall aesthetic appeal of the container. Here are some popular options:
Lip Balm Tubes
Lip balm tubes are a popular choice for storing homemade lip balm. They are convenient to use, mess-free, and easily portable. These tubes typically come in a variety of sizes and materials, such as plastic or eco-friendly options like paper tubes. They are perfect for on-the-go application and can easily fit in your pocket or purse.
Lip Balm Tins
Lip balm tins provide a stylish and nostalgic way to store your homemade lip balm. They come in various shapes and sizes, allowing you to choose the one that best suits your preferences. These tins are perfect for those who prefer a more traditional and environmentally friendly option. They can be easily customized with labels or decorations to add a personal touch.
Small Jars
If you prefer a more versatile and reusable option, small jars are a great choice. These glass or plastic jars come with screw-top lids and provide a sturdy and long-lasting container for your lip balm. They are perfect for those who want to avoid any kind of waste and prefer a more sustainable option. Small jars also allow for easy application using your fingertips.
Remember to choose containers that are specifically designed for lip balm to ensure proper storage and preservation. Consider your personal preferences, the intended use, and the overall presentation of your homemade lip balm when selecting the right container option.
Table: Lip Balm Container Options Comparison
| Container Option | Advantages | Disadvantages |
|---|---|---|
| Lip Balm Tubes | – Convenient and mess-free – Portable and easy to use – Come in various sizes |
– Limited customization options – Plastic tubes may not be eco-friendly |
| Lip Balm Tins | – Stylish and nostalgic – Environmentally friendly options available – Can be easily customized |
– May require using fingertips for application – Not as portable as tubes |
| Small Jars | – Versatile and reusable – Sturdy and long-lasting – Sustainable option |
– May require more careful handling – May require more time for application |
Using Beeswax Lip Balm
To reap the full benefits of your homemade beeswax lip balm, it’s important to use it correctly and incorporate it into your lip care routine. Here are some tips to help you make the most of your nourishing creation:
- Apply a thin layer: When using beeswax lip balm, a little goes a long way. Apply a thin layer to your lips as needed throughout the day. This will help lock in moisture and protect your lips from drying out in harsh weather conditions.
- Apply before bed: For intensive overnight moisturization, apply a generous layer of beeswax lip balm before going to sleep. This will give the balm ample time to work its magic and leave you with soft, supple lips in the morning.
- Store properly: Beeswax lip balm should be stored in a cool place, away from direct sunlight and heat. Excessive heat can cause the balm to melt or become rancid, diminishing its effectiveness.
- Discontinue use if needed: While homemade lip balm is generally safe and gentle, everyone’s skin is unique. If you experience any adverse reactions, such as irritation or allergic symptoms, discontinue use and consult a dermatologist.
Using beeswax lip balm regularly will help keep your lips moisturized, nourished, and protected from the elements. Incorporate it into your daily lip care routine for maximum benefits.
“I absolutely love using beeswax lip balm! It keeps my lips hydrated and protected throughout the day, and the natural ingredients give me peace of mind. I can’t imagine going back to store-bought lip balms.” – Sarah, DIY lip balm enthusiast
Takeaway
By following these simple tips, you can effectively incorporate your homemade beeswax lip balm into your daily routine. Enjoy the benefits of natural ingredients, nourished lips, and peace of mind knowing exactly what goes into the product you’re using.
| Benefits of Using Beeswax Lip Balm | |
|---|---|
| Locks in moisture | Beeswax creates a protective barrier that helps prevent moisture loss, keeping your lips hydrated. |
| Natural and organic | Homemade lip balm allows you to avoid synthetic ingredients and opt for a more natural and organic product. |
| Customizable | Add your favorite essential oils or experiment with different flavors to create a lip balm that suits your preferences. |
| Cost-effective | Making your own lip balm can save you money in the long run compared to buying commercial brands. |
DIY Beeswax Lip Balm Variations
One of the great things about making your own DIY beeswax lip balm is the ability to customize it according to your preferences. There are several variations you can try to create a lip balm that is uniquely yours.
To add a touch of creativity to your lip balm, experiment with different essential oil combinations. Essential oils not only add fragrance but can also provide additional benefits for your lips. For example, peppermint oil can give a refreshing sensation, while lavender oil can provide a soothing effect.
If you want to add a subtle tint to your lip balm, you can try using natural colorants like beetroot powder. This will give your lip balm a beautiful, tinted hue. Just remember to start with a small amount of colorant and adjust according to your desired shade.
Creating Lip Balm with a Hint of Flavor
If you enjoy flavored lip balms, you can experiment by adding flavor oils to your homemade lip balm mixture. Some popular options include vanilla, strawberry, or citrus flavors. These oils will not only add a pleasant scent but also a hint of delicious taste to your lip balm.
Adding Healing Ingredients
If you’re looking to enhance the healing properties of your lip balm, consider adding ingredients such as aloe vera gel or vitamin E oil. Aloe vera gel can help soothe dry and chapped lips, while vitamin E oil can provide nourishment and protect against environmental damage.
Remember to experiment and have fun with your DIY lip balm variations. By trying different combinations of essential oils, colorants, and healing ingredients, you can create a lip balm that suits your personal preferences and provides optimal care for your lips.
Packaging and Labeling Your DIY Beeswax Lip Balm
Once your homemade lip balm has solidified, it’s time to give it a professional touch with packaging and labeling. Not only will this make your lip balm look more enticing, but it will also add a personal and attractive element to it. There are various options to consider when it comes to packaging your DIY beeswax lip balm.
Jars, Tubes, or Tins
One popular choice for packaging lip balm is small jars. These are convenient and easy to use, allowing you to apply the lip balm with your fingers. They also provide ample space for labeling and adding decorative elements. Lip balm tubes are another option, offering a more portable and mess-free application. These are especially great if you’re planning to give your lip balm as gifts or carry them with you on the go. Metal tins are also a popular choice, providing a vintage and eco-friendly packaging solution.

Designing and Printing Labels
To add a personalized touch to your homemade lip balm, consider designing and printing labels. This allows you to showcase the ingredients, highlight the scent or flavor, and include your own branding if desired. There are online platforms and software programs available that can help you create professional-looking labels. Make sure to include the name of your lip balm, the ingredients, and any additional information or warnings.
Decorative Elements
Make your DIY lip balm even more visually appealing by adding decorative elements. Consider tying a ribbon around the lip balm tube or jar, attaching a custom-made tag or sticker, or even creating a small gift box if you’re giving the lip balm as a present. These little touches can make your homemade lip balm stand out and add an extra special touch to your finished product.
With the right packaging and labeling, you can transform your homemade beeswax lip balm into a professional-looking product. Whether you opt for jars, tubes, or tins, don’t forget to design and print labels that showcase the ingredients and personalize your lip balm. And don’t be afraid to get creative with decorative elements to make your lip balm truly unique and appealing.
Conclusion
Making your own DIY lip balm with natural beeswax is a fantastic way to care for your lips and indulge in a nourishing beauty routine. By creating your own lip balm, you have full control over the ingredients, ensuring that you use only the best and most natural components. This allows you to avoid harmful chemicals and additives that are commonly found in store-bought lip balms.
With your homemade lip balm, say goodbye to dry and chapped lips. The beeswax acts as a protective barrier, locking in moisture and providing long-lasting hydration. Your lips will feel soft, smooth, and rejuvenated, thanks to the nourishing properties of the natural beeswax.
Not only is making your own lip balm a great way to care for your lips, but it can also be a fun and rewarding DIY project. You can experiment with different essential oil combinations to create your own unique scents and even add natural colorants for a tinted lip balm. The possibilities are endless, allowing you to customize your lip balm to suit your personal preferences.
So why wait? Start your DIY lip care journey today and enjoy the soothing and moisturizing effects of your very own homemade beeswax lip balm. Your lips will thank you!
FAQ
What are the benefits of using beeswax in lip balm?
Beeswax locks in moisture and provides a protective barrier for the lips. It is organic and natural, promoting healthier lip care without harmful chemicals.
What ingredients do I need for DIY beeswax lip balm?
You will need beeswax, carrier oils (such as coconut oil or olive oil), solid butter (like shea butter or cocoa butter), and optional essential oils for fragrance and additional benefits.
How do I make DIY lip balm with beeswax?
Start by melting the carrier oil, solid butter, and beeswax together. Add essential oils for fragrance and pour the mixture into lip balm tubes or tins. Allow it to cool and solidify before use.
Are there alternative methods for making DIY lip balm with beeswax?
Yes, you can also combine beeswax, coconut oil, and shea butter. Melt the ingredients, add flavoring oil, and pour the mixture into small lip balm jars. Let it set and enjoy your homemade lip balm.
What tips should I keep in mind for successful lip balm making?
Use cosmetic-grade beeswax and oils, be cautious about overheating the ingredients, and pour the balm carefully into containers. Store the lip balm in a cool place and avoid sharing it with others to prevent the spread of germs.
What are the benefits of homemade beeswax lip balm?
Homemade lip balm allows you to control the ingredients, avoid harmful chemicals, and customize the scent and flavor. It can also be more affordable in the long run.
What container options can I use for my homemade lip balm?
Explore options such as lip balm tubes, tins, or small jars. Consider convenience, portability, and personal preferences when choosing the right container.
How should I use beeswax lip balm?
Apply a thin layer whenever needed, especially before bed or in harsh weather conditions. Store the lip balm in a cool place away from direct sunlight. If you experience any adverse reactions, discontinue use and consult a dermatologist.
Can I customize my DIY lip balm?
Yes, you can get creative with different essential oil combinations or add natural colorants like beetroot powder for a tinted lip balm. Explore different options to make your lip balm uniquely yours.
How can I package and label my homemade lip balm?
Once your lip balm has solidified, consider using small jars, tubes, or tins. You can design and print labels to add a personal and attractive element to your homemade lip balm.