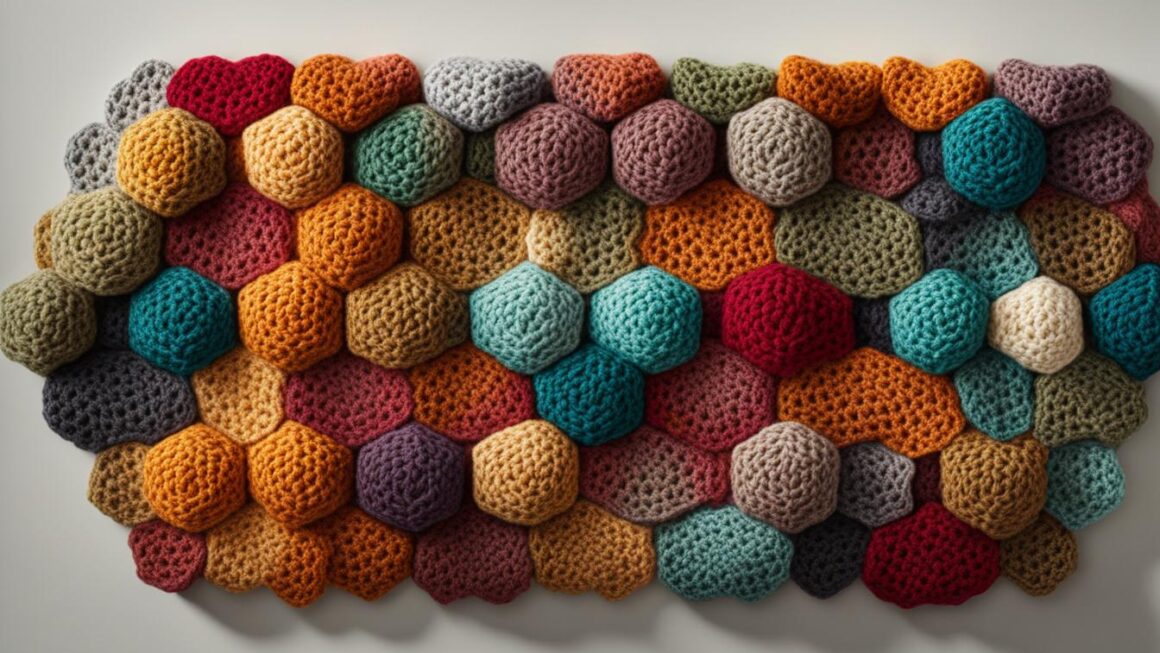
Honeycomb crochet is a versatile technique that allows you to create intricate and beautiful patterns using the hexagonal shape of a honeycomb. With this technique, you can make various accessories such as blankets, wraps, potholders, and more. The interlocking hexagonal structure provides both sturdiness and flexibility, resulting in textured and visually appealing items.
Key Takeaways:
- Honeycomb crochet is a versatile technique for creating beautiful patterns.
- The hexagonal shape of the honeycomb adds texture and visual interest to crochet projects.
- With honeycomb crochet, you can make a variety of accessories and home decor items.
- The interlocking hexagonal structure provides both sturdiness and flexibility to your creations.
- Mastering the art of honeycomb crochet opens up endless possibilities for creativity.
The Honeycomb Crochet Textured Stitch
The honeycomb crochet textured stitch is a popular choice for creating cozy and warm items like blankets, winter hats, and scarves. It involves using half-double crochets mixed with front post stitches to create a close-knit fabric with a lovely texture. This stitch can also be used to make accessories, bags, and dishcloths. With its detailed design, the honeycomb stitch allows for endless creativity.
To crochet the honeycomb textured stitch, start by creating a foundation chain in a multiple of 3 stitches plus 2. Then, work a row of half-double crochets across the foundation chain. In the next row, you’ll alternate between front post double crochets and regular double crochets. This alternating pattern creates the honeycomb texture.
“The honeycomb crochet textured stitch adds dimension and visual interest to any project. The interlocking hexagonal pattern creates a cozy and warm fabric that is perfect for winter accessories. Whether you’re a beginner or an experienced crocheter, the honeycomb stitch is a fun and versatile technique to explore.”
How to Crochet the Honeycomb Textured Stitch:
- Create a foundation chain in a multiple of 3 stitches plus 2.
- Work a row of half-double crochets across the foundation chain.
- For the next row, alternate between front post double crochets and regular double crochets.
- Continue repeating the second and third rows to create the honeycomb texture.
- Experiment with different yarn colors and hook sizes to customize the look of your projects.
The honeycomb crochet textured stitch is a versatile and visually appealing technique that adds depth and texture to your crochet projects. Whether you’re creating cozy blankets or stylish accessories, the honeycomb stitch allows you to showcase your creativity and create stunning pieces. With a few simple steps, you can master this beautiful stitch and incorporate it into your own designs.
Crochet Hook Case with Honeycomb Stitch
In this tutorial, we will guide you step by step on how to create a crochet hook case using the honeycomb stitch. This practical and stylish case will keep your crochet hooks organized and secure, while also adding a pop of color to your crochet tools collection. Follow the instructions below to create your own crochet hook case with the beautiful honeycomb pattern.
Materials Needed:
- Worsted weight yarn in vibrant green
- Size G (4mm) crochet hook
- Button for closure
- Yarn needle
- Scissors
Start by creating a chain of 26 stitches using the green yarn. This will be the base of your hook case. Next, you will work the honeycomb stitch pattern using half-double crochets and front post stitches. Repeat the honeycomb stitch pattern until the case reaches your desired height, leaving a small opening at the top for the button closure.
Once you have completed the main body of the case, fold it in half and sew the sides together using the yarn needle. Attach the button to the front of the case, aligning it with the opening. Make sure the button is securely attached so that it can hold the case closed when needed. Lastly, weave in any loose ends and trim off any excess yarn.
| Row | Stitch | Instructions |
|---|---|---|
| 1 | Chain | Create a chain of 26 stitches using the green yarn. |
| 2 | Honeycomb Stitch | Work the honeycomb stitch pattern using half-double crochets and front post stitches. Repeat this pattern until the case reaches your desired height. |
| 3 | Button Closure | Leave a small opening at the top for the button closure. |
| 4 | Sew Sides | Fold the case in half and sew the sides together using the yarn needle. |
| 5 | Attach Button | Attach the button to the front of the case, aligning it with the opening. |
| 6 | Finishing Touches | Weave in any loose ends and trim off any excess yarn. |
With this crochet hook case, you can keep your crochet hooks organized and protected while showcasing your creativity with the beautiful honeycomb stitch. Enjoy the process of making your own crochet hook case and have fun exploring different color combinations and patterns to make it uniquely yours.
Crochet Shawl with Honeycomb Stitch
If you’re looking for a versatile and stylish crochet project, look no further than the crochet shawl with honeycomb stitch. This pattern showcases the beauty of the honeycomb stitch and allows you to create a stunning accessory that can be worn in various ways. Whether you drape it over your shoulders or wrap it around your neck, this shawl is sure to add a touch of elegance to any outfit.
To create the crochet shawl, you can choose between delicate fingering weight yarn or slightly thicker DK weight yarn, depending on your preference and desired look. The detailed honeycomb stitch creates a textured fabric that is both warm and visually appealing. With a Size G (4mm) crochet hook for fingering weight yarn or a Size I (5.5mm) hook for DK weight yarn, you can easily bring this beautiful shawl to life.
Not only is the crochet shawl with honeycomb stitch a gorgeous accessory, but it’s also a great project for crocheters of all skill levels. Whether you’re a beginner looking to expand your skills or an experienced crocheter in search of a new project, this tutorial will guide you step-by-step through the process of creating your own stunning shawl. So grab your crochet hook and yarn, and let’s get started on this exciting crochet adventure!
Materials:
- Fingering weight yarn or DK weight yarn
- Size G (4mm) crochet hook for fingering weight yarn or Size I (5.5mm) crochet hook for DK weight yarn
- Scissors
- Tapestry needle
Instructions:
- Start by chaining a multiple of 6 plus 3 stitches.
- Row 1: In the fourth chain from the hook, work a double crochet. Skip 2 chains, then work a front post double crochet around the next chain. Repeat this pattern across the row until you have 1 chain left. Work a double crochet in the last chain.
- Row 2: Chain 3, then turn your work. Work a front post double crochet around the first stitch. Skip 2 stitches, then work a double crochet in the next front post double crochet. Repeat this pattern across the row until you have 2 stitches left. Skip 1 stitch, then work a double crochet in the last stitch.
- Repeat Row 2 until your shawl reaches your desired length.
- Fasten off and weave in any loose ends.
With these simple instructions, you’ll be able to create a beautiful crochet shawl with the honeycomb stitch. Whether you’re crocheting for yourself or looking to make a thoughtful gift for a loved one, this shawl is sure to impress. So grab your favorite yarn and crochet hook, and start stitching your way to a stunning accessory!
Crochet Beach Tote Bag with Honeycomb Stitch
If you’re looking to add a touch of style to your beach outings, this crochet beach tote bag with honeycomb stitch is the perfect accessory. Not only is it practical for carrying all your beach essentials, but it also showcases the beautiful texture of the honeycomb crochet stitch.
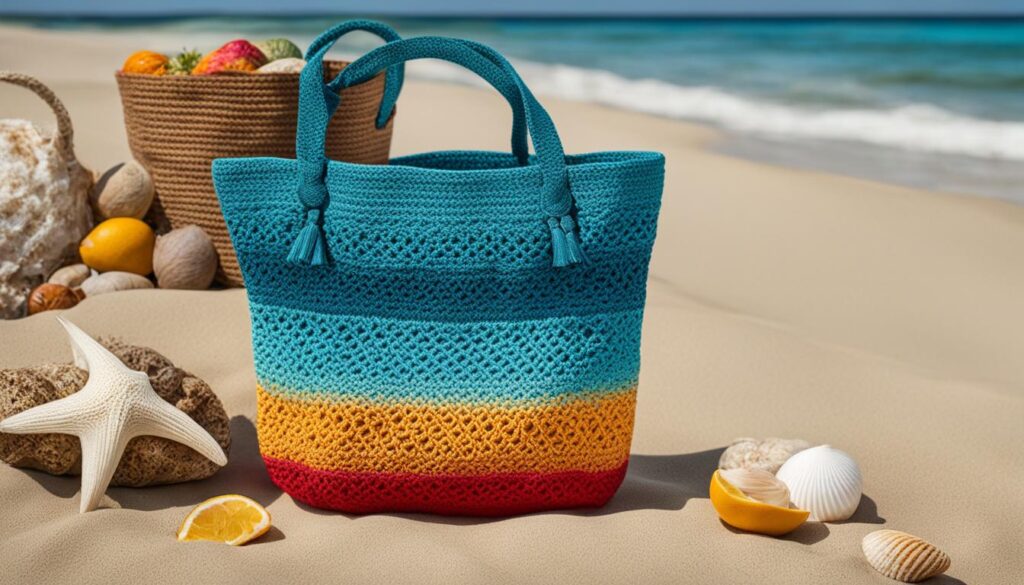
To create this beach tote bag, you’ll need just three balls of DK yarn in any color, a 4.5mm crochet hook, scissors, and a needle. The honeycomb stitch adds depth and visual interest to the bag, giving it a unique and stylish look. Plus, the sturdy construction ensures that your belongings will stay safe and secure while you enjoy a day by the water.
This crochet beach tote bag tutorial is beginner-friendly, making it a great project for those new to crochet. The pattern includes step-by-step instructions and helpful tips to guide you through the process. With some basic crochet skills and a little bit of time, you’ll have a beautiful and functional beach tote bag that you can proudly show off at the beach.
Add a touch of handmade charm to your summer adventures with this crochet beach tote bag. It’s not only a practical accessory but also a stylish statement piece that reflects your creativity and love for crochet. Get ready to turn heads and make waves with your very own honeycomb stitch beach tote bag.
Crochet Honeycomb Coasters Pattern
Enhance your home décor with these stylish and practical crochet honeycomb coasters. These coasters are not only attractive but also functional, protecting your furniture from spills and hot beverages. The honeycomb crochet stitch adds texture and visual interest to these coasters, making them a standout addition to any living space.
To create these coasters, you will need the following materials:
- Abbey Road Freedom yarn in Tutti Frutti
- Size G (4mm) crochet hook
- Scissors
- Needle
Follow the step-by-step instructions below to crochet your own honeycomb coasters:
- Start by making a magic ring and chain 2.
- Work 12 double crochets into the magic ring. Join with a slip stitch to the first double crochet.
- Chain 2 and work 2 double crochets in each stitch around. Join with a slip stitch to the first double crochet.
- Chain 2 and work 1 double crochet in the same stitch. *Skip 1 stitch, work 2 double crochets in the next stitch.* Repeat from * to * around. Join with a slip stitch to the first double crochet.
- Repeat step 4 until you have reached the desired size for your coaster.
- Fasten off and weave in the ends.
| Materials | Abbey Road Freedom yarn in Tutti Frutti |
|---|---|
| Crochet Hook | Size G (4mm) |
“These honeycomb coasters are a stunning addition to any home. The vibrant colors and intricate stitch pattern make them a true centerpiece for your coffee table. Plus, they’re so fun and easy to make! Don’t be afraid to experiment with different colors to match your décor.”
These honeycomb coasters are not only functional but also a great opportunity to showcase your crochet skills. Whether you use them for your morning coffee or as decorative pieces, they are sure to add a touch of beauty to your home.
Crochet Honeycomb Coral Cowl Pattern
The crochet honeycomb coral cowl pattern is a gorgeous and cozy accessory that will keep you warm in style. Made with the honeycomb stitch, this cowl combines well-defined stitches and fun textures, creating a unique and eye-catching design.
To create this cowl, you will need 50g of fingering weight yarn in a beautiful coral color. The pattern also calls for 10g of Cumulus by Fiberspates, a soft and fluffy yarn that adds a touch of luxury to the cowl. With a Size C crochet hook and a stitch marker, you’ll be able to bring this stunning piece to life.
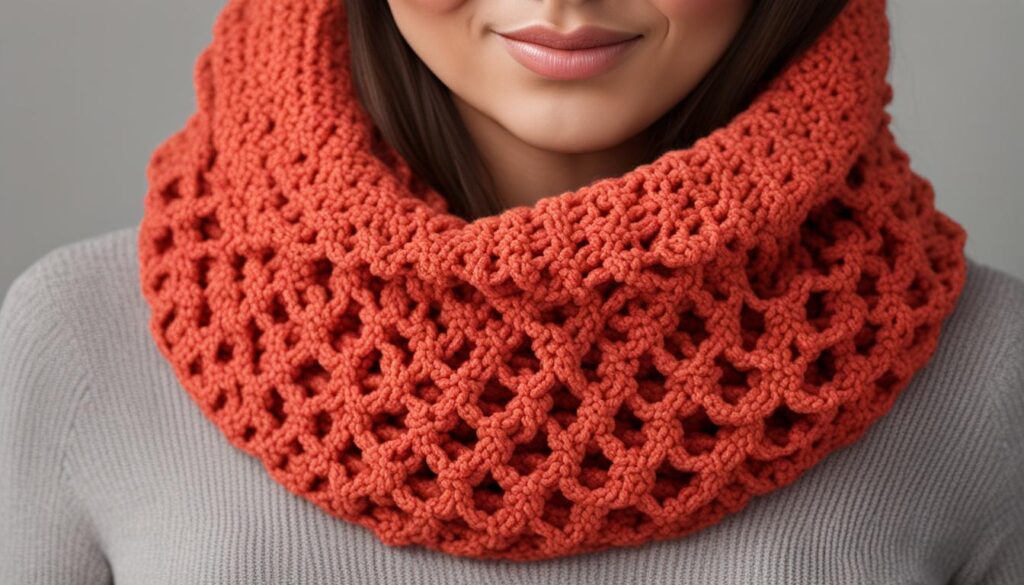
The finished cowl measures approximately 2.375 inches (6 cm) per motif, providing both style and functionality. The honeycomb stitch creates a warm and cozy fabric, making this cowl perfect for chilly days or as a statement accessory.
Whether you’re a beginner or an experienced crocheter, this pattern is suitable for all skill levels. The clear instructions and detailed stitch diagrams will guide you through each step, ensuring a successful and enjoyable crochet project.
Materials:
- 50g of fingering weight yarn in coral
- 10g of Cumulus by Fiberspates
- Size C crochet hook
- Stitch marker
Instructions:
- Chain 30.
- Row 1: In the second chain from the hook, work 1 single crochet. Work 1 single crochet in each chain across. (29 stitches total)
- Rows 2-5: Chain 1, turn. Work 1 single crochet in each stitch across.
- Row 6: Chain 3 (counts as first half-double crochet), skip 2 stitches, *work 2 half-double crochets in the next stitch, skip 2 stitches*. Repeat from * to * across, ending with 1 half-double crochet in the last stitch.
- Rows 7-80: Repeat Row 6.
- Fasten off and weave in ends.
Notes:
“The honeycomb coral cowl is a versatile accessory that can be worn in different ways – as a long cowl, a double-loop cowl, or even as a scarf. The beautiful coral color adds a vibrant touch to any outfit, making it a statement piece. The honeycomb stitch not only provides warmth, but also gives the cowl a unique and textured look. This pattern is perfect for crocheters looking to try something new and create a stylish accessory for themselves or as a thoughtful gift.”
Crochet Tunisian Honeycomb Washcloth Pattern
Learn how to create a simple and quick Tunisian honeycomb washcloth with this easy-to-follow crochet pattern. This pattern is perfect for beginners and requires only three stitches, making it an ideal project to practice and showcase your Tunisian crochet skills. The washcloth is not only functional but also adds a touch of elegance to your bathroom or kitchen.
To create this beautiful washcloth, you will need a Tunisian crochet hook in your preferred size, a ball of cotton yarn in your favorite color, and a pair of scissors. The pattern includes a step-by-step video tutorial to guide you through each stitch, ensuring that you can confidently complete the project from start to finish.
Materials You’ll Need:
- Tunisian crochet hook in your preferred size (recommended: 5.0mm)
- 1 ball of cotton yarn in your favorite color (recommended: Lily Sugar’n Cream Cotton Yarn)
- Scissors
Pattern Instructions:
- Chain 30 stitches using the Tunisian simple stitch.
- Row 1: Work the honeycomb stitch across the row.
- Repeat Row 1 until the washcloth reaches your desired size.
- Bind off and weave in any loose ends.
With this Tunisian honeycomb washcloth pattern, you can create a set of matching washcloths or experiment with different colors to add a pop of color to your bathroom or kitchen decor. These washcloths also make great homemade gifts for friends and family. Get creative and enjoy the soothing process of crocheting your very own Tunisian honeycomb washcloths.
Crochet Honeycomb Beanie Pattern
Looking to add a cozy and stylish accessory to your winter wardrobe? The Crochet Honeycomb Beanie is the perfect choice. This pattern features the unique honeycomb stitch, which creates a sturdy yet soft fabric with a stunning texture. Whether you’re a beginner or an experienced crocheter, you’ll love creating this beanie for yourself or as a special handmade gift for a loved one.
To get started, you’ll need the following materials:
- Worsted-weight yarn
- Crochet hook (size G or 4.0 mm)
- Scissors
- Yarn needle
Once you have your materials ready, follow the step-by-step instructions below to create your own Crochet Honeycomb Beanie:
- Start by creating a foundation chain of the desired length, based on the beanie size you want. Join the last chain to the first chain with a slip stitch to form a ring.
- For the first round, work a round of single crochet stitches into the ring.
- Continue working the honeycomb stitch pattern in the round, following the specific stitch instructions. This pattern typically involves combinations of half-double crochet and front post stitches to create the honeycomb texture.
- Repeat the honeycomb stitch pattern for the desired length of the beanie, keeping in mind the stretch factor and fit you desire.
- Finish off your beanie by fastening the yarn and weaving in any loose ends.
Add your own personal touch by experimenting with different yarn colors and embellishments. The Crochet Honeycomb Beanie is a versatile pattern that can be customized to match your style and preferences. Whether you’re wearing it on a chilly winter day or gifting it to someone special, this beanie is sure to keep you warm and stylish.
Tips:
To ensure a snug fit, measure the circumference of your head before starting the project. Adjust the number of stitches in the foundation chain accordingly.
Don’t be afraid to get creative with color combinations. Experiment with variegated or self-striping yarn for a unique look.
If you’re new to the honeycomb stitch, practice the pattern on a swatch before starting your beanie to familiarize yourself with the stitch technique.
Crochet Honeycomb Cute Beanie Pattern
If you’re looking for a fun and stylish crochet project, the crochet honeycomb cute beanie pattern is perfect for you. This pattern features the honeycomb smock stitch, which adds a unique texture and visual interest to the beanie. Using Color Theory Yarn by Lion Brand, this beanie is not only fashionable but also cozy for those chilly days.
To create this cute beanie, you will need just one ball of worsted-weight yarn, making it an affordable project. The pattern is worked from the brim up, and you can easily customize the height to your liking. The finished beanie has a snug fit, keeping your head warm and comfortable.
Materials:
- One ball of worsted-weight yarn in your preferred color
- Size H (5mm) crochet hook
- Tapestry needle
- Scissors
Pattern:
- Make a magic ring and crochet 10 single crochet stitches into the ring. Pull the ring tight to close.
- Join with a slip stitch to the first single crochet to form a circle.
- Chain 1, then work 2 single crochet stitches into each stitch around. Join with a slip stitch to the first single crochet. (20 stitches)
- Continue to work in rounds, without joining or turning. Work 1 single crochet in each stitch around for a total of 20 stitches per round. Continue until the beanie reaches your desired height.
- Fasten off and weave in any loose ends with the tapestry needle. Your crochet honeycomb cute beanie is now complete!
This pattern is suitable for beginners and can be easily customized by using different colors or adding embellishments such as a pom-pom or a decorative button. Whether you’re making it for yourself or as a gift, this cute beanie is sure to be a hit.
Crochet Honeycomb Handtowel & Washcloth Set Pattern
In this section, we’ll explore a delightful crochet pattern for creating a handtowel and washcloth set using the honeycomb Tunisian crochet stitch. This pattern combines functionality and beauty, allowing you to add a touch of elegance to your bathroom or kitchen decor. Whether you’re a beginner or experienced in Tunisian crochet, this pattern is accessible and provides an opportunity to showcase your skills.
The honeycomb stitch adds a wonderful texture to the handtowel and washcloth, making them a stylish addition to your home. The handtowel measures approximately 12 inches by 18 inches, while the washcloth measures approximately 6 inches by 6 inches. The size can be easily adjusted by adding or subtracting rows to suit your preferences.
| Materials: | Gauge: |
|---|---|
|
14 stitches and 8 rows = 4 inches in honeycomb stitch |
| Abbreviations: | |
|
Pattern:
- Row 1: CH 40, starting from the second chain from the hook, work a TSS in each chain across. (40 stitches)
- Row 2: CH 1, *work a TAS in the next stitch, work a TSS in the next stitch; repeat from * across. (40 stitches)
- Repeat Row 2 until the handtowel measures approximately 18 inches in length. Fasten off.
- For the washcloth, follow the same pattern, but adjust the starting chain to your desired width. Repeat Row 2 until the washcloth measures approximately 6 inches in length. Fasten off.
Once you’ve completed the handtowel and washcloth, weave in any loose ends and block them to shape. Your honeycomb crochet handtowel and washcloth set is now ready to be used and admired! These lovely pieces make perfect gifts for housewarmings, birthdays, or any occasion. Enjoy the process of creating these functional and beautiful crochet items.
Tip:
Experiment with different colors of cotton yarn to match your home decor or create a vibrant contrast. Variegated yarns can also add an interesting touch to the honeycomb pattern.
Conclusion
Honeycomb crochet offers endless possibilities for creating beautiful and unique patterns. Whether you’re looking to make blankets, accessories, home decor, or fashion items, the honeycomb stitch adds texture and visual interest to your crochet projects.
Regardless of your skill level, mastering the art of honeycomb crochet will open up a world of creativity. You can start exploring this fascinating technique and bring the beauty of honeycomb into your crochet creations.
So why wait? Grab your crochet hooks and yarn, and get ready to embark on a journey filled with intricate patterns and stunning designs. With honeycomb crochet, you’ll be able to create pieces that are both visually appealing and handmade with love.
So let your imagination run wild and start incorporating the honeycomb stitch into your next crochet project. Whether you’re a beginner or an experienced crocheter, the art of honeycomb crochet is sure to capture your heart and inspire you to create beautiful and unique items.
FAQ
What is honeycomb crochet?
Honeycomb crochet is a versatile technique that uses the hexagonal shape of a honeycomb to create intricate and beautiful patterns in crochet. It allows for the creation of various accessories such as blankets, wraps, potholders, and more.
How do I create the honeycomb crochet textured stitch?
The honeycomb crochet textured stitch is created by combining half-double crochets with front post stitches. This creates a close-knit fabric with a lovely texture, perfect for cozy and warm items like blankets, hats, and scarves.
How can I make a crochet hook case using the honeycomb stitch?
To create a crochet hook case using the honeycomb stitch, you will need vibrant yarn, a crochet hook, and a button for closure. The honeycomb stitch will add texture and visual interest to the case, making it both practical and stylish.
How can I crochet a shawl using the honeycomb stitch?
To crochet a shawl using the honeycomb stitch, you can choose between delicate fingering weight yarn or slightly thicker DK weight yarn, depending on your preference. The pattern allows you to customize your shawl according to your style, using a crochet hook suitable for the chosen yarn weight.
How can I crochet a beach tote bag using the honeycomb stitch?
Crocheting a beach tote bag using the honeycomb stitch is a beginner-friendly project that requires just three balls of DK yarn, a 4.5mm crochet hook, scissors, and a needle. The finished bag will not only be functional but also stylish, perfect for trips to the beach or the local market.
How can I make honeycomb crochet coasters?
Honeycomb crochet coasters are both attractive and practical for your home. The pattern allows you to showcase your skills and offers the opportunity to learn a new crochet stitch. You can choose colors based on the season or your mood, making these coasters a versatile addition to any style.
How can I crochet a honeycomb coral cowl?
To crochet a honeycomb coral cowl, you will need fingering weight yarn, Cumulus by Fiberspates, a Size C crochet hook, and a stitch marker. The pattern combines well-defined stitches and fun textures to create a warm and fashionable accessory.
How can I crochet a Tunisian honeycomb washcloth?
Crocheting a Tunisian honeycomb washcloth is a simple and quick project, perfect for beginners. The pattern requires only three stitches and includes a video guide to help you master the technique. This washcloth is a great way to create something small and satisfying.
How can I crochet a honeycomb beanie?
Crocheting a honeycomb beanie is a cozy and comfy project that results in a hat with a double-folded brim and a stunning texture. The honeycomb stitch used in this pattern creates a sturdy yet soft fabric, making it ideal for winter accessories.
How can I crochet a cute honeycomb beanie?
Crocheting a cute honeycomb beanie is a quick and easy project that requires just one ball of worsted-weight yarn. The finished beanie has a snug fit and can be customized to your desired height, making it a perfect accessory for any outfit.
How can I crochet a honeycomb handtowel and washcloth set?
Crocheting a honeycomb handtowel and washcloth set is both practical and beautiful. The pattern includes clear written instructions and a video guide to make learning Tunisian crochet easy. The set will add a touch of elegance to your bathroom or kitchen.

