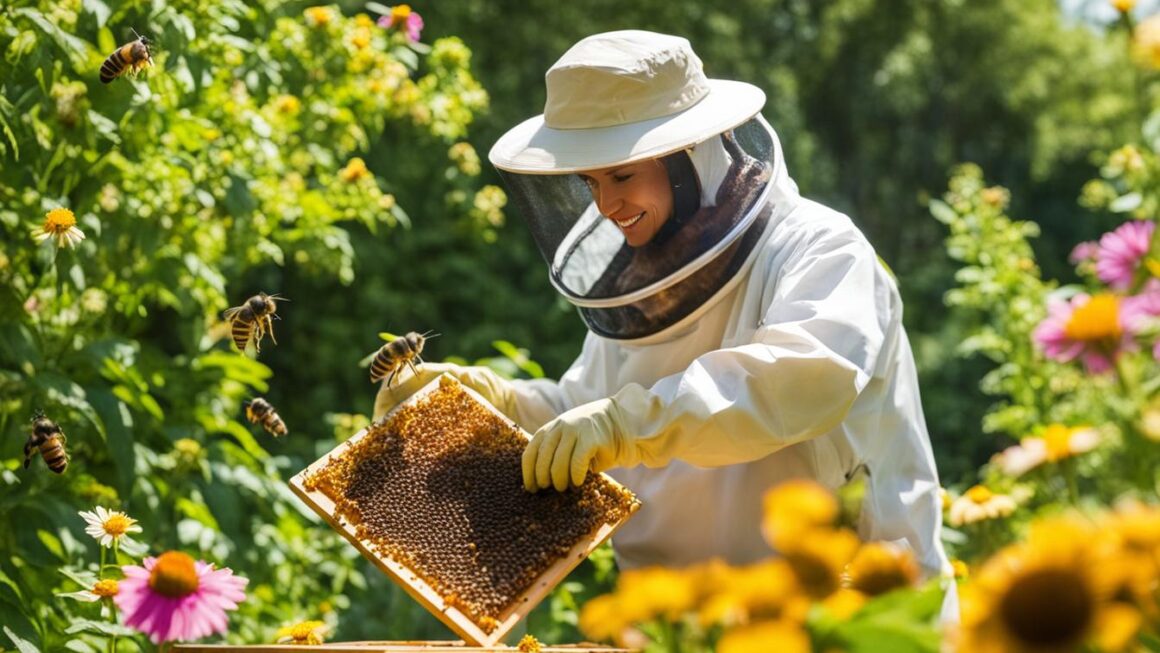
Beeswax is a versatile and valuable substance with numerous natural applications. Whether you’re a beekeeper or a DIY enthusiast, understanding how to use beeswax properly is essential. In this comprehensive guide, we will explore the benefits and uses of beeswax, as well as provide step-by-step instructions for different beeswax applications.
Key Takeaways:
- Beeswax is a versatile and valuable substance with various natural applications.
- Understanding how to use beeswax properly is essential for beekeepers and DIY enthusiasts.
- Beeswax can be filtered to remove impurities for cleaner and more refined results.
- It is commonly used in candle making, skincare, furniture restoration, and DIY projects.
- Using sustainably sourced beeswax is important for optimal results and environmental sustainability.
The Importance of Beeswax Filtering
Filtering beeswax is a crucial step in the processing and purification of this natural substance. Beeswax can contain impurities such as bee parts, pollen, and debris from the hive, which can affect its quality and suitability for various applications. By properly filtering beeswax, these impurities can be effectively removed, resulting in cleaner and more refined beeswax.
The purification of beeswax is particularly important for applications like candle making and skincare, where purity is essential. Impurities in beeswax can affect the burning quality of candles and the effectiveness of skincare products. By implementing effective filtering methods, you can ensure that the beeswax used in these applications is of the highest quality.
There are several techniques available for filtering beeswax, each with its own advantages and considerations. Some common methods include sedimentary filtering and gravity filtering. Sedimentary filtering involves melting the beeswax and allowing it to cool slowly, while gravity filtering utilizes a filtering system to separate impurities from the wax.
The Importance of Beeswax Filtering
Proper beeswax filtering not only removes impurities but also helps enhance the overall quality and properties of the wax. Clean, filtered beeswax is more desirable for its consistent texture, color, and aroma. It also ensures that the resulting products, such as candles and skincare items, will be of the highest standard.
When filtering beeswax, it is crucial to use appropriate equipment and follow the correct procedures. This includes using food-grade filters or cheesecloths, ensuring the filtering medium is clean and sterile, and melting the beeswax at the right temperature. By being diligent in the filtering process, you can achieve beeswax with exceptional purity and performance.
| Methods | Advantages | Considerations |
|---|---|---|
| Sedimentary Filtering | Simple and accessible method | May not remove smaller impurities |
| Gravity Filtering | Provides more refined results | Requires specific filtering equipment |
The Sedimentary Filtering Method for Beeswax Purification
When it comes to filtering raw beeswax, the sedimentary method is a simple yet effective technique. This method is ideal for removing larger impurities and debris from the beeswax, resulting in a cleaner and more refined final product. Sedimentary filtering can be easily done at home with minimal equipment, making it a convenient option for beekeepers and DIY enthusiasts.
How to Filter Beeswax Using the Sedimentary Method
To filter beeswax using the sedimentary method, follow these step-by-step instructions:
- Melt the raw beeswax in a double boiler or a heat-resistant container placed in a pot of simmering water.
- Allow the melted beeswax to cool slowly until a layer of sediment, water, and impurities settle at the bottom.
- Gently separate the solidified beeswax from the bottom layer, taking care not to disturb the sediment.
- Repeat the process if necessary to ensure all impurities are removed.
- Store the filtered beeswax in a clean, airtight container for future use.
This sedimentary filtering method effectively removes larger particles and debris, resulting in purer beeswax. However, it may not be as effective in removing smaller impurities, such as pollen or wax remnants. If a higher level of purity is desired, an additional filtering method, such as gravity filtering, can be used.
| Sedimentary Filtering for Beeswax | Pros | Cons |
|---|---|---|
| Simple and easy to do at home | Removes larger impurities | May not remove smaller particles |
| Minimal equipment required | Cost-effective | Additional filtering method may be needed for higher purity |
Gravity Filtering for Beeswax
Gravity filtering is a highly effective technique for purifying beeswax, removing impurities, and achieving a clean and refined final product. This method utilizes gravity to separate the beeswax from unwanted particles, resulting in high-quality beeswax that is suitable for various applications. By understanding the process and following the proper steps, you can easily filter beeswax using gravity at home.
“Gravity filtering of beeswax is a simple yet powerful purification technique that allows for efficient removal of impurities. This method is particularly useful when dealing with smaller particles that may not be effectively removed through other filtering methods. By allowing the beeswax to pass through a filtering medium under the force of gravity, impurities get trapped while the clean beeswax flows through.
– Beekeeping Expert
How to Gravity Filter Beeswax
To gravity filter beeswax, you will need a container, a filtering medium, and a support structure. Follow these steps:
- Melt the beeswax using a double boiler or a dedicated beeswax melting pot.
- Place the filtering medium, such as cheesecloth or a fine mesh sieve, over the container.
- Secure the filtering medium onto the container using the support structure to create a stable setup.
- Pour the melted beeswax into the filtering medium, allowing it to pass through under the force of gravity.
- As the beeswax passes through the filtering medium, impurities will be captured, and the clean beeswax will collect in the container below.
- Once the filtering process is complete, carefully remove the filtered beeswax from the container and transfer it to a clean container or mold for storage or further use.
By utilizing gravity filtering, you can effectively remove impurities from your beeswax, ensuring a high-quality end product. Keep in mind that gravity filtering may take some time, as the filtering process relies on the natural force of gravity. However, the result is well worth the wait, as you will achieve clean and refined beeswax that is ready to be used in various applications like candle making, skincare, and more.
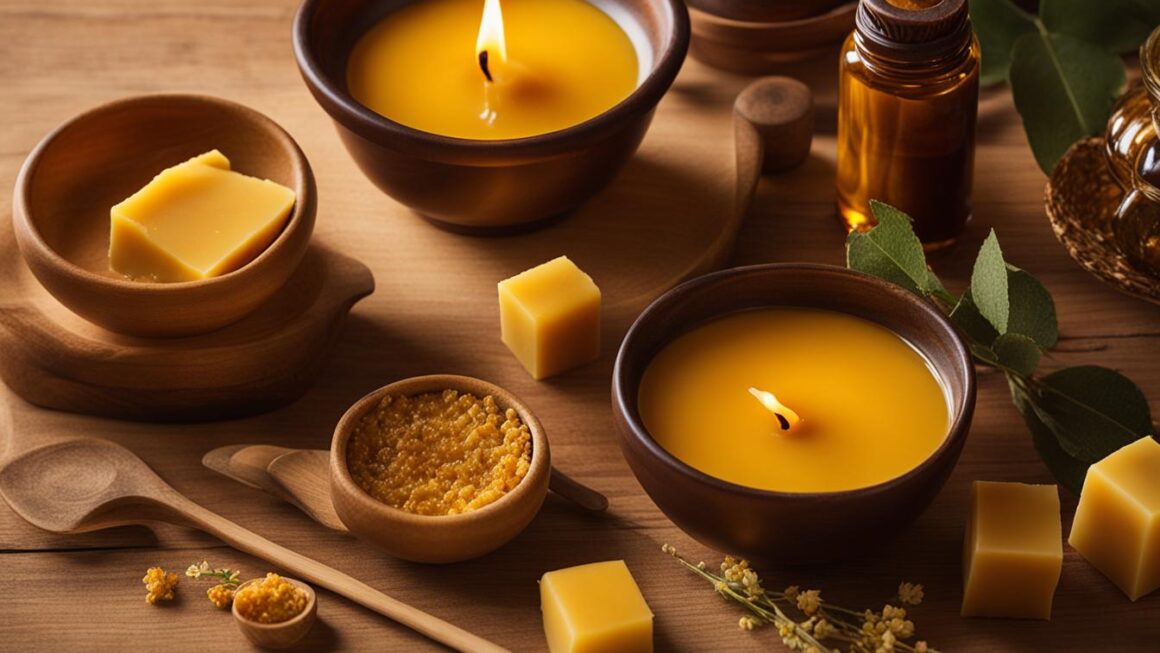
Beeswax for Candle Making
Beeswax is a popular choice for homemade candles due to its natural golden hue and pleasant scent. Unlike paraffin candles, beeswax candles burn clean without releasing harmful toxins or soot into the air. They also have a longer burn time compared to other types of candles. Making your own beeswax candles at home is a fun and rewarding DIY project that allows you to create personalized candles for yourself or as gifts for friends and family.
To start making beeswax candles, you will need a few basic supplies:
- Beeswax sheets or blocks
- Candle wicks
- Double boiler or a heat-resistant container
- Optional: Essential oils for fragrance
Begin by melting the beeswax in a double boiler or a heat-resistant container placed in a pot of simmering water. Once the beeswax has fully melted, remove it from the heat and add any desired fragrance using essential oils. Stir well to ensure the fragrance is evenly distributed throughout the wax.
Next, prepare the candle wicks by cutting them to the desired length, leaving a little extra to secure them in the candle mold or container. Dip the wicks into the melted beeswax to coat them, then place them in the center of the mold or container. Allow the wax to cool and harden completely before trimming the wick to the desired length.
Once your beeswax candles have fully hardened, they are ready to be lit and enjoyed. Beeswax candles create a warm and cozy ambiance, making them perfect for relaxing evenings or special occasions. Experiment with different shapes, sizes, and colors of candles to add a personal touch to your space.
Beeswax for Skincare
Beeswax is a popular and natural ingredient in skincare products due to its numerous benefits. Its moisturizing and protective properties make it ideal for nourishing and hydrating the skin. Using beeswax in DIY skincare products allows you to create natural and effective remedies without harmful chemicals or additives.
One popular use of beeswax in skincare is for making lip balm. The beeswax acts as a barrier, locking in moisture and preventing chapped lips. You can create your own beeswax lip balm by melting beeswax with nourishing oils such as coconut oil and shea butter, and adding essential oils for fragrance. The result is a hydrating lip balm that keeps your lips soft and supple.
Another DIY beeswax skincare product is lotion bars. These solid bars are made by combining beeswax with oils and butters such as cocoa butter and almond oil. When applied to the skin, the heat of your body melts the bar, releasing the moisturizing properties of the beeswax and other ingredients. Lotion bars are a convenient and mess-free way to moisturize your skin, especially in dry areas like elbows and knees.
Lastly, beeswax can be used in the creation of body butter. Body butter is a rich and nourishing moisturizer that leaves your skin feeling soft and smooth. By combining beeswax with oils like jojoba oil and shea butter, you can create a luxurious body butter that deeply hydrates and protects your skin. Adding essential oils to the mixture can also provide a pleasant fragrance and additional skincare benefits.
Beeswax for Furniture Restoration
Beeswax is a versatile and natural option for restoring and maintaining furniture. Its unique properties make it an excellent choice for nourishing and protecting wood surfaces. Whether you have a vintage piece that needs a little TLC or you want to revive your worn-out furniture, beeswax can help bring back the natural beauty and luster. In this section, we will explore the benefits of using beeswax polish, provide step-by-step instructions for making your own natural wood polish at home, and offer tips for successful furniture restoration.
Benefits of Beeswax Polish
Beeswax polish offers several advantages over commercial furniture polishes. Firstly, it is a natural and eco-friendly alternative, free from harsh chemicals and toxins that can be detrimental to your health and the environment. Secondly, beeswax nourishes the wood, preventing it from drying out and cracking over time. It also creates a protective barrier that helps repel dust, moisture, and stains. Additionally, beeswax polish enhances the natural color and grain of the wood, giving it a warm and inviting appearance.
By using beeswax polish, you can not only restore the beauty of your furniture but also extend its lifespan. Regular application of beeswax polish can help maintain the integrity of the wood, preventing expensive repairs or replacements down the line. It’s a cost-effective and sustainable solution for keeping your furniture looking its best for years to come.
DIY Beeswax Polish
Making your own beeswax polish is a simple and rewarding DIY project. Here is a step-by-step guide to creating your own natural wood polish:
- Melt 1 part beeswax and 4 parts natural oil (such as jojoba oil or olive oil) in a double boiler or a heat-safe container placed in a pot of simmering water.
- Stir the mixture until the beeswax is completely melted and well combined with the oil.
- Remove the container from heat and let it cool slightly.
- Pour the mixture into a clean and dry container, such as a glass jar.
- Allow the polish to cool and solidify before using it.
To use the beeswax polish, apply a small amount to a clean cloth and rub it onto the wood surface in a circular motion. Let it dry for a few minutes, then buff the surface with a clean cloth to achieve a lustrous shine. Repeat the process as needed to maintain the furniture’s appearance and protection.
With a little time and effort, you can transform your furniture using natural beeswax polish. Not only will you enjoy the satisfaction of restoring your favorite pieces, but you’ll also create a healthier and more sustainable environment in your home.
| Benefits of Beeswax Polish | DIY Beeswax Polish |
|---|---|
| – Natural and eco-friendly alternative | – Melt 1 part beeswax and 4 parts natural oil |
| – Nourishes and protects wood surfaces | – Stir the mixture until the beeswax is completely melted |
| – Creates a protective barrier against dust, moisture, and stains | – Remove from heat and let it cool slightly |
| – Enhances the natural color and grain of the wood | – Pour the mixture into a clean and dry container |
| – Extends the lifespan of furniture | – Allow the polish to cool and solidify |
DIY Beeswax Crafts: Unleash Your Creativity
Beeswax is not only a natural and sustainable material but also a fantastic medium for DIY crafts. Whether you’re a seasoned crafter looking for new ideas or a beginner searching for a creative outlet, there is no shortage of possibilities when it comes to beeswax crafting. From decorative candles to beauty products and even unique household items, beeswax can be transformed into stunning creations that are both functional and aesthetically pleasing.
If you’re new to beeswax crafting, it’s essential to start with the basics. One popular project is making beeswax wraps, which are a reusable and eco-friendly alternative to plastic wrap. By spreading a mixture of beeswax, jojoba oil, and tree resin onto a piece of fabric, you can create a natural food wrap that molds to the shape of your containers and keeps your food fresh. This simple yet practical DIY project is perfect for reducing waste in your kitchen and showcasing your creativity.
Beeswax crafts are not only fun to make but also make great eco-friendly gifts for friends and family. Whether you’re creating scented beeswax candles, handcrafted lip balms, or decorative ornaments, the possibilities are endless.
If you’re looking for a more advanced beeswax craft, consider making your own beeswax candles. Beeswax candles have a beautiful natural glow and emit a subtle honey aroma when burned. To create your own unique candles, melt beeswax pellets and pour the melted wax into a mold of your choice. You can experiment with different colors, scents, and shapes to personalize your candles and create a cozy ambiance in your home.
When it comes to beeswax crafts, the only limit is your imagination. From intricate beeswax sculptures to personalized beeswax seals, there are countless opportunities to explore your creativity and showcase the beauty of this natural material. So, gather your supplies, unleash your creativity, and dive into the world of DIY beeswax crafts!
Examples of Beeswax Crafts:
| DIY Beeswax Candle | Beeswax Lip Balm | Beeswax Wraps |
|---|---|---|
 |
 |
|
| Create beautiful and scented beeswax candles for a cozy ambiance. | Make your own moisturizing lip balm with beeswax and natural oils. | Reduce waste by crafting reusable beeswax wraps for food storage. |
Beeswax Wrap Tutorial
Beeswax wraps are a sustainable and eco-friendly alternative to plastic wrap for food storage. These reusable food wraps are not only better for the environment, but they also help keep your food fresh without the need for disposable plastic. Making your own beeswax wraps is a simple and rewarding DIY project that you can easily do at home. Here’s a step-by-step tutorial to guide you through the process:
- Choose the right fabric: Start by selecting a fabric that is 100% cotton, preferably organic. The fabric should be lightweight and tightly woven to ensure that it provides a good seal for your food.
- Prepare the beeswax mixture: In a double boiler or a heatproof glass bowl set over a pot of simmering water, melt together equal parts of beeswax pellets and jojoba oil. The jojoba oil helps make the wraps more pliable.
- Apply the beeswax mixture: Lay the fabric on a baking sheet lined with parchment paper. Using a brush or a spoon, evenly spread the beeswax mixture over the fabric, making sure to cover the entire surface.
- Set the wraps: Place the baking sheet with the fabric in a preheated oven at 200°F (93°C) for a few minutes until the beeswax mixture has fully melted and soaked into the fabric. Remove from the oven and let the wraps cool and harden.
- Wrap and store your food: Once the wraps have cooled, they are ready to be used. Simply wrap your food, using the heat of your hands to mold the wrap around the item. The warmth will help create a seal. Beeswax wraps are perfect for covering bowls, wrapping sandwiches, fruits, vegetables, and cheese.
Beeswax wraps can be easily cleaned with a mild dish soap and lukewarm water. Avoid using hot water or harsh cleaning agents as they can remove the beeswax coating. With proper care, your beeswax wraps can last for up to a year, providing a sustainable and reusable solution for your food storage needs.
By making your own beeswax wraps, you are not only reducing waste but also embracing a more environmentally friendly way of storing food. These wraps are not only functional but also visually appealing, adding a touch of natural beauty to your kitchen. Give this DIY beeswax wrap tutorial a try and say goodbye to disposable plastic wrap for good!
Conclusion
In conclusion, beeswax is a versatile and valuable substance with a wide range of uses. Whether you’re a beekeeper or a DIY enthusiast, understanding how to properly use and filter beeswax is essential. By filtering out impurities, you can ensure the purity and quality of your beeswax, making it suitable for various applications.
Beeswax can be used to make candles, skincare products, furniture polish, and even DIY crafts. Its natural properties make it an excellent choice for these purposes, offering benefits such as long burn times, moisturizing effects, and protective barriers. Additionally, beeswax wraps provide a sustainable alternative to plastic wrap for food storage.
As you explore the world of beeswax, remember to have fun and be creative with your projects. Whether you’re making homemade candles, crafting skincare products, or restoring furniture, there are countless opportunities to experiment and enjoy the benefits of this natural material. Always choose sustainably sourced beeswax for the best results, ensuring you’re supporting ethical beekeeping practices.
FAQ
How do I filter beeswax?
Beeswax can be filtered using sedimentary filtering or gravity filtering. Sedimentary filtering involves melting the beeswax, allowing it to cool slowly, and separating the wax from impurities that settle to the bottom. Gravity filtering utilizes a filtering system with a container, filtering medium, and support structure to separate impurities from the melted beeswax.
Why is filtering beeswax important?
Filtering beeswax helps remove impurities such as bee parts, pollen, and hive debris, resulting in cleaner and more refined beeswax. This is crucial for applications like candle making and skincare where purity is important.
How do I make beeswax candles?
To make beeswax candles, melt the beeswax, choose the right wick, and pour the melted wax into a container. Allow it to cool and solidify before trimming the wick and lighting the candle.
What are the benefits of using beeswax in skincare?
Beeswax is moisturizing and protective, locking in moisture and creating a barrier against environmental irritants. It is commonly used in lip balms, lotion bars, and body butter for its skincare benefits.
How can I use beeswax for furniture restoration?
Beeswax polish can be used to nourish and protect wood surfaces. By applying beeswax polish, you can enhance the natural beauty of the wood and create a protective barrier.
What are some DIY beeswax projects?
Beeswax can be used for a variety of DIY projects, including beeswax wraps, candles, beauty products, and more. There are endless opportunities for crafting with beeswax.
How do I make beeswax wraps?
To make beeswax wraps, choose the right fabric, melt the beeswax, and spread it onto the fabric. Allow it to cool and harden before using the wraps for sustainable food storage.