Learn how to make your own homemade honey beeswax lip balm. This easy recipe uses natural ingredients to create a nourishing and moisturizing lip balm that is perfect for your DIY skincare routine.
Key Takeaways:
- Create your own homemade lip balm using natural ingredients.
- Avoid harmful chemicals found in commercial lip balms.
- Beeswax provides a protective barrier and helps soothe chapped lips.
- Customize the flavor and fragrance with essential oils.
- Package and store your homemade lip balm for optimal longevity.
Why Make Your Own Lip Balm?
Creating your own lip balm is not only a fun DIY project, but it also offers several advantages over commercial products. By making your own lip balm, you have control over the ingredients used, ensuring that you are avoiding harmful chemicals often found in store-bought options. This is especially important for those who prefer to use organic and all-natural beauty products.
Making your own lip balm allows you to tailor the recipe to your specific needs and preferences. You can choose high-quality ingredients that provide nourishment and moisturization for your lips, such as beeswax and essential oils. By customizing the flavor and fragrance with essential oils, you can create a lip balm that is uniquely yours.
Benefits of Making Your Own Lip Balm
- You have control over the ingredients used
- Avoidance of harmful chemicals found in commercial products
- Ability to customize the recipe to your preferences
- Use of high-quality ingredients for nourishment and moisturization
- Creation of a unique lip balm with custom flavor and fragrance
By making your own lip balm, you can ensure that you are using a safe and beneficial product for your lips. Plus, it’s a great way to unleash your creativity and indulge in a little self-care.
So if you’re looking for a rewarding DIY beauty project, why not try making your own lip balm? With the right ingredients and a simple recipe, you’ll have a natural and nourishing lip balm that will keep your lips soft, hydrated, and oh-so-kissable.
| Advantages of Making Your Own Lip Balm | Disadvantages of Commercial Lip Balms |
|---|---|
| Control over ingredients | Potential presence of harmful chemicals |
| Customizable recipe to meet your preferences | Limited options for customization |
| Use of high-quality, natural ingredients | Possible use of synthetic ingredients |
| Unique flavor and fragrance combinations | Standardized scents and flavors |
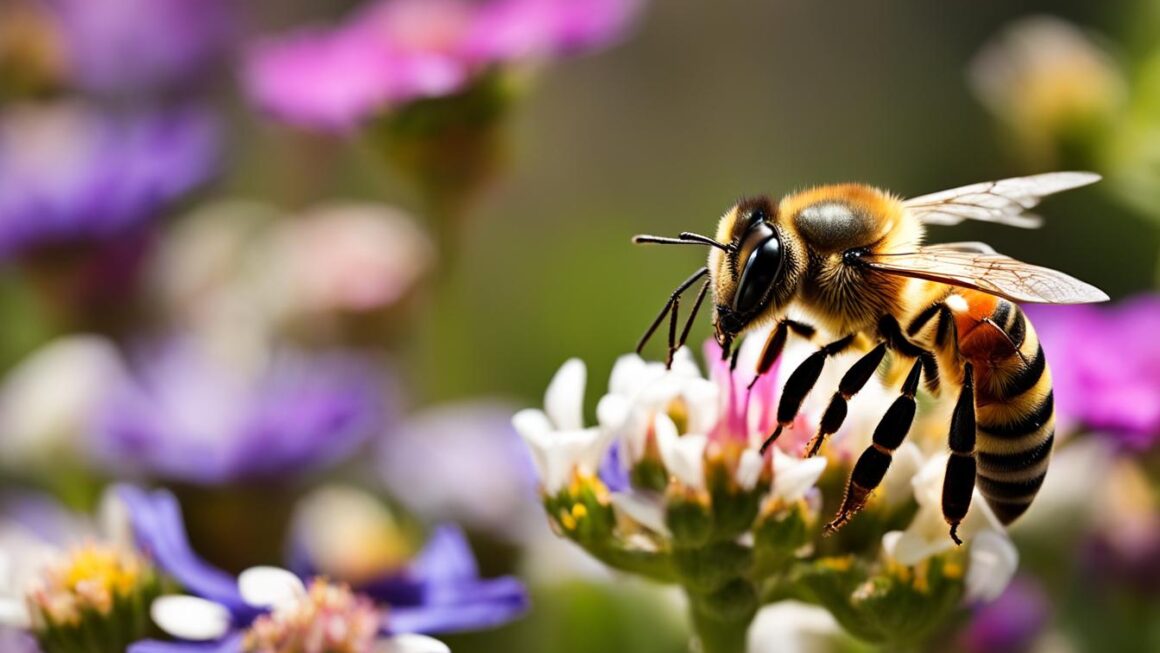
The Benefits of Beeswax
Beeswax is a crucial ingredient in homemade lip balm recipes. Its unique properties make it an excellent choice for nourishing and protecting the lips.
Protection and Moisture
Beeswax forms a protective barrier on the lips, sealing in moisture and preventing dryness. This barrier helps to retain the natural oils present in the skin, keeping the lips hydrated and soft. Regular use of beeswax lip balm can help protect against environmental factors, such as cold weather or wind, which can cause chapped and cracked lips.
Healing and Soothing
Not only does beeswax protect the lips, but it also has healing properties. It contains natural emollients that help to soothe and repair chapped lips. Beeswax creates a gentle, non-irritating layer on the lips, allowing them to heal while providing relief from discomfort and pain.
Non-Toxic and All-Natural
One of the greatest benefits of using beeswax in homemade lip balm is that it is non-toxic and all-natural. Commercial lip balms often contain synthetic additives and chemicals that can be harmful to your health. By opting for a homemade beeswax lip balm, you can ensure that you are using a product that is free from harmful ingredients and filled with the goodness of nature.
| Benefits of Beeswax Lip Balm | Protection and Moisture | Healing and Soothing | Non-Toxic and All-Natural |
|---|---|---|---|
| Achieves a protective barrier on the lips | Helps to retain moisture and prevent dryness | Contains healing properties to soothe and repair chapped lips | Free from harmful synthetic additives and chemicals |
| Seals in natural oils to keep the lips hydrated | Protects against environmental factors | Provides relief from discomfort and pain | Filled with the goodness of nature |
With its protective, healing, and non-toxic qualities, beeswax is a valuable ingredient for creating a homemade lip balm that nourishes and cares for your lips in a natural and effective way.
“The natural emollients in beeswax provide deep nourishment and protection for the lips, making it a perfect ingredient for homemade lip balm.” – Skincare Expert
Essential Oils for Flavor and Fragrance
Adding essential oils to your DIY honey lip balm not only enhances its fragrance but also adds a delicious flavor to your lip care routine. Essential oils are concentrated plant extracts that offer various scents and tastes, allowing you to customize your lip balm according to your preferences.
One popular essential oil choice for lip balms is peppermint oil. Its refreshing and cooling properties provide a pleasant sensation on the lips. Additionally, peppermint oil has a minty taste that leaves your lips feeling invigorated. Other essential oils that you can consider for flavor and fragrance include lavender, grapefruit, and lemon, each offering its unique aromatic experience.
When using essential oils in your lip balm recipe, it’s essential to note their potency. Start with a small amount, such as a few drops, and adjust according to your liking. Remember that some essential oils may have sensitizing effects, so it’s best to do a patch test before applying the lip balm generously.
Benefits of Essential Oils
In addition to their aromatic properties, essential oils offer various potential benefits for lip care. Peppermint oil, for example, has antimicrobial properties that can help freshen breath and combat bacteria that may contribute to lip issues. Lavender oil is known for its calming effects and can soothe dry or irritated lips. Grapefruit and lemon oils offer a burst of citrusy goodness, invigorating the senses while providing potential antioxidant benefits.
However, it’s important to note that essential oils are highly concentrated and should be used with caution. If you have sensitive skin or are prone to allergies, it’s advisable to consult with a healthcare professional before incorporating essential oils into your lip balm recipe.
| Essential Oil | Flavor | Fragrance | Potential Benefits |
|---|---|---|---|
| Peppermint | Minty | Refreshing | Antimicrobial, breath freshening |
| Lavender | Herbal | Calming | Soothing, potentially anti-inflammatory |
| Grapefruit | Citrusy | Energizing | Potential antioxidant benefits |
| Lemon | Citrusy | Invigorating | Potential antioxidant benefits |
Gathering Your Ingredients
To make this homemade beeswax lip balm, you will need a few key ingredients that are readily available. Here’s a list of what you’ll need:
- Beeswax: Beeswax is the main ingredient that provides the balm with its thick texture and protective properties.
- Cocoa Butter: Cocoa butter adds moisturizing benefits and helps to create a smooth consistency.
- Sunflower Oil: Sunflower oil is light and easily absorbed, providing additional moisture to the lips.
- Vitamin E Oil: Vitamin E oil is known for its antioxidant properties and helps to keep the lips healthy.
- Rosemary Oil: Rosemary oil adds a pleasant scent and has antimicrobial properties that can help keep the lip balm fresh.
- Peppermint Oil: Peppermint oil adds a refreshing flavor and can provide a cooling sensation on the lips.
- Lanolin: Lanolin is a natural moisturizer that helps to lock in moisture and prevent dryness.
These ingredients can be found online or at your local natural health store. Make sure to choose high-quality, organic options for the best results.
Table: Ingredients for Homemade Beeswax Lip Balm
| Ingredient | Benefits |
|---|---|
| Beeswax | Provides a protective barrier and locks in moisture |
| Cocoa Butter | Moisturizes and creates a smooth texture |
| Sunflower Oil | Light and easily absorbed, adds moisture to the lips |
| Vitamin E Oil | Antioxidant properties, keeps the lips healthy |
| Rosemary Oil | Pleasant scent, antimicrobial properties |
| Peppermint Oil | Refreshing flavor, cooling sensation |
| Lanolin | Natural moisturizer, prevents dryness |
Having all of these ingredients on hand will ensure that you can make the lip balm whenever you need it. Now that you have gathered your ingredients, let’s move on to the process of making the lip balm itself.
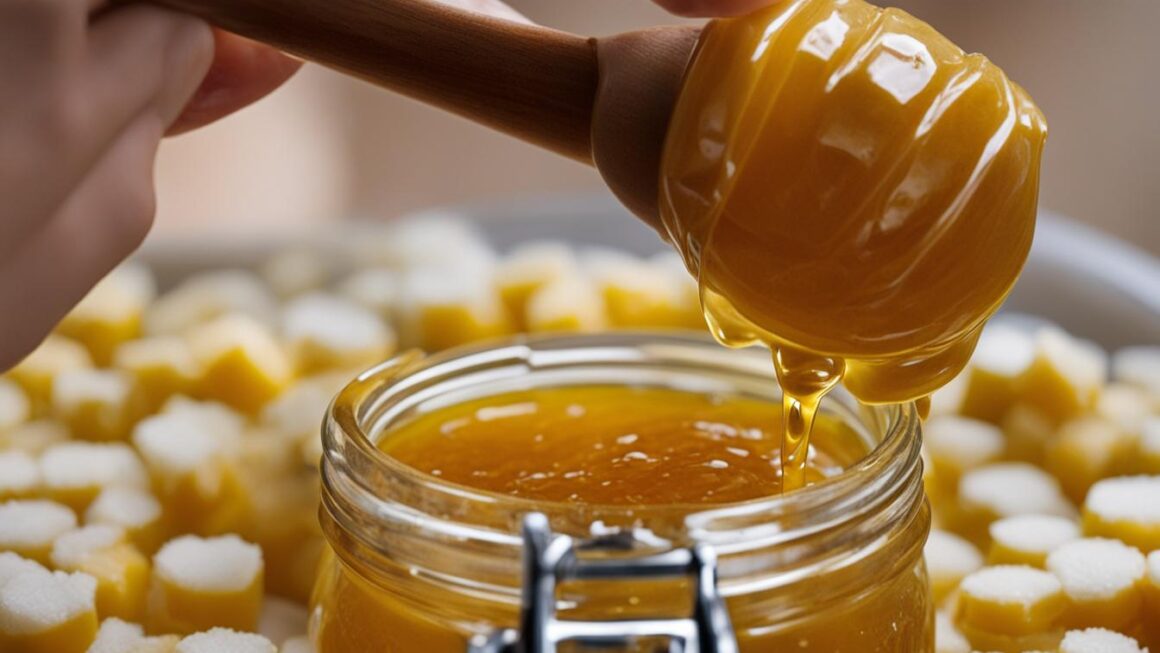
The Lip Balm Making Process
Creating your own beeswax lip balm is a simple and rewarding DIY project that allows you to customize the ingredients and cater to your specific skincare needs. Follow these easy steps to make your own natural lip balm recipe:
- Melt the beeswax and cocoa butter in a double boiler or a glass bowl over a saucepan of simmering water. This gentle heating process ensures that the ingredients blend smoothly and create a creamy consistency.
- Once the beeswax and cocoa butter are fully melted and combined, add the remaining ingredients – sunflower oil, vitamin E oil, rosemary oil, peppermint oil, and lanolin. Stir well to ensure all the ingredients are evenly distributed.
- Pour the mixture into lip balm tubes or tins, leaving a small amount of space at the top to account for the lip balm expansion when it solidifies. This is especially important for lip balm tubes.
- Allow the lip balm to cool and solidify completely before use. It usually takes about 15-20 minutes for the lip balm to firm up, depending on the temperature and the size of the containers used.
Once your homemade lip balm has solidified, it is ready to use for nourishing and moisturizing your lips. Remember to properly label your lip balm tubes or tins to keep track of the ingredients and expiration date.
This homemade lip balm recipe is versatile and can be easily customized to suit your preferences. Experiment with different essential oils to create unique flavors and fragrances. You can also adjust the consistency by adding more or less beeswax and cocoa butter.
Pro Tips for Lip Balm Making:
1. Use a dedicated double boiler or create a makeshift one by placing a heat-resistant glass bowl over a saucepan of simmering water. Make sure the bottom of the bowl doesn’t touch the water to avoid overheating the ingredients.
2. Stir the mixture constantly while melting the beeswax and cocoa butter to prevent scorching or clumping.
3. When adding the essential oils, start with a small amount and gradually increase if needed. Some essential oils have stronger scents, so a little goes a long way.
4. Before pouring the mixture into lip balm containers, do a quick test by placing a small amount on a spoon and letting it cool. This allows you to check the consistency and adjust as necessary.
Packaging and Storing Your Lip Balm
Once your homemade beeswax lip balm has solidified, it’s time to package and store it. This step not only adds a personal touch but also ensures that your lip balm stays fresh and easily accessible. Here are some tips on how to package and store your organic lip balm:
Labeling and Decorating
Take your homemade lip balm tubes or tins and add labels to them. You can create personalized labels using sticker paper or simply write on them with a permanent marker. Include the name of the lip balm, the date it was made, and the ingredients used. This way, you’ll always know what’s in each tube or tin. To make your lip balm even more visually appealing, consider decorating the containers with cute stickers or ribbons.
Storage Tips
After labeling and decorating, it’s important to store your lip balm properly to maintain its quality. Keep your lip balm in a cool, dry place away from direct sunlight and heat sources. Excessive heat can cause the lip balm to melt, while moisture can promote the growth of mold. A bathroom cabinet or a desk drawer are ideal storage locations. Remember to keep the lip balm out of reach of children or pets.
Extra Tubes and Tins
It’s always a good idea to have a few extra lip balm tubes or tins on hand. They can be used for refilling or for gifting. If you’re planning on sharing your homemade lip balm with friends or family, having spare containers will make the process much easier. Plus, if you run out of lip balm, you’ll have a backup supply ready to go.

By following these packaging and storing tips, you can ensure that your homemade lip balm remains fresh, visually appealing, and ready to use whenever you need it. Whether it’s for personal use or as a thoughtful gift, your organic lip balm will provide nourishing and moisturizing benefits for your lips.
Using Your Homemade Lip Balm
If you’ve followed the homemade honey beeswax lip balm recipe, you now have a nourishing and all-natural lip balm that is ready to use. Applying your homemade lip balm is simple and offers long-lasting hydration and protection for your lips.
Before applying your lip balm, make sure your lips are clean and dry. Gently exfoliate any dry or flaky skin with a soft toothbrush or a homemade sugar scrub. This will create a smooth surface for the lip balm to adhere to.
Take a small amount of the lip balm and apply it to your lips, starting from the center and moving towards the corners. Use your finger or a lip brush to evenly distribute the lip balm. Reapply throughout the day as needed, especially after eating or drinking.
Top Tips for Using Your Homemade Lip Balm:
- A little goes a long way. Start with a small amount and add more if needed.
- Store your lip balm in a cool, dry place to prevent melting or changes in texture.
- Use a lip balm with SPF if you will be spending time in the sun.
- Apply your lip balm before bed to wake up with softer, smoother lips.
Enjoy the natural and soothing benefits of your homemade lip balm. Not only will it keep your lips moisturized and protected, but it will also give you peace of mind knowing exactly what ingredients are going on your skin.
References:
- “Nourishing Beeswax Lip Balm Recipe – DIY Lip Balm.” Wellness Mama, Wellness Mama, 20 Sept. 2021, www.wellnessmama.com/25459/lip-chap-recipe/.
- “How to Make Beeswax Lip Balm – Easy DIY Recipe.” Happiness is Homemade, www.happinessishomemade.net/homemade-lip-balm-recipe/.
Homemade Lip Balm as a Gift
Looking for a unique and thoughtful gift idea? Consider giving homemade lip balm! Not only is it a practical gift that everyone can use, but it also shows that you put time and effort into creating something special. Homemade lip balm can be customized with different flavors and packaging, making it a personal and heartfelt present.
When giving homemade lip balm as a gift, presentation is key. Consider packaging it in a small bag or box and adding a personalized label or note. You can also get creative with the packaging by using decorative tins or tubes. Adding a ribbon or bow can also give it a festive touch.
Another idea is to make multiple batches of lip balm and create a variety pack. This way, the recipient can try different flavors and find their favorite. It’s a great way to introduce them to the benefits of natural lip balm and encourage them to incorporate it into their skincare routine.
Benefits of Giving Homemade Lip Balm as a Gift:
- Personalized and thoughtful
- Practical and useful
- Showcases your creativity and DIY skills
- All-natural and free from harmful chemicals
By giving homemade lip balm as a gift, you’re not only sharing a nourishing beauty product but also promoting a more natural and sustainable lifestyle. It’s a small gesture that can make a big impact, both for the recipient and the environment.

Other Uses for Beeswax
Beeswax is a versatile ingredient that can be used for more than just making homemade lip balm. If you have leftover beeswax from this recipe, consider exploring its other uses in various DIY projects. Here are some ideas:
Candles
Beeswax candles are a popular choice due to their natural and clean burning properties. They emit a subtle honey scent and produce little to no soot, making them a healthier option compared to paraffin candles. You can create your own beeswax candles by melting the beeswax and pouring it into candle molds with a wick. Enjoy the warm, natural glow and ambiance of beeswax candles in your home.
Lotions and Salves
Beeswax can be used as a thickening agent in homemade lotions and salves. It helps create a creamy and smooth texture, while also providing a protective barrier for the skin. Combine beeswax with nourishing oils, such as coconut oil and shea butter, to create your own moisturizing and soothing skincare products. Customize the scents and add essential oils for a personalized touch.
Furniture Polish
Beeswax can also be used to make your own natural furniture polish. It helps restore and protect wood surfaces, leaving them with a beautiful shine. Simply melt beeswax with a carrier oil, such as jojoba oil or olive oil, and apply the mixture to your wooden furniture with a soft cloth. Buff it to a smooth finish for a natural and chemical-free way to care for your furniture.
These are just a few examples of the many uses for beeswax. Its versatility and natural properties make it a valuable ingredient for DIY projects. Explore the world of beeswax and unleash your creativity in making all-natural and sustainable products for your home and personal care routine.
| Uses for Beeswax | Benefits |
|---|---|
| Candles | Natural and clean burning, subtle honey scent. |
| Lotions and Salves | Thickens and protects the skin, customizable with scents and essential oils. |
| Furniture Polish | Restores and protects wood surfaces, natural alternative to chemical-based polishes. |
Why Choose Natural Beauty Products
When it comes to beauty products, many people are turning to homemade options that are natural and free from harmful chemicals. There are several reasons why choosing natural beauty products, like all-natural lip balm, is a smart choice.
First and foremost, natural beauty products are gentle on the skin. They are made with ingredients that are known to be safe and beneficial, without any harsh chemicals that can irritate or damage the skin. This makes them suitable for all skin types, including sensitive skin.
Furthermore, homemade beauty products give you the ability to customize formulas to suit your individual needs. You can add specific ingredients and essential oils that target your unique concerns, such as dryness or aging. This level of personalization ensures that you are getting the most out of your beauty products.
Lastly, choosing natural beauty products is not only beneficial for your skin but also for the environment. Many commercial beauty products contain chemicals that can be harmful to the planet, as well as to your body. By opting for homemade beauty products, you are reducing your carbon footprint and contributing to a more sustainable future.
The Benefits of Natural Beauty Products:
- Gentle on the skin
- Customizable formulas
- Safe and beneficial ingredients
- Environmentally friendly
By choosing natural beauty products, you can enjoy the peace of mind that comes with knowing exactly what you are putting on your skin. With homemade beauty products like all-natural lip balm, you can nourish and care for your skin in a safe and effective way.
Conclusion
In conclusion, creating your own honey beeswax lip balm is a fantastic way to enhance your DIY skincare routine. By following this homemade lip balm recipe, you can make a nourishing and moisturizing product that is free from harmful chemicals found in many commercial lip balms.
With just a few simple ingredients, such as beeswax, cocoa butter, and essential oils, you can customize the flavor and fragrance of your lip balm. The beeswax provides a protective barrier on your lips, locking in moisture and promoting healing for chapped lips.
Making your own lip balm also allows you to have control over the quality of the ingredients. By opting for organic and all-natural components, you can ensure that you are using a safe and beneficial product on your lips. Additionally, by gifting this DIY lip balm to your friends and family, you can share the benefits of homemade beauty products.
So why not indulge in the gratifying experience of making your own honey beeswax lip balm? Give your lips the nourishment and care they deserve by using this natural, homemade alternative. Enjoy the process, embrace the benefits, and spread the joy by sharing this thoughtful gift with others.
FAQ
Is making homemade lip balm difficult?
Making homemade lip balm is actually quite simple and can be done with just a few ingredients and some basic kitchen tools.
How long does homemade lip balm last?
When stored properly in a cool, dry place, homemade lip balm can last for up to 1 year.
Can I customize the flavor of my lip balm?
Yes, by adding different essential oils, such as peppermint or lavender, you can create a lip balm with a customized flavor and fragrance.
Where can I find the ingredients for homemade lip balm?
The ingredients for homemade lip balm can be found online or at your local natural health store.
Can I use the lip balm immediately after making it?
It is best to allow the lip balm to cool and solidify before using it to ensure optimal consistency and effectiveness.
How often should I apply the lip balm?
You can apply the homemade lip balm to your lips as often as needed, especially when they feel dry or chapped.
Can I give homemade lip balm as a gift?
Absolutely! Homemade lip balm makes a thoughtful and personalized gift for friends, family, and coworkers.
What other uses are there for beeswax?
Beeswax can be used to make candles, lotions, salves, and even furniture polish, among many other DIY projects.
Why should I choose natural beauty products?
Natural beauty products, like homemade lip balm, are free from harmful chemicals, gentle on the skin, and better for the environment.